Use balenaEtcher to write the Yodeck software image to a microSD card. The whole process takes about 10 minutes and works the same on Windows, Mac and Linux.
Already comfortable with Etcher? The short version is in Create a Yodeck Player with a Raspberry Pi 4.
What you need

- A microSD card: Class 10 from a reputable brand. 16GB is recommended, 8GB is the minimum. The Raspberry Pi runs entirely from this card, so a reliable one saves you trouble later.
- A Windows, Mac or Linux computer with an SD card slot or a USB card reader.
- An internet connection to download the Yodeck image and Etcher. Both are free.
⚠️ Flashing erases the card. Everything on the SD card is overwritten, and the card becomes dedicated to your Yodeck Player. Back up anything you need before you start.
1. Download the Yodeck image
The Yodeck image is the software your Raspberry Pi will run. It’s a single .zip file, and the same download works whether you flash from Windows, Mac or Linux.
Download the Yodeck image2. Unzip the file
Extract the .zip to get a single .img file of about 3.2GB. Your computer can do this on its own, no extra software needed:
- Windows: right-click the file and choose Extract All.
- Mac: double-click the file.
- Linux: right-click and choose Extract Here, or run
unzip RaspberryPi_Yodeck.zip.
💡 Common mistake: flashing the .zip instead of the .img. Always select the unzipped .img file in Etcher.
3. Install Etcher
balenaEtcher is a free tool that writes image files to SD cards and checks the result. Download the version for your computer, then install it:
- Windows: Run the installer and follow the setup wizard.
- Mac: Open the .dmg and drag Etcher into your Applications folder.
- Linux: Download the AppImage, make it executable and run it.
4. Flash the SD card
Etcher works in three steps from left to right: pick the image, pick the card, flash.
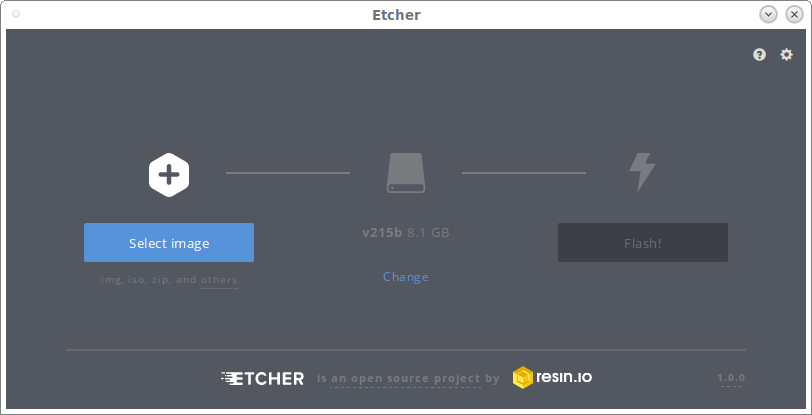
- Insert the SD card into your computer. If any windows pop up, including a prompt to format the disk, close them.
- Open Etcher and click Flash from file. Select the unzipped Yodeck .img file.
- Click Select target and choose your SD card. Etcher hides your computer’s main drive by default, but check the name and size to make sure you’ve picked the card.
- Click Flash! Etcher writes the image, then verifies it. A progress bar shows each stage, and the whole thing takes a few minutes.
- When Etcher shows Flash Complete, remove the SD card.
💡 Prefer Raspberry Pi Imager? It works too. Follow How to Flash an SD Card with Raspberry Pi Imager.
Troubleshooting
Etcher doesn’t show my SD card
Remove the card and insert it again. If it still doesn’t appear, try a different card reader or USB port. On Windows, right-click Etcher and choose Run as administrator.
Flashing or verification fails
Flash the card again. If it fails a second time, the card or reader is likely faulty. Try a different card, ideally from a known brand.
My computer says the card needs formatting
That’s normal after flashing, because your computer can’t read the Yodeck file system. Click Cancel and don’t format the card, or you’ll have to flash it again.
What’s next: boot your player
- Insert the SD card into your Raspberry Pi.
- Connect the HDMI cable to your screen and the Ethernet cable to your network.
- Plug in the power supply last.
The first boot can take up to 5 minutes while the player expands the SD card and sets itself up. Later boots take under a minute. For the full steps, including registering your screen, see Boot the player.

