Table of Contents
Configuring One Login SAML for Yodeck
This topic describes how to configure OneLogin to provide SSO for Yodeck using SAML.
- Log into OneLogin as an admin and go to Apps > Add Apps .
- At the top right click ADD APP and then search for Yodeck SAML 2.0
- Click Save to add the app to your Company Apps and display additional configuration tabs.
- Go to the SSO tab to obtain the Issuer URL that you will need to setup your Yodeck SSO settings.
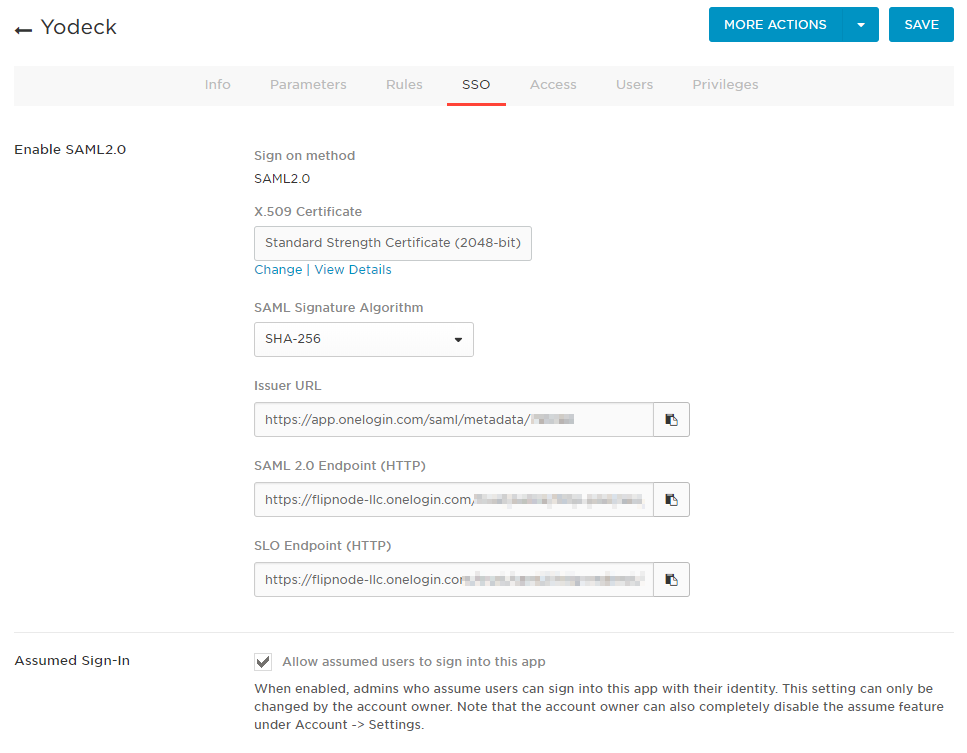
- Now login to your Yodeck account and go to the SAML Configuration Tab and click the enable button.
- The Digest Algorithm must be the same as the SAML Signature Algorithm from One Login.
Note : We recommend you choose the SHA256( secure hash algorithm).Check this link for details about the comparison between different SHA’s . - Paste the copied URL and click import. Now you will see the URLs that have been preconfigured.
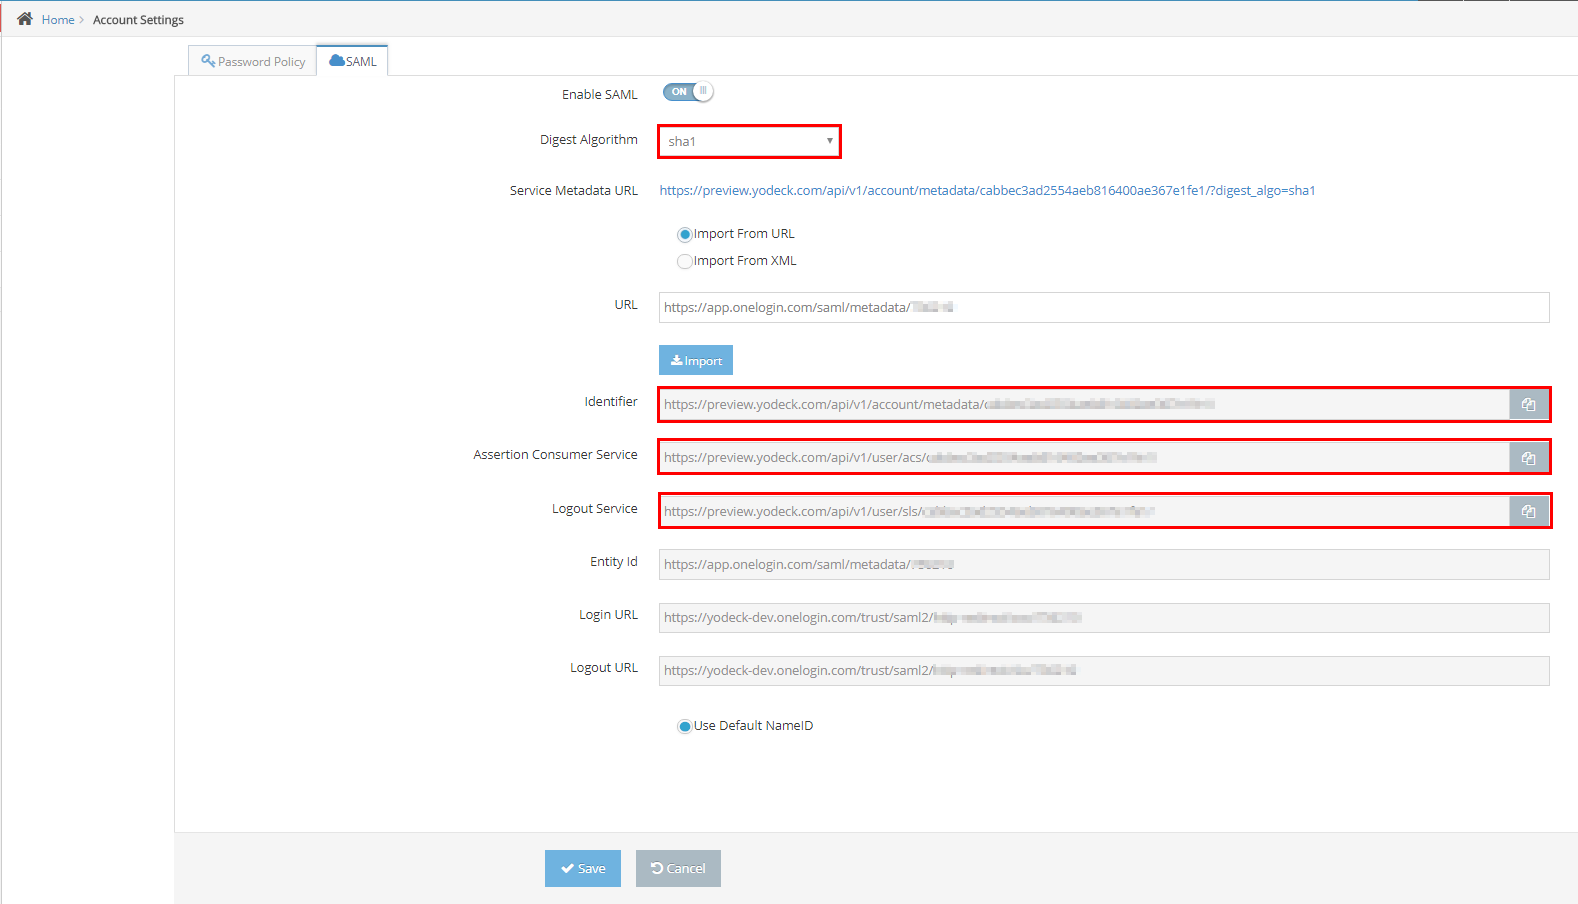
- Click Save
- Select the Parameters Tab.
- Ensure that Credentials are set to Configured by admin and that the mappings are as follows:

- You can add a different attribute and paste it in the Yodeck SAML Configuration in the “Attribute name for NameID” textbox or leave the “Use Default NameID” that uses the email as the username.
- Click Save .
Create a OneLogin SAML User for the Yodeck App
Create a user that will use SAML through Yodeck and assign the user to the Yodeck SAML Application.
- Go to your Users Administrative page through OneLogin.
- Click New User and fill out the form.
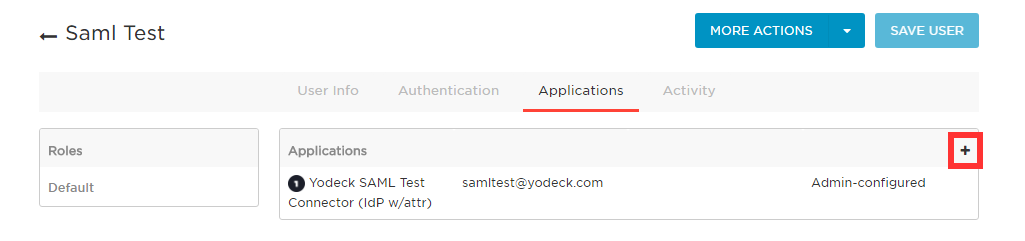
- Click the Plus sign (+) and choose the Yodeck App.
Creating a Yodeck Test User
To provision a user account, perform the following steps:
- Log in to your Yodeck tenant.
- Click Users , and then click Add User.
- On the Add user dialog page, perform the following steps:
-
- In the First name textbox, enter the first name, like SAML . In the Last name textbox, enter the last name, like User.
- In the Email address textbox, enter the email of the user that you have created in the previous step (OneLogin User). In this example case, it’s samltest@yodeck.com .
Note: Bear in mind that the Yodeck user and OneLogin user must have the exact same email. - Select a Role for your User.
- Click Save.