Step-by-step procedure
Hardcode the WiFi credentials to the player
If you do not have an Ethernet cable or you cannot access the WIFi wizard for some reason, you can hardcode the WiFi credentials directly on the SD card. To do that, please follow the below steps.
To follow this guide, you will need an SD card reader (check some examples). You can get one from your local tech store if you do not have one.
First things first
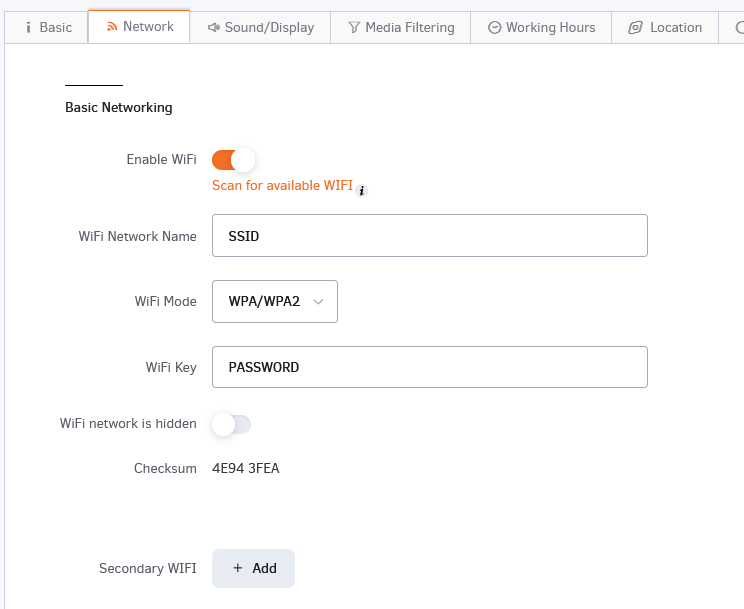
First, in the Yodeck Portal Screen Settings, add your wireless network’s WiFi credentials to the Yodeck Portal. Screens->Network and click Save.
⚠️ Keep in mind that WiFi network names are case-sensitive.
Editing the SETTINGS.TXT file
- Power off the player and remove the SD card from it.
- Use an SD card reader, place the SD card on your Laptop or PC and open the SETTINGS.TXT file.
- This file is located in the first partition of the SD card.
- 💡Ignore any pop-up messages. Find the SETTINGS.TXT file that resides in the first boot partition.
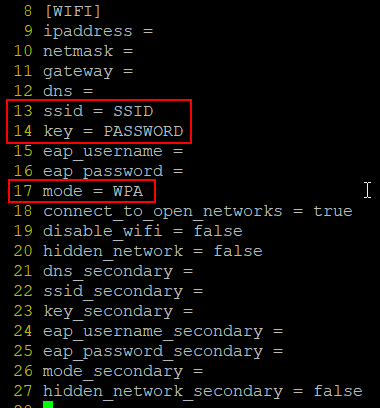
- Edit the SETTINGS.TXT file and add the same Wireless credentials in the relative field.
- In the ssid, type the WiFi Network Name
- In the key, type the WiFi Key
- In the mode, type one of the following
- WPA –> For WPA/WPA2
- WEP –. For WEP
- WPA–EAP –> For EAP (Extensible Authentication Protocol)
- Leave it Blank –> If the wireless network doesn’t require a password
Completing the procedure
- Place the SD card back into the Yodeck Player and plug in the power cable.
- After powering on the player, a blinking message “Configuring ” will display at the bottom right of your screen.
- Please do not unplug or reboot the player at this stage.
- This might take up to 5 minutes.
- The player should connect to your wireless network without issues if the WiFi credentials are correct.
- Try to make some content changes to ensure the player responds via your wireless network to the new pushed content.
WiFi credentials obfuscation
When the player successfully connects to your Yodeck account, the WiFi credentials on the SD card will be obfuscated for security reasons. If you edit the SETTINGS.TXT file again, you will see something like that in the “ssid” and “key” text fields.
ssid = <__e__AfdfERhoddfA__e__>
key = <__e__WedghppaADEWV__e__>
If you want to pair your player to a new WiFi network, delete everything in the relative fields (SSID, key) and type the new WiFi credentials accordingly, as you did in the Portal WiFi settings.
There is no need to type anything like that: <__e__ssid,key__e__>.