Overview
Registering a screen connects your physical display, media player, smart TV, or browser preview to your Yodeck account.
Yodeck guides you through the setup based on the type of hardware you have. You can follow the recommended flow if you are setting up your first screen, enter a Registration Code directly if you already have one, or use Advanced setup if you want to select a specific player type manually.
Before You Start
Before registering your screen, make sure that:
- Your screen, TV, or player is powered on.
- The device is connected to the internet.
- The Yodeck Player app or player software is installed, where required.
- You can see the Registration Code on your screen, or you are ready to follow the guided setup to find it.
ℹ️The Registration Code is usually 8 or 9 characters long.
Start Screen Registration
To start the registration process:
- Sign in to your Yodeck account.
- Go to the Screens section.
- Click the Add Screen button.
You will open the New Screen Registration page.
From there, you can either select the type of player you have (Option 1), enter the Registration Code directly (Option 2), or click the Let’s get started button if you need help finding the player type selection (from Option 1).
Option 1: Use the Guided Setup
ℹ️You can use this option if you are a new user and you wish to have platform guidance through the setup type that best matches your hardware.
You can start using the guided setup if you need assistance in locating your Registration Code or selecting the appropriate setup path. By default, this option appears as a pop-up window that guides you step-by-step to identify the specific player type you have and wish to register. If the pop-up window does not appear or if you’ve closed it accidentally, you can click on Let’s get started at the bottom of the Screen Registration page to bring it back.
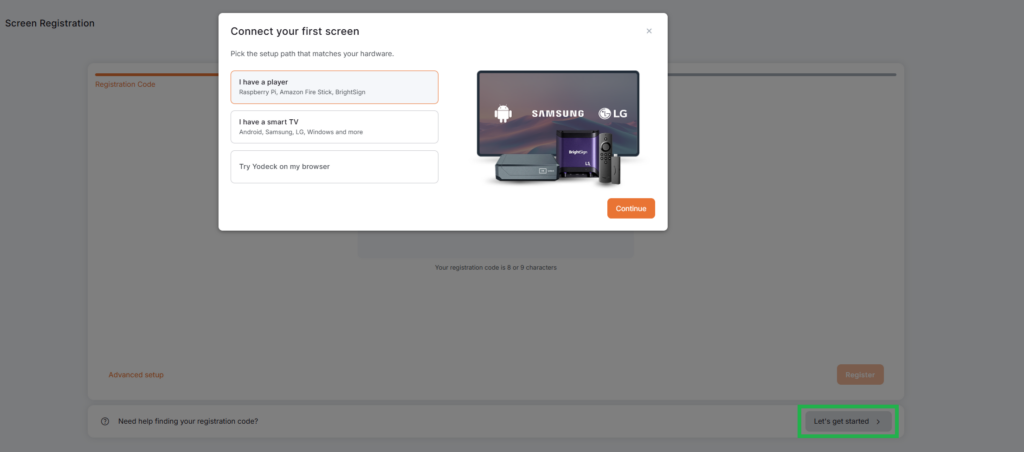
Connect your First Screen
If your account has not registered a physical player before, Yodeck starts with a simple hardware selection step.
You will see three options:
- I have a player
- I have a smart TV
- Try Yodeck on my browser
💡The analysis of each option is available in the following table. ⬇️
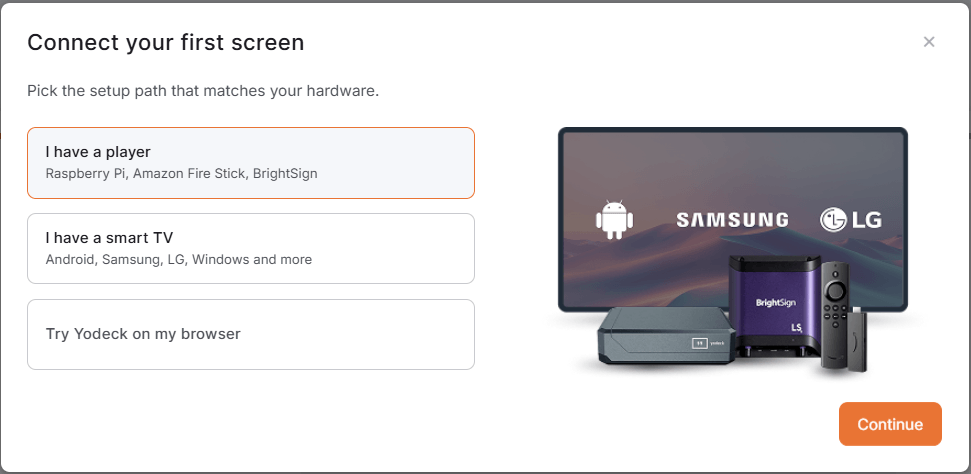
I Have a Player
Select I have a player if you are using a separate device connected to your screen, such as a Raspberry Pi, Amazon Fire Stick, or BrightSign player.
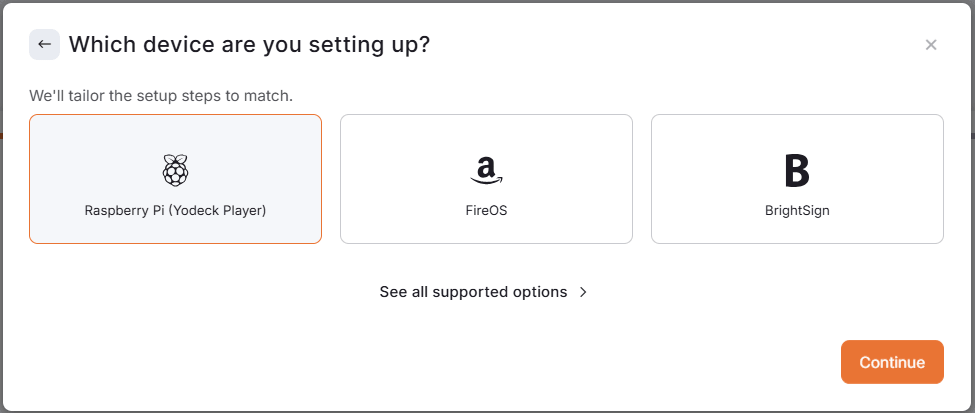
After clicking Continue, Yodeck shows the available player options for this path, such as:
Raspberry Pi (Yodeck Player)
FireOS
BrightSign
You can also click See all supported options if your device is not listed in the recommended options.
I Have a Smart TV
Select I have a smart TV if you want to run Yodeck directly on a supported TV or built-in platform.
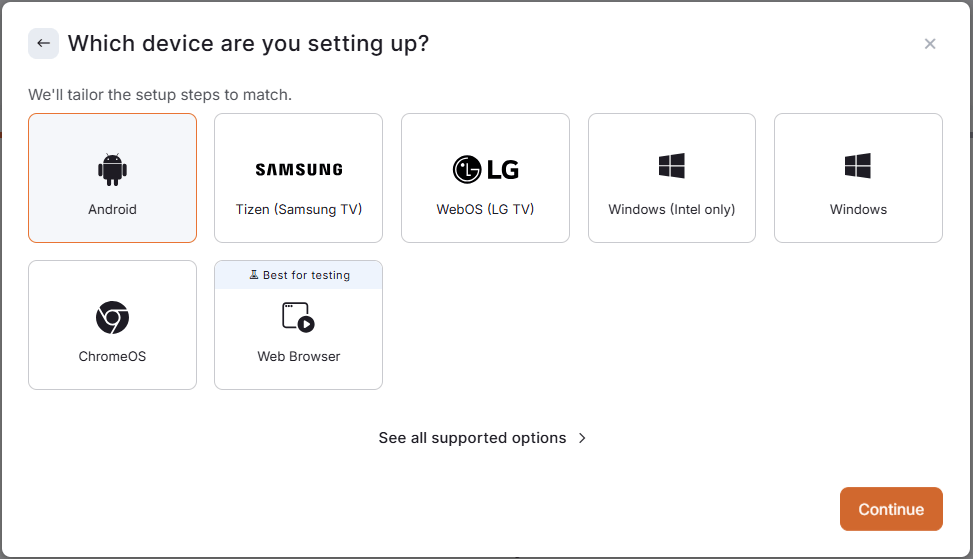
After clicking Continue, Yodeck shows smart TV and platform options such as:
Android
Tizen (Samsung TV)
WebOS (LG TV)
Windows (Intel only)
ChromeOS
Web Player
You can also click See all supported options to view the full list of available player types.
Try Yodeck on My Browser
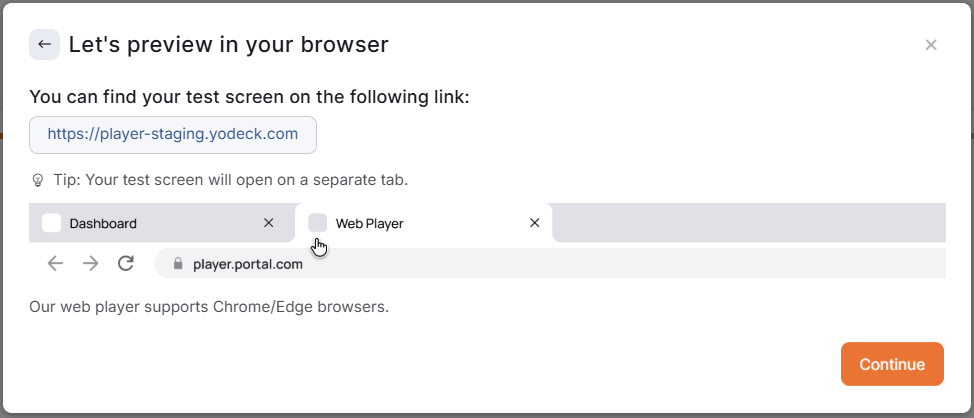
Select Try Yodeck on my browser if you want to test Yodeck without setting up a separate device immediately.
Yodeck will show a browser preview step and provide a link for your test screen. The Web Player opens in a separate browser tab.
The Web Player supports Chrome and Edge browsers.
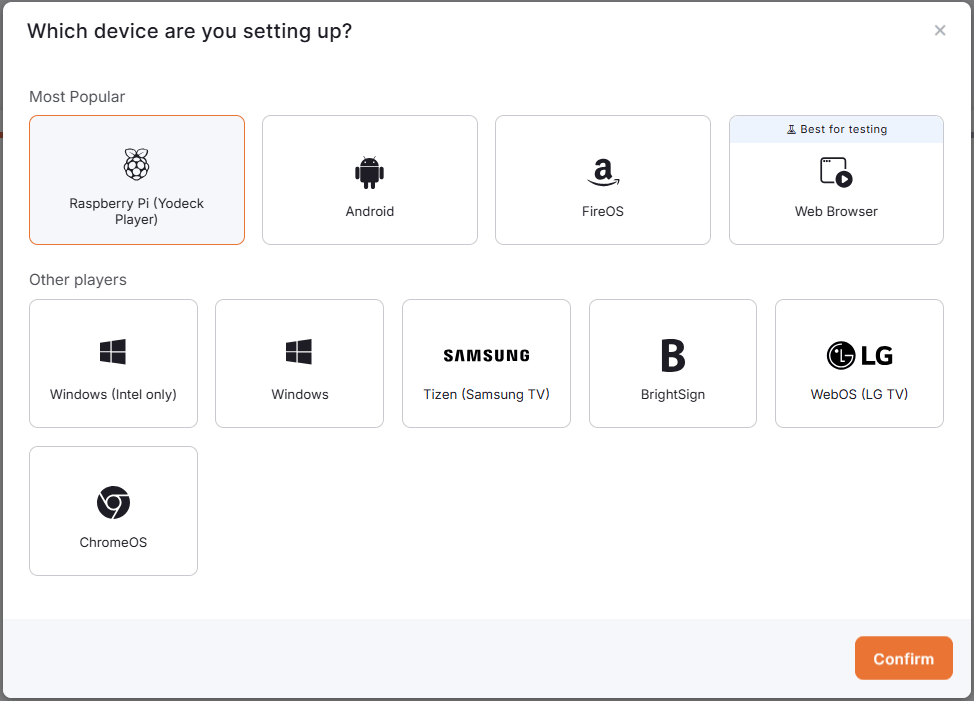
Choose a Device Type
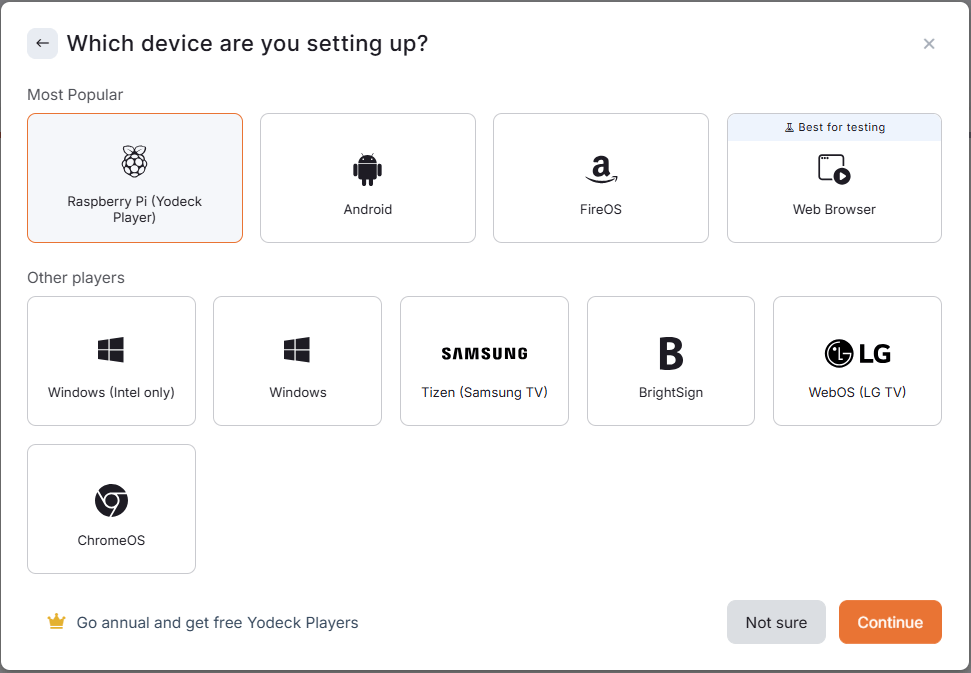
After you choose a setup path, select the device type you want to register.
Supported options include:
- Raspberry Pi (Yodeck Player)
- Android
- FireOS
- Web Player
- Windows (Intel only)
- Windows
- Tizen (Samsung TV)
- BrightSign
- WebOS (LG TV)
- ChromeOS
Some options may include a label, such as Best for testing, to help you choose the right setup path.
Click Continue after selecting your device type.
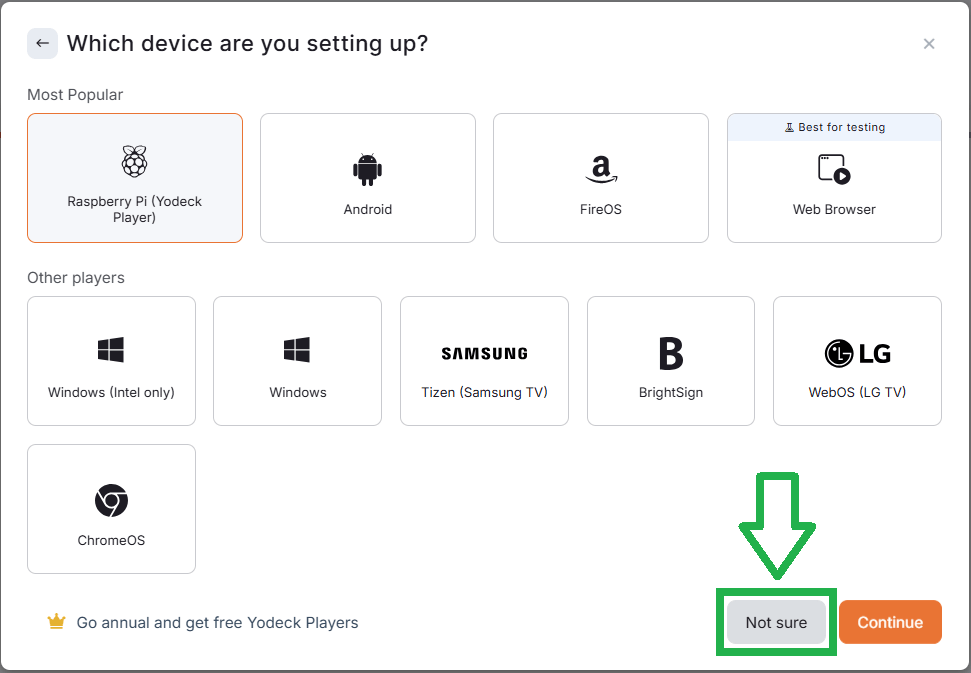
Use the “Not sure” button if you do not know which device to choose
If you do not know which player type matches your hardware, click Not sure.
Yodeck will ask if you have access to an Android device.
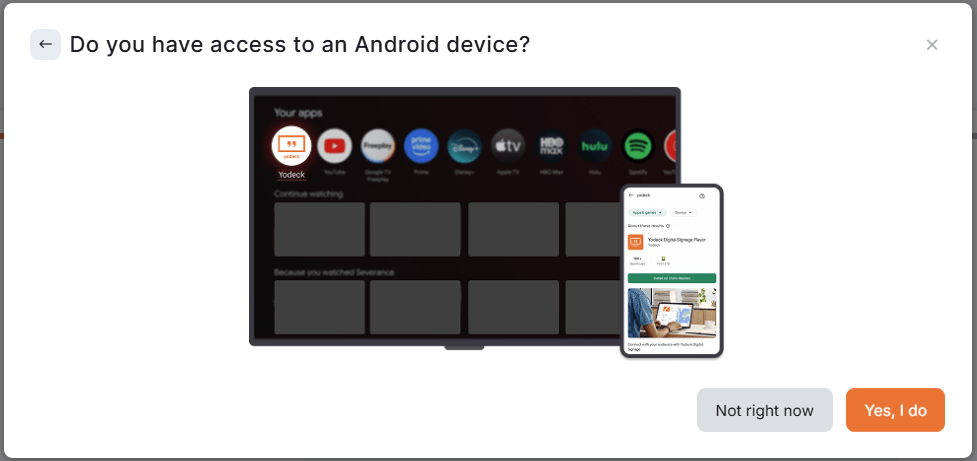
If You Have an Android Device
Click Yes, I do.
Yodeck will show you how to install the Yodeck Player app from the Android app store. After you open the app, the Registration Code will appear on your screen.
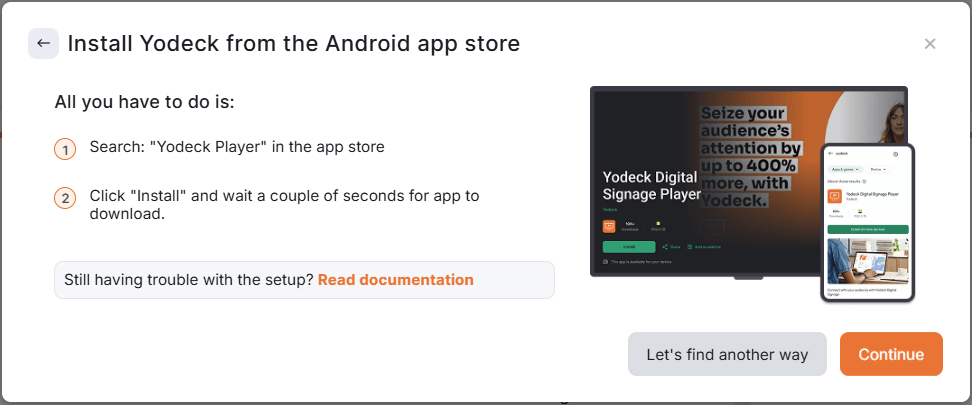
ℹ️Of course, you can click the button “Let’s find another way” if you have changed your mind.
If You Do Not Have an Android Device
Click Not right now.
Yodeck will guide you to the Web Player, so you can try Yodeck in your browser without setting up a physical player first.
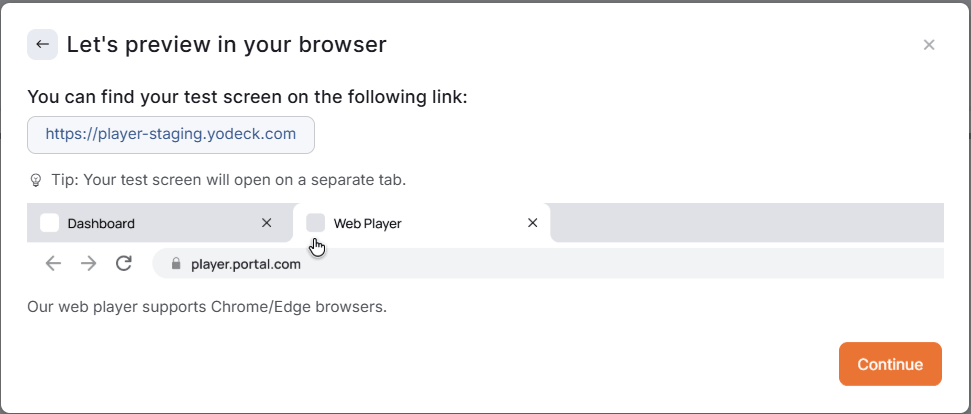
ℹ️Of course, you can click the back arrow button if you have changed your mind.
Follow the Device Instructions
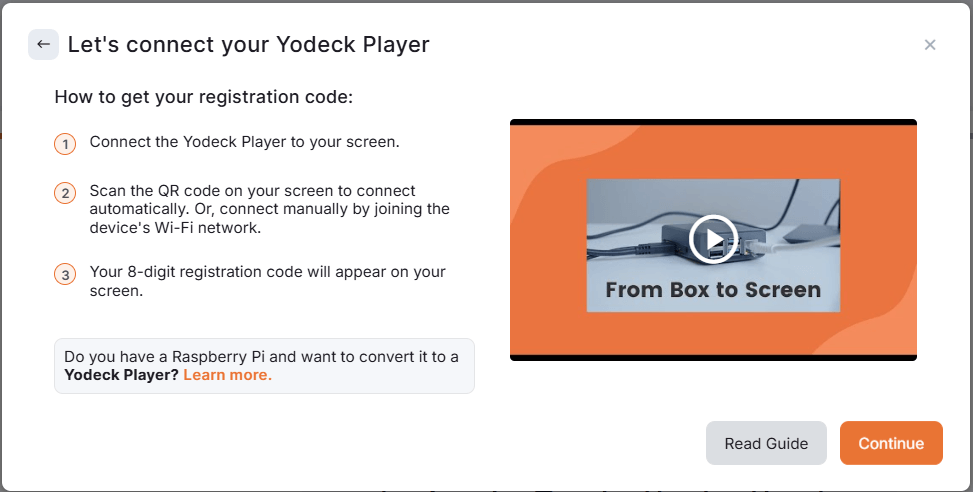
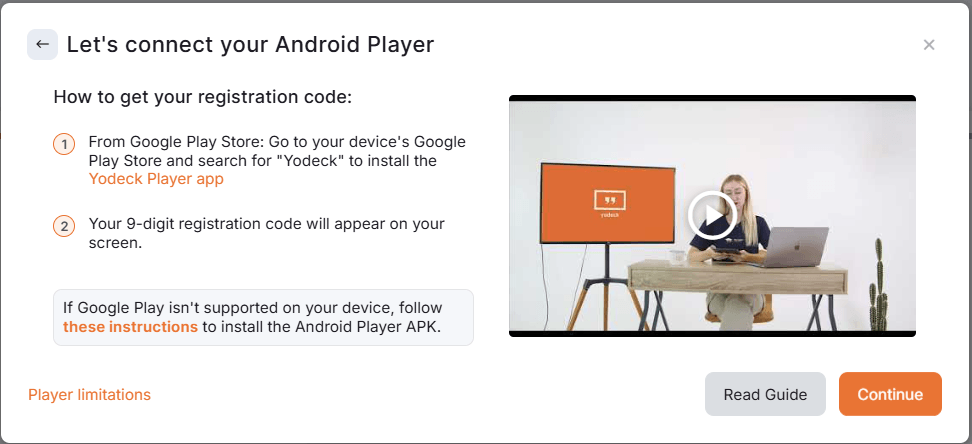
Yodeck then shows setup instructions for the selected player type.
The instructions may include:
- Steps to connect or install the player.
- A short video guide.
- A Read Guide button.
- Documentation links for setup details or player limitations.
- A Continue button to proceed.
For example, when setting up a Yodeck Player, you may be asked to:
- Connect the Yodeck Player to your screen.
- Connect the device to the internet.
- Wait for the Registration Code to appear on your screen.
ℹ️For Android devices, Yodeck may guide you to install the Yodeck Player app from the Android Play Store.
Read the Setup Guide
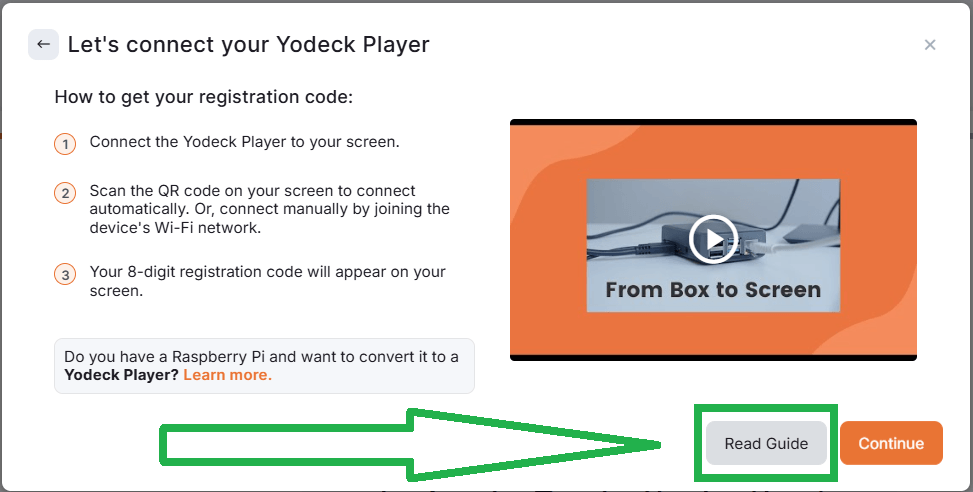
For some player types, Yodeck provides you with a Read Guide button during the guided setup.
You can click Read Guide to open the full documentation article for the selected player. The guide includes more detailed setup instructions, requirements, and any extra steps that may not fit inside the registration window.
ℹ️This is very useful if you are setting up the player for the first time or if you need more information before continuing with the Registration Code step.
Review Player Limitations
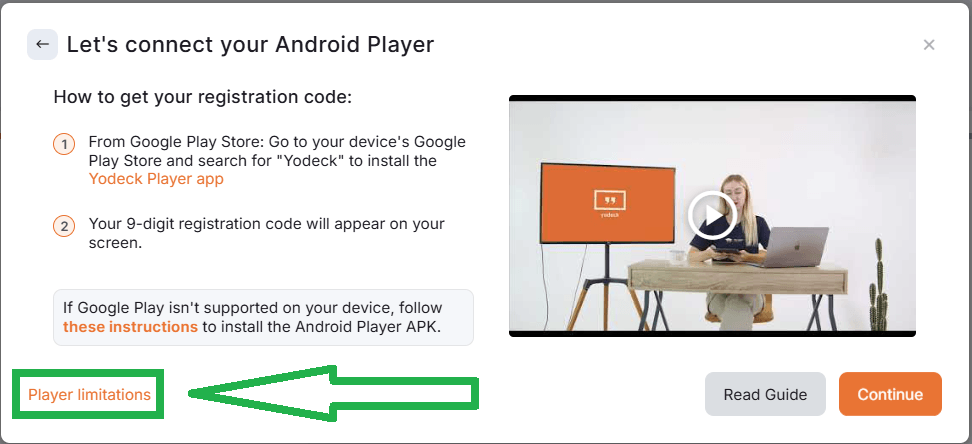
Some player types may have specific limitations or requirements. When this applies, Yodeck shows a relevant documentation link during the setup flow.
Use this link to review important details before registering the screen, including supported features, platform-specific behavior, and setup requirements for that player type.
ℹ️Reviewing these details can help you avoid challenges later in the setup.
Confirm That You Can See the Code
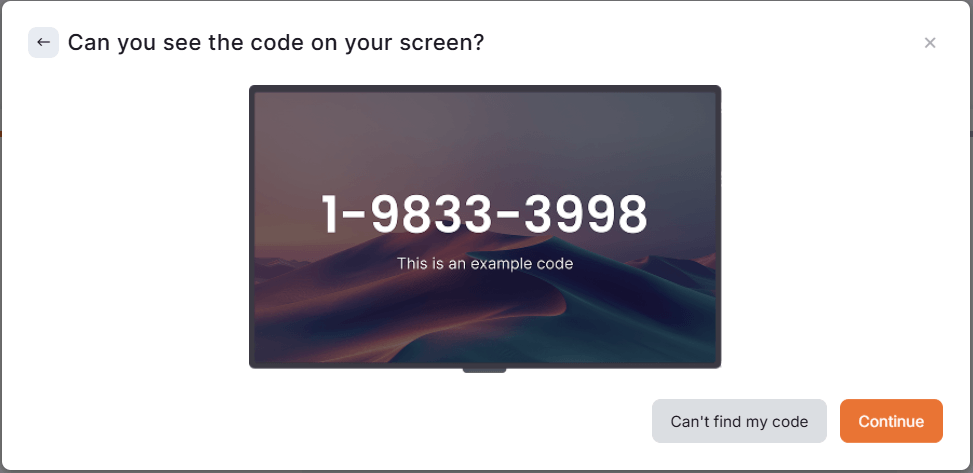
Before asking you to enter the code, Yodeck shows an example of what the Registration Code should look like on your screen.
If you can see the code on your screen, click Continue, to fill it in on the following “Registration Code page”.
⚠️ The code of the image in the pop-up window is just an example code for visual reference and might not be related to your selected player type, in terms of character numbering or format. Don’t worry!
⚠️If you cannot find the code, click Can’t find my code. This opens the Registration Code documentation article:
Enter the Registration Code
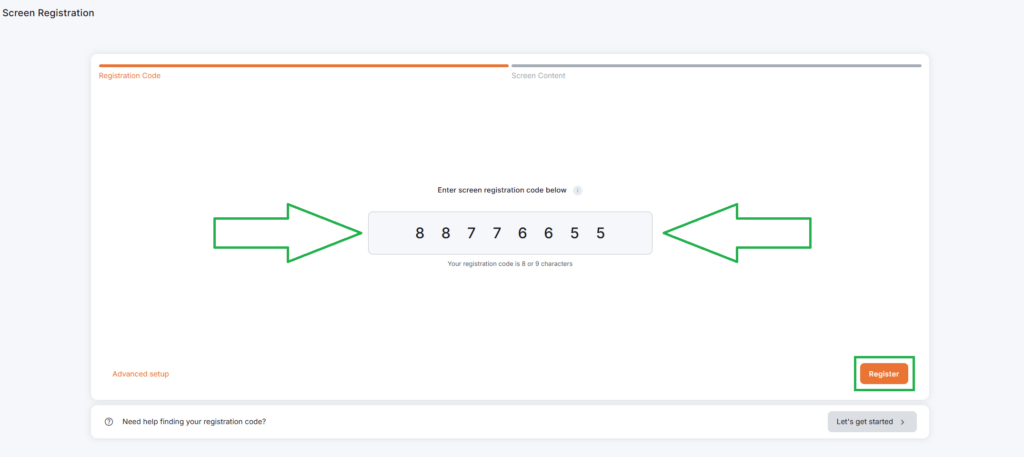
After confirming that you can see the code, enter it in the Registration Code field and click Register.
Yodeck will automatically recognize the player type from the Registration Code and register the appropriate screen type.
💡You can click Let’s get started again at any time to restart the guided setup and find the code for a different device.
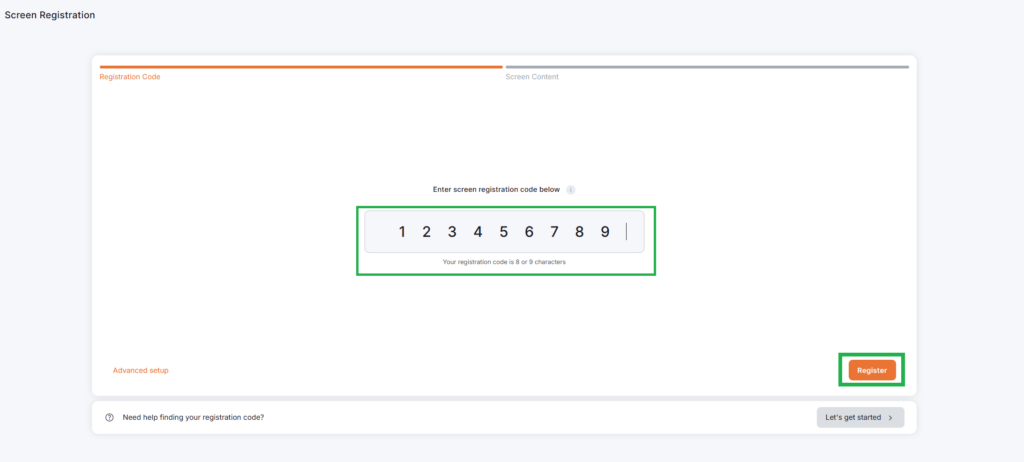
Option 2: Enter the Registration Code Directly
ℹ️Use this option if you can already see the Registration Code on your screen.
- Type the Registration Code in the Registration Code field.
- Click the Register button.
Yodeck automatically detects the player type based on the Registration Code you enter. This means you do not need to select the correct player type before registering the screen.
After the code is accepted, Yodeck continues to the next step of the screen setup.
Option 3: Advanced Setup
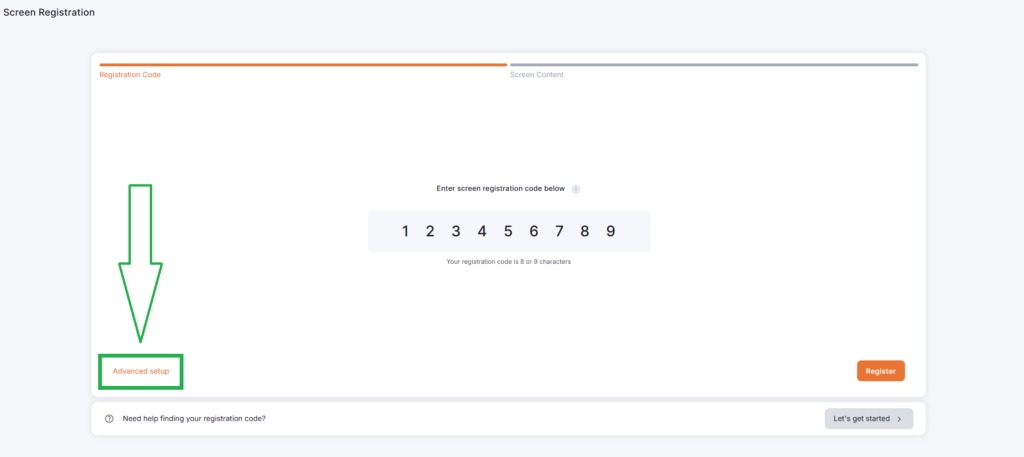
ℹ️Use the Advanced setup option if you already know which player type you want to configure and want to go directly to the screen setup form.
To use it:
- Close the first pop-up window (if visible).
- Click Advanced setup on the Screen Registration page.
- Select the player type from the list of all player type tiles.
- Click on the Continue button to proceed to the screen form for that player type.
Troubleshooting
You can click the expandable arrows below to reveal troubleshooting methods for common Screen Registration challenges.
I Can’t Find My Registration Code
Make sure the player or TV is powered on and connected to the internet. The Registration Code should appear on the screen after the player app or software starts.
If the code does not appear, click Can’t find my code in the guided setup or open this article:
I Selected the Wrong Player Type
You can still enter the Registration Code.
Yodeck automatically detects the correct player type from the code, so you do not need to start over just because you selected the wrong device type during the guided setup.
I Want to Test Yodeck Without a Player
Choose Try Yodeck on my browser during the guided setup.
This option lets you preview Yodeck using the Web Player in a supported browser. It is best for testing and quick demos, not for a permanent production setup.
F.A.Q.s
Got questions? We’ve got answers! This section addresses common questions about the Screen Registration in Yodeck.
Yes. If you already have the Registration Code, you can enter it directly in the Registration Code field. Yodeck detects the player type automatically.
If your account has already registered a physical player before, Yodeck may take you directly to the Registration Code field. You can still click Let’s get started if you need help finding the code.
Click Let’s get started, then choose the path that best matches your hardware. If you are still not sure, click Not sure in the device selection step.
Yes. Select Try Yodeck on my browser. Yodeck will open a Web Player test screen in a separate browser tab.
Advanced setup is for users who already know which player type they want to configure. It lets you select a player type and go directly to the screen form.
Need Help?
The Yodeck Support Team can help you out! Log in to your Yodeck account and send us a message from the bottom right corner!
