Overview
This guide shows you how to install and register the new Yodeck Windows Player on a supported Windows device.
Before you begin, make sure your device meets the Windows player requirements and that you have access to your Yodeck account.
Before you begin
Make sure you have the following:
- A supported Windows device
- Stable Internet connection
- Access to your Yodeck account
- Permission to install software on the device
- A display connected to the device
- A keyboard/mouse available for setup, if needed
Setup
Step 1 – Download and install the Windows player
1) Click Download the .exe file to download the latest Windows player installer.
2) When you download the Windows player exe installer file, your browser may warn you about the file. Select to Keep the download and continue.
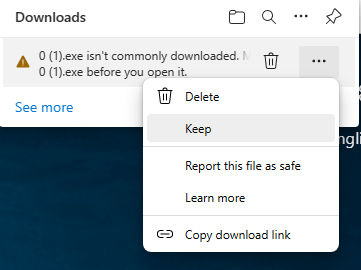
3) Once you click Keep, select Show more and then click on Keep anyway.
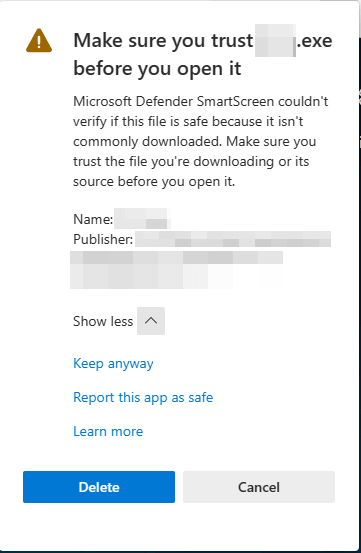
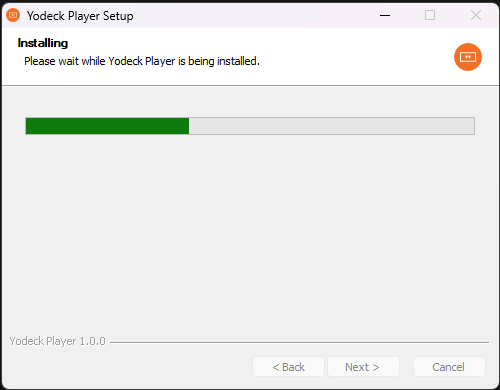
4) After the file finishes downloading, double-click it to start the installation.
If Windows displays a security warning, click More info and then click Run anyway.
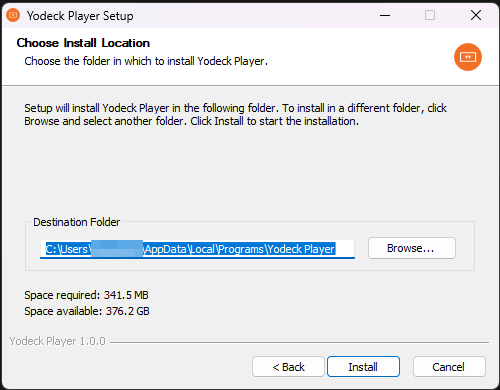
5) Choose who the app should be installed for and select the installation folder.
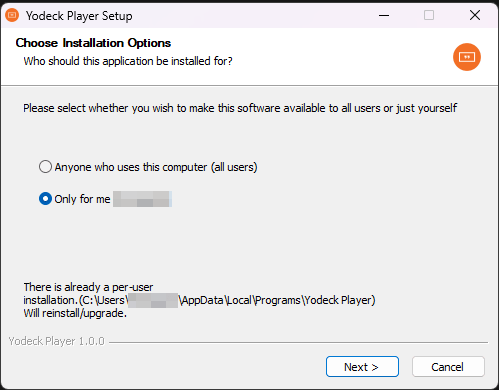
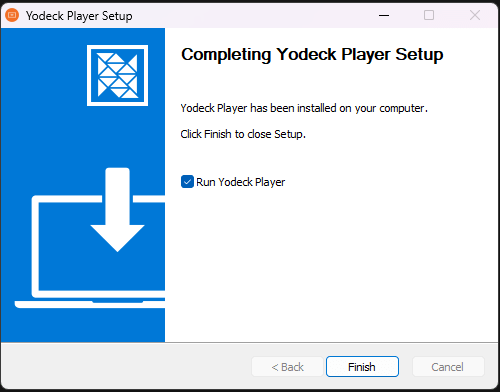
6) After the installation is successfully completed, the option to Run the Yodeck Player is enabled by default. This means that when you click the Finish button, the player will start automatically.
Step 2 – Get the registration code
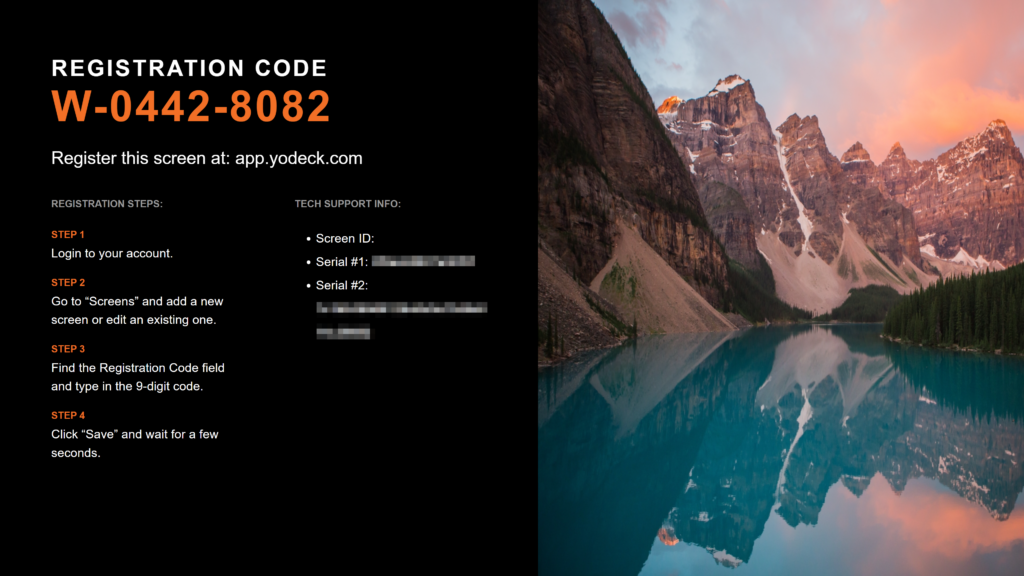
When the player starts for the first time, it loads and displays a 9-digit registration code on screen, alongside the steps to register it. You will use this code to link the device to your Yodeck account.

Step 3 – Register the Windows Player in your Yodeck Account
After seeing the registration code on your screen, you must register the player to your Yodeck Account.
After seeing the registration code on your screen, you must register the player to your Yodeck Account.
- Log in to your Yodeck Account and go to the “Screens” section.
- Create a new Screen entry by clicking the “+Add Screen” button.
- A new window will appear. You have two options for registration:
- 1. Follow the registration flow and select the Windows Player option. After that, you can fill in the registration code.
- 2. Alternatively, you can close the pop-up window and directly enter the 9-digit registration code displayed on your TV screen in the “Registration Code” field.
In both cases, the registration process will use the provided code to complete your registration, helping to minimize user errors and guesswork for new users.
ℹ️For more information, please check the New Screen Registration article.
- To finish the registration, click the “Save” button.
- After a minute, your player should register with your Yodeck Account, and the assigned content should start showing on the screen.
Step 4 (Optional) – Hide and Prevent Windows Updates
After completing the Windows player registration, as analyzed above, you have the option to hide the Windows Update restart and boot-up screens and prevent Windows Update from running during the screen’s working hours.
- Log in to your Yodeck Account and go to the “Screens” section.
- Click on the screen with the Windows player.
- To select multiple screens with the Windows player, select all of those (with the corresponding checkboxes) and click the Actions button, then select the Edit option.
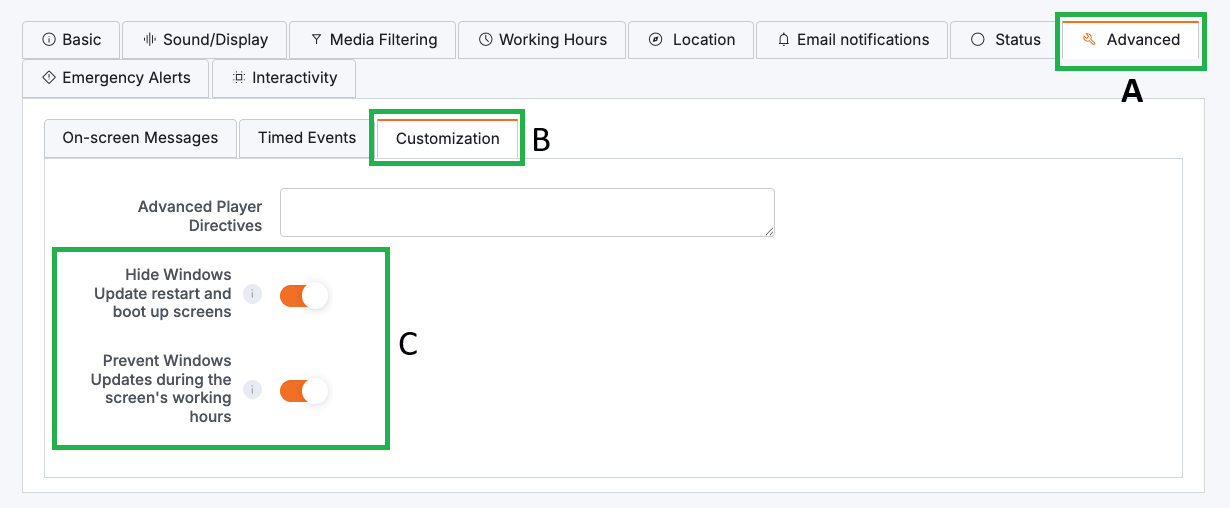
- Once you are redirected to that Screen’s Details page (or “Bulk changes to Screens” depending on whether you chose to edit multiple screens), select the Advanced tab (A), and within it, select the Custom sub-tab (B).
- Inside the Custom tab, you can enable the following two toggle button options (C):
- Hide Windows Update restart and boot up screens: Windows Update will still be operational and will follow the device’s working hours to install updates without affecting your playback.
- Prevent Windows Updates during the screen’s working hours: Apply the working hours you have set in Yodeck to prevent Windows from updating the device while you’re using it.
- To finish this change, click the “Save” button.
That is it! From now on, Windows Update will no longer affect your screen’s playback.
Limitations
Turning the TV On and Off remotely using CEC. For Windows devices, the screen will turn black instead of turning on or off.
Troubleshooting
- I can’t download the .exe file: Your browser or security software may flag the installer because it is a downloadable executable. Keep the file, then continue the installation if you trust the source (which is only this very page).
- Windows blocks the installer: If Windows displays a security warning, click More info and then Run anyway. Otherwise, make sure that other firewall-based programs you may have installed on your Windows machine do not interfere.
- The player does not show a registration code: Make sure the installation completed successfully and the player is running. Restart the application and check that the device has an active internet connection.
- The registration code does not work: Enter the code exactly as shown on screen. If the code expires or the app restarts, use the latest code displayed by the player.
- The player registered, but nothing is playing: Make sure the content is assigned and pushed to the screen in Yodeck. If no content is assigned and pushed, the player shows No Content Assigned to Player.
- The app does not open in fullscreen: Restart the player after installation and confirm the device display settings are configured correctly.
- The player does not start automatically after installation: Launch the player manually once and verify that the installation finished successfully.
F.A.Q.s
Got questions? We’ve got answers! This section addresses common questions about the Yodeck Windows player.
Do I need administrator rights to install the Windows player?
In many environments, yes. If your organization restricts software installation, you may need administrator permission. Antivirus, endpoint protection, or local IT policies may also block the installer or prevent the app from launching.
Why do my browser or Windows warn me about the installer?
Browsers and Windows frequently alert users before allowing downloaded files to run. This behavior is normal for custom executables, such as ours. You don’t need to worry, as it is safe.
Can I install the player now and assign content later?
Yes. You can install and register the player first, then assign content later from your Yodeck account. If no content is assigned, the player will display No Content Assigned to Player until content is added.
Can I change the screen name and assigned content later?
Yes. After registration, you can rename the screen and change its assigned content at any time from your Yodeck account.
Can I use the same registration code for more than one screen?
No. Each running player instance shows its own registration code and should be registered as a separate screen.
Does the player start automatically after installation or a reboot?
By default, the player restarts after a normal device restart. If it does not, check whether Windows settings or local IT policies are preventing it from launching automatically.
What happens if I close, uninstall, or reinstall the player?
If you close the player, the registration code will no longer be shown until you open the app again. If you uninstall and reinstall it later, the app will display a registration code again so you can register the device to your Yodeck account.
Can I move a registered Windows player to a different Yodeck account?
Yes, but a player cannot remain registered to two accounts at the same time. To use it with another account, you will need to remove or re-register it through the normal registration process.
What happens if the device loses internet access?
If the device temporarily loses internet access, it may continue showing already-synced content, depending on what has been downloaded locally. However, it will not be able to register, sync updates, or receive new changes until the connection is restored.
Do I need a keyboard and mouse connected all the time?
Not necessarily. They are useful during installation and troubleshooting, but after setup many users run the player without keeping them connected.
Can I use Remote Desktop to install or manage the player?
In many cases, yes. However, the experience may vary depending on the device, display configuration, and IT restrictions. For the most reliable setup, verify the registration code and final playback directly on the connected display.
Can existing customers still use the legacy (Intel-only) Windows player?
Yes. Existing customers can continue using the legacy Windows player or switch to the new version. New customers, however, should only use the new Windows player.
Need Help?
The Yodeck Support Team can help you out! Log in to your Yodeck account and send us a message from the bottom right corner!
