Table of Contents
Configure a SAML App on Google
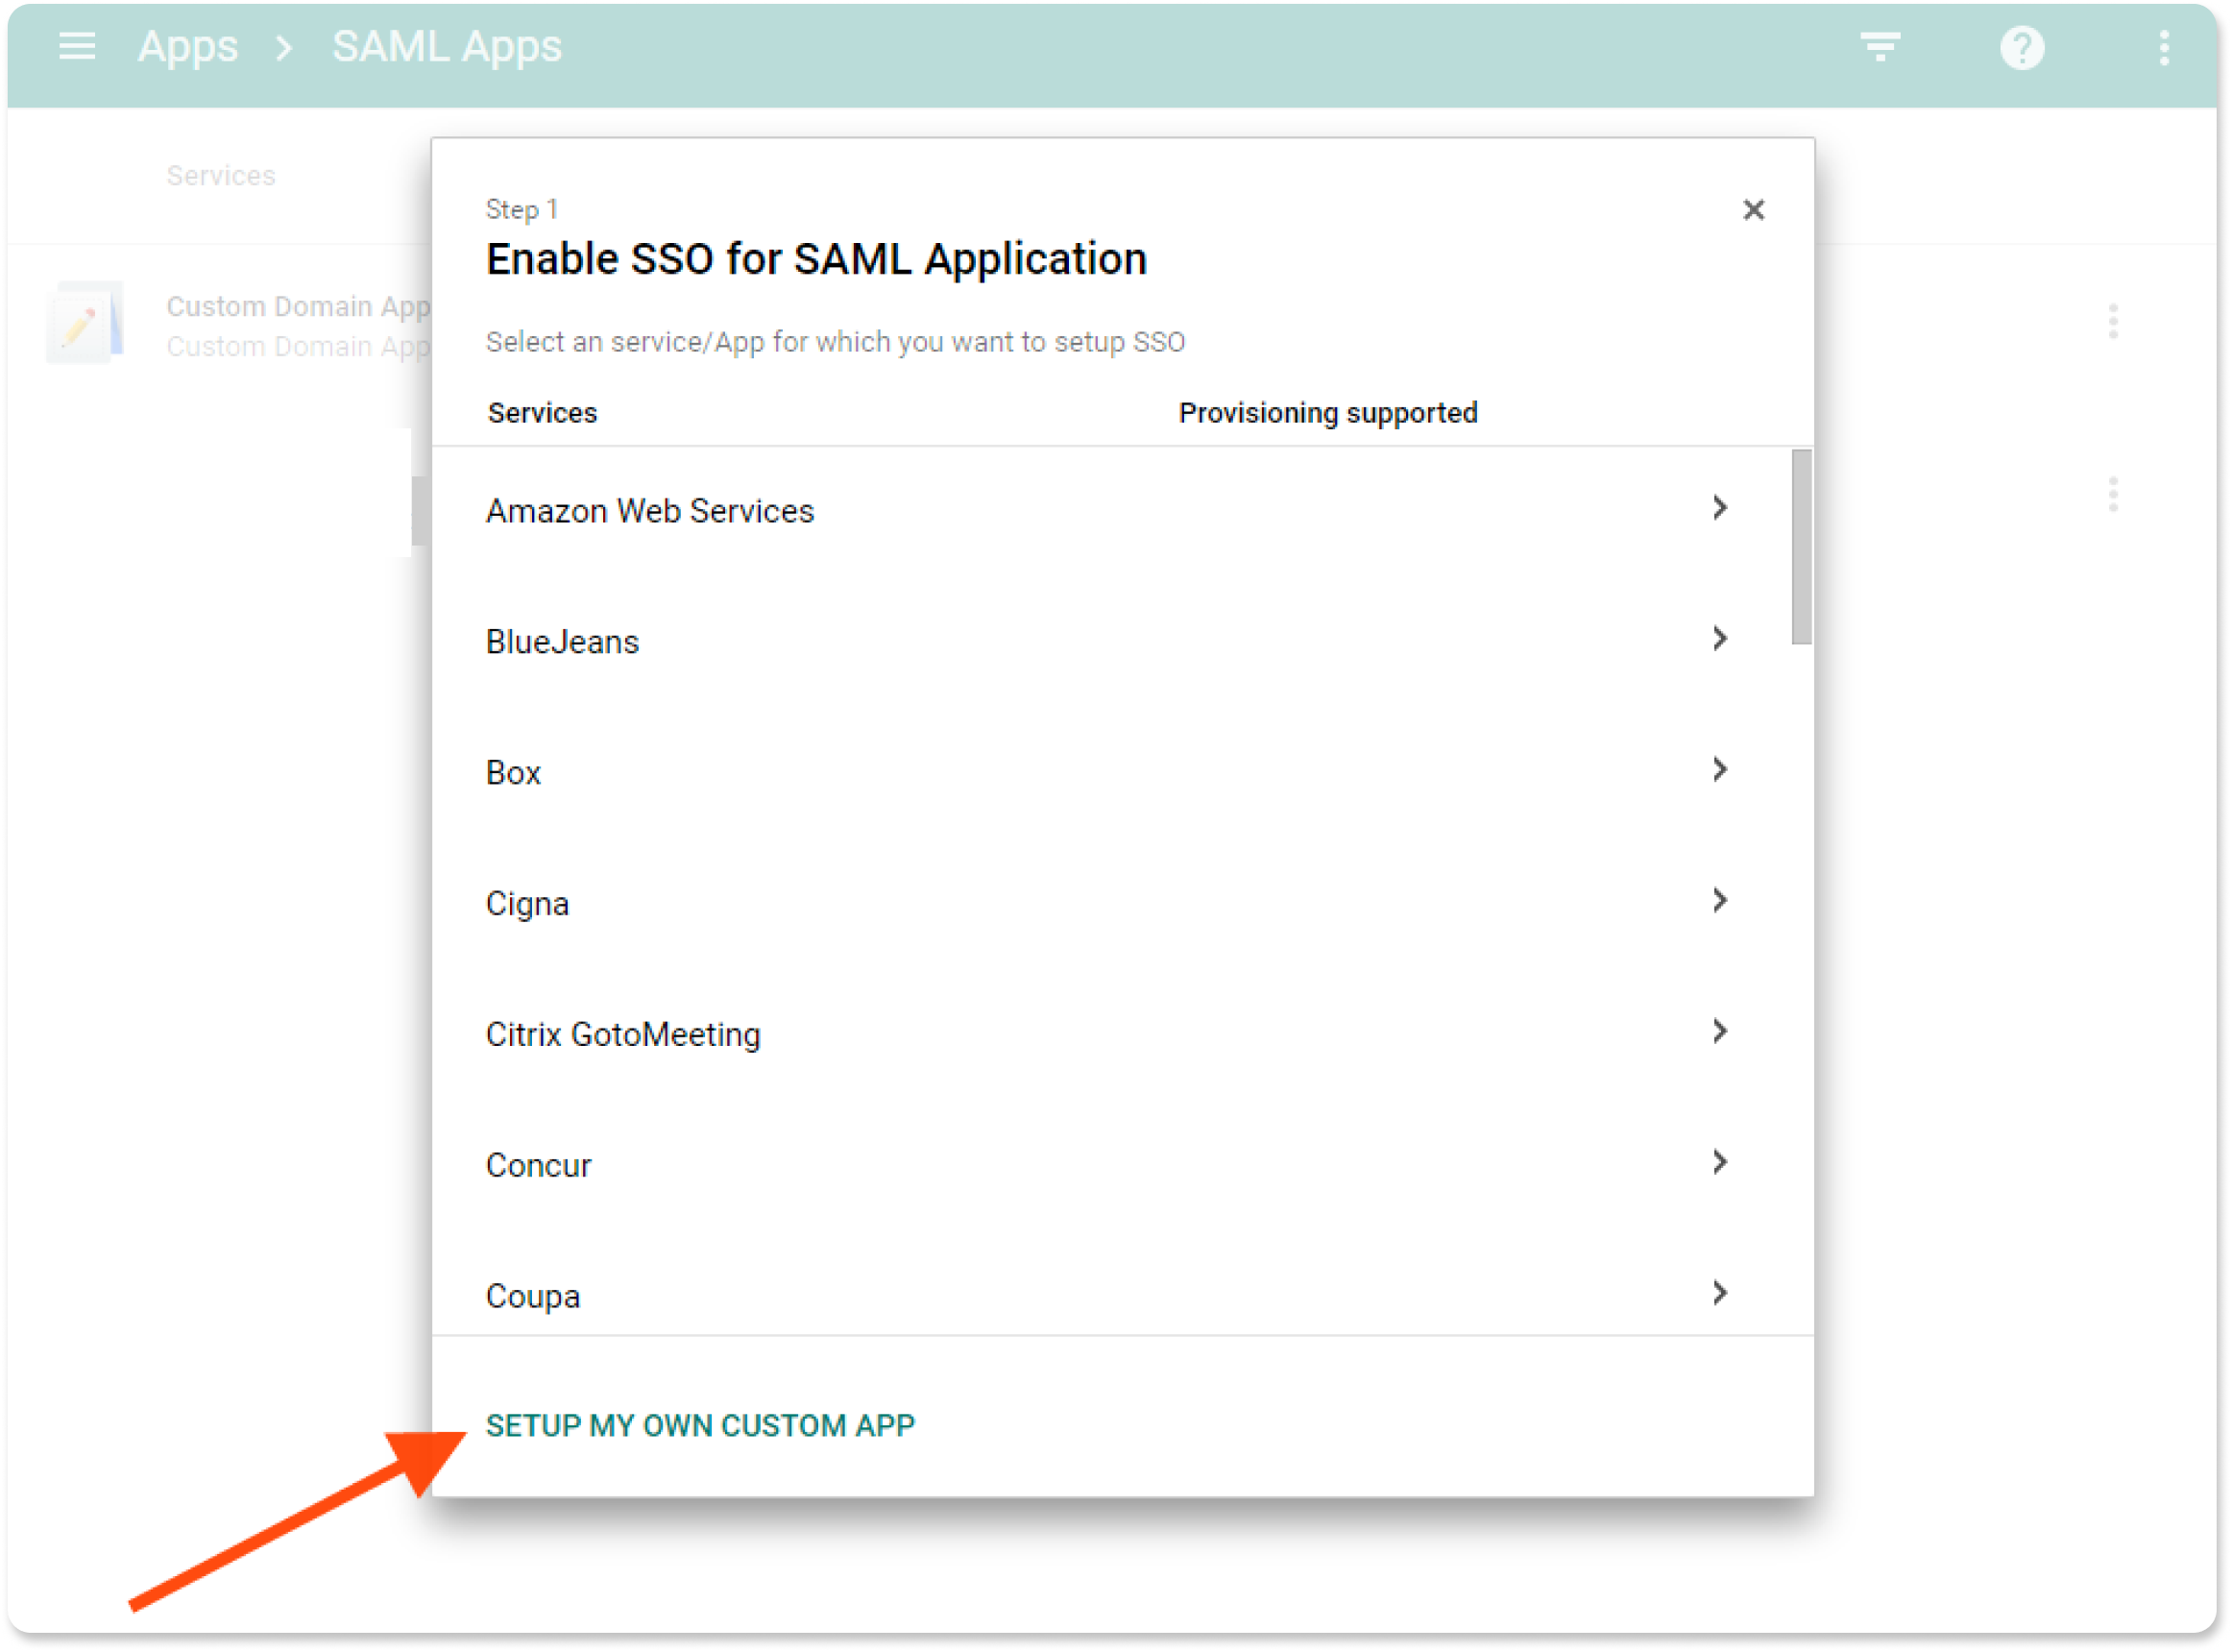
- As an administrator on your Google account, log in to Google Adminand click on Apps→SAML Apps . On the apps listing page click on the plus sign at the bottom right to create a new SAML App. On the pop-up modal, click on ” Setup my own custom app ” at the bottom
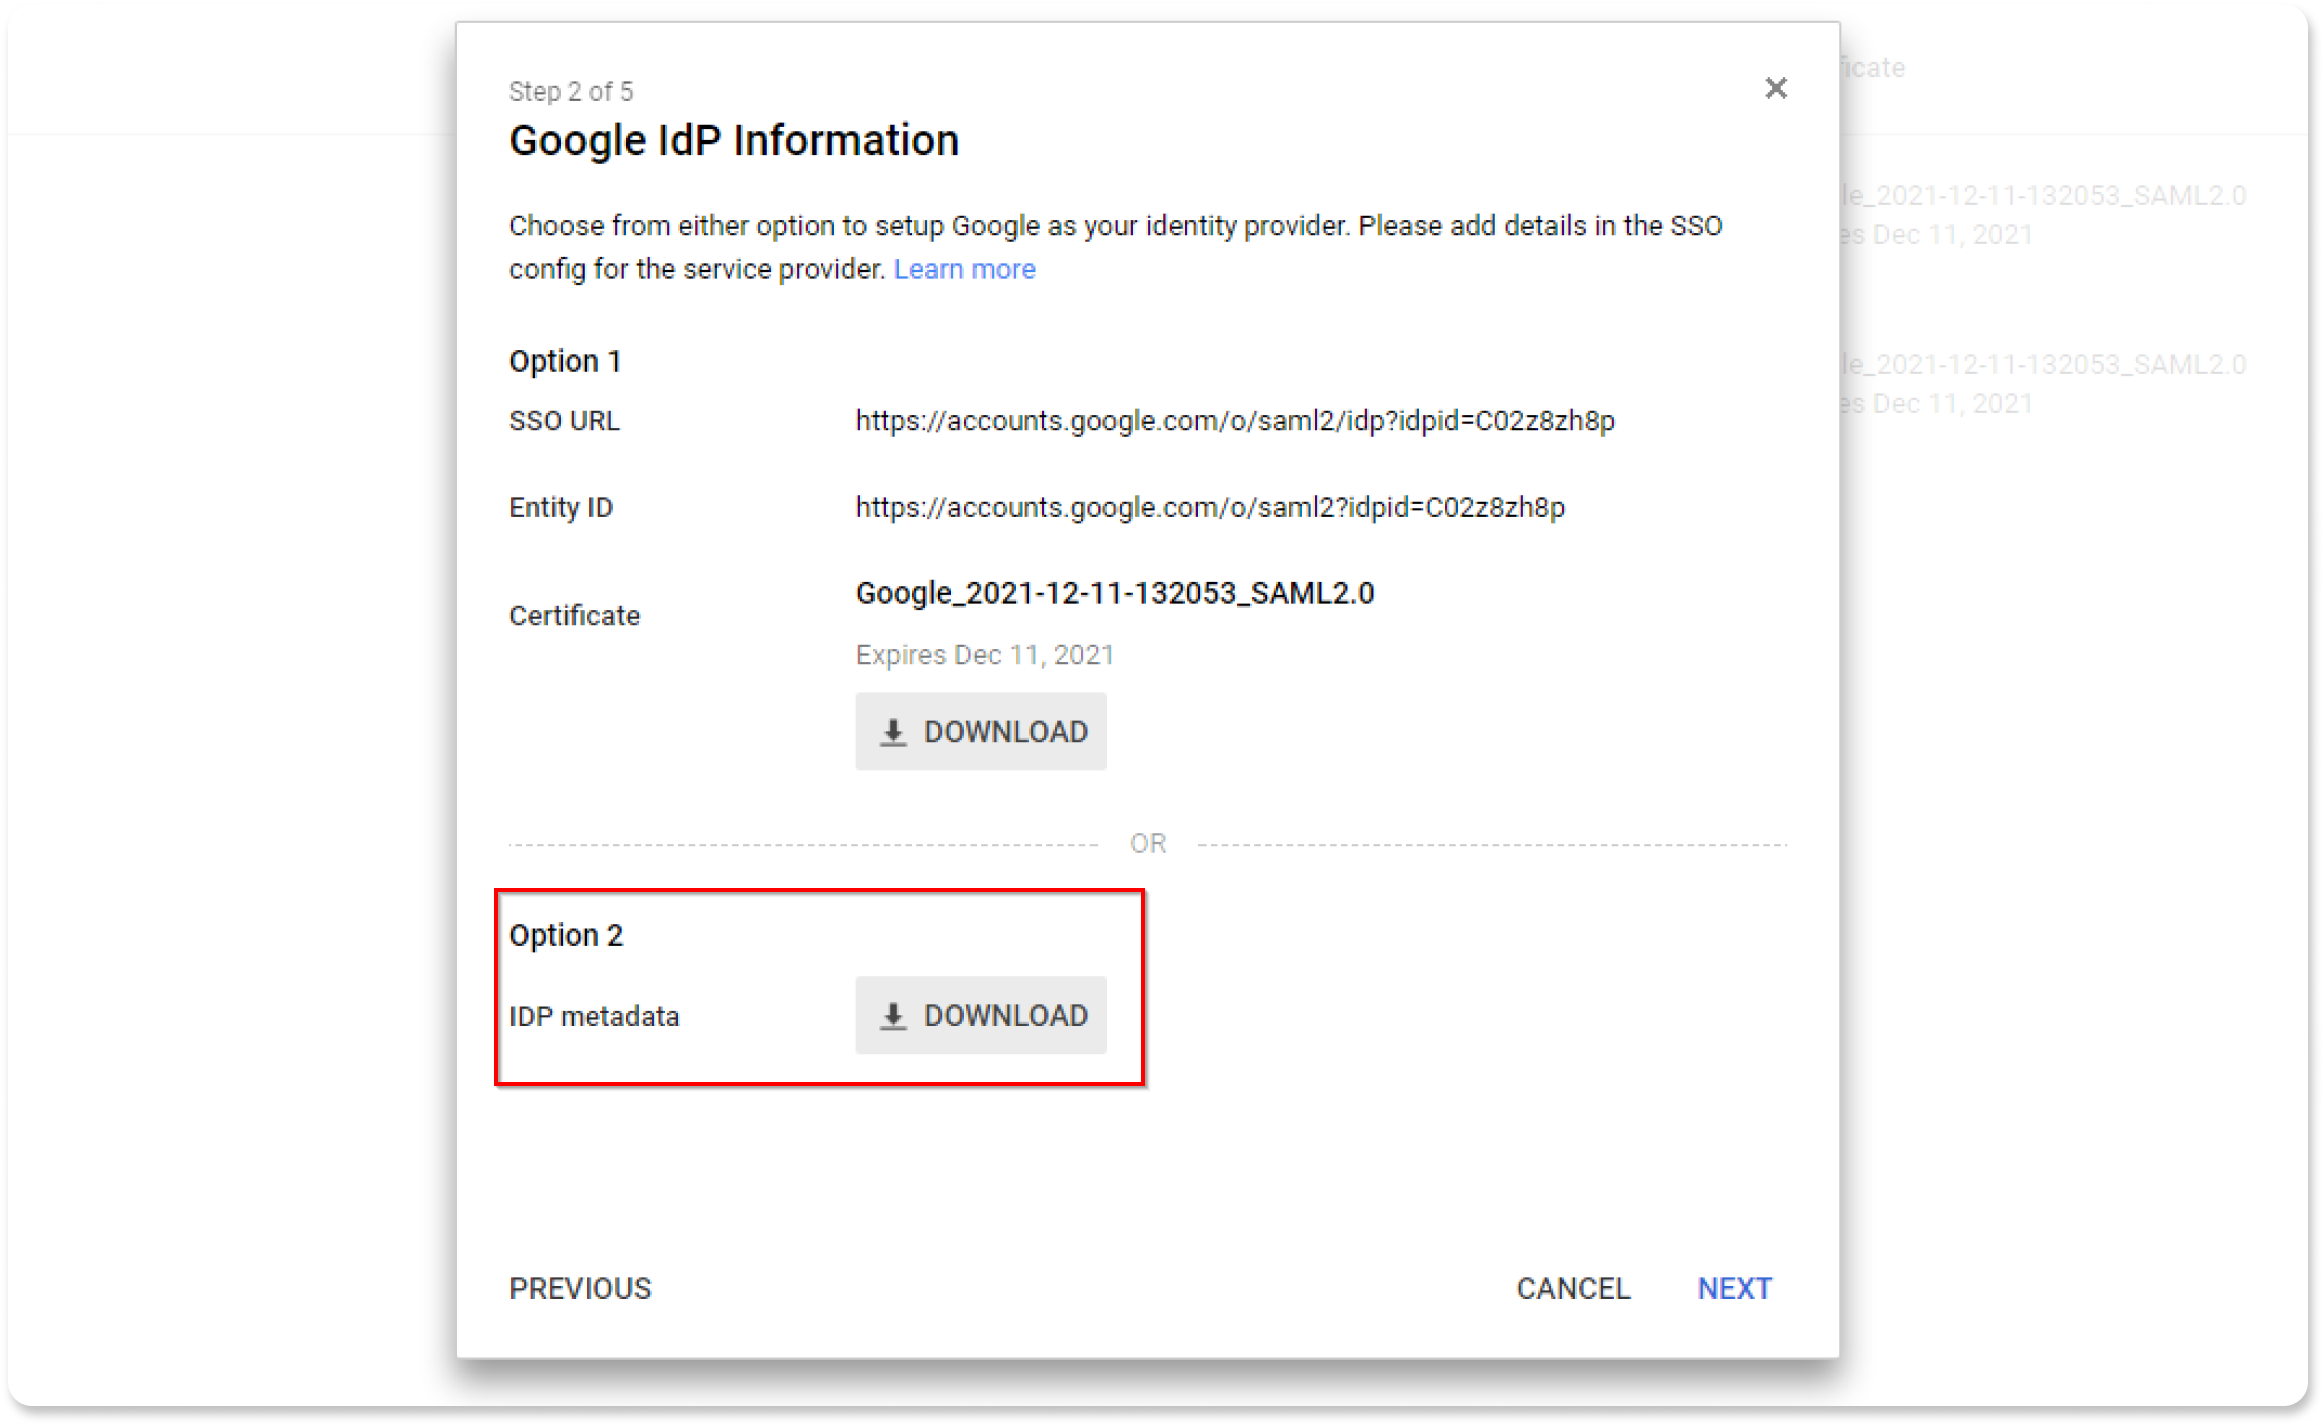
- On the next page, choose Option 2 and download the IDP metadata because you will need them to configure your Yodeck domain.
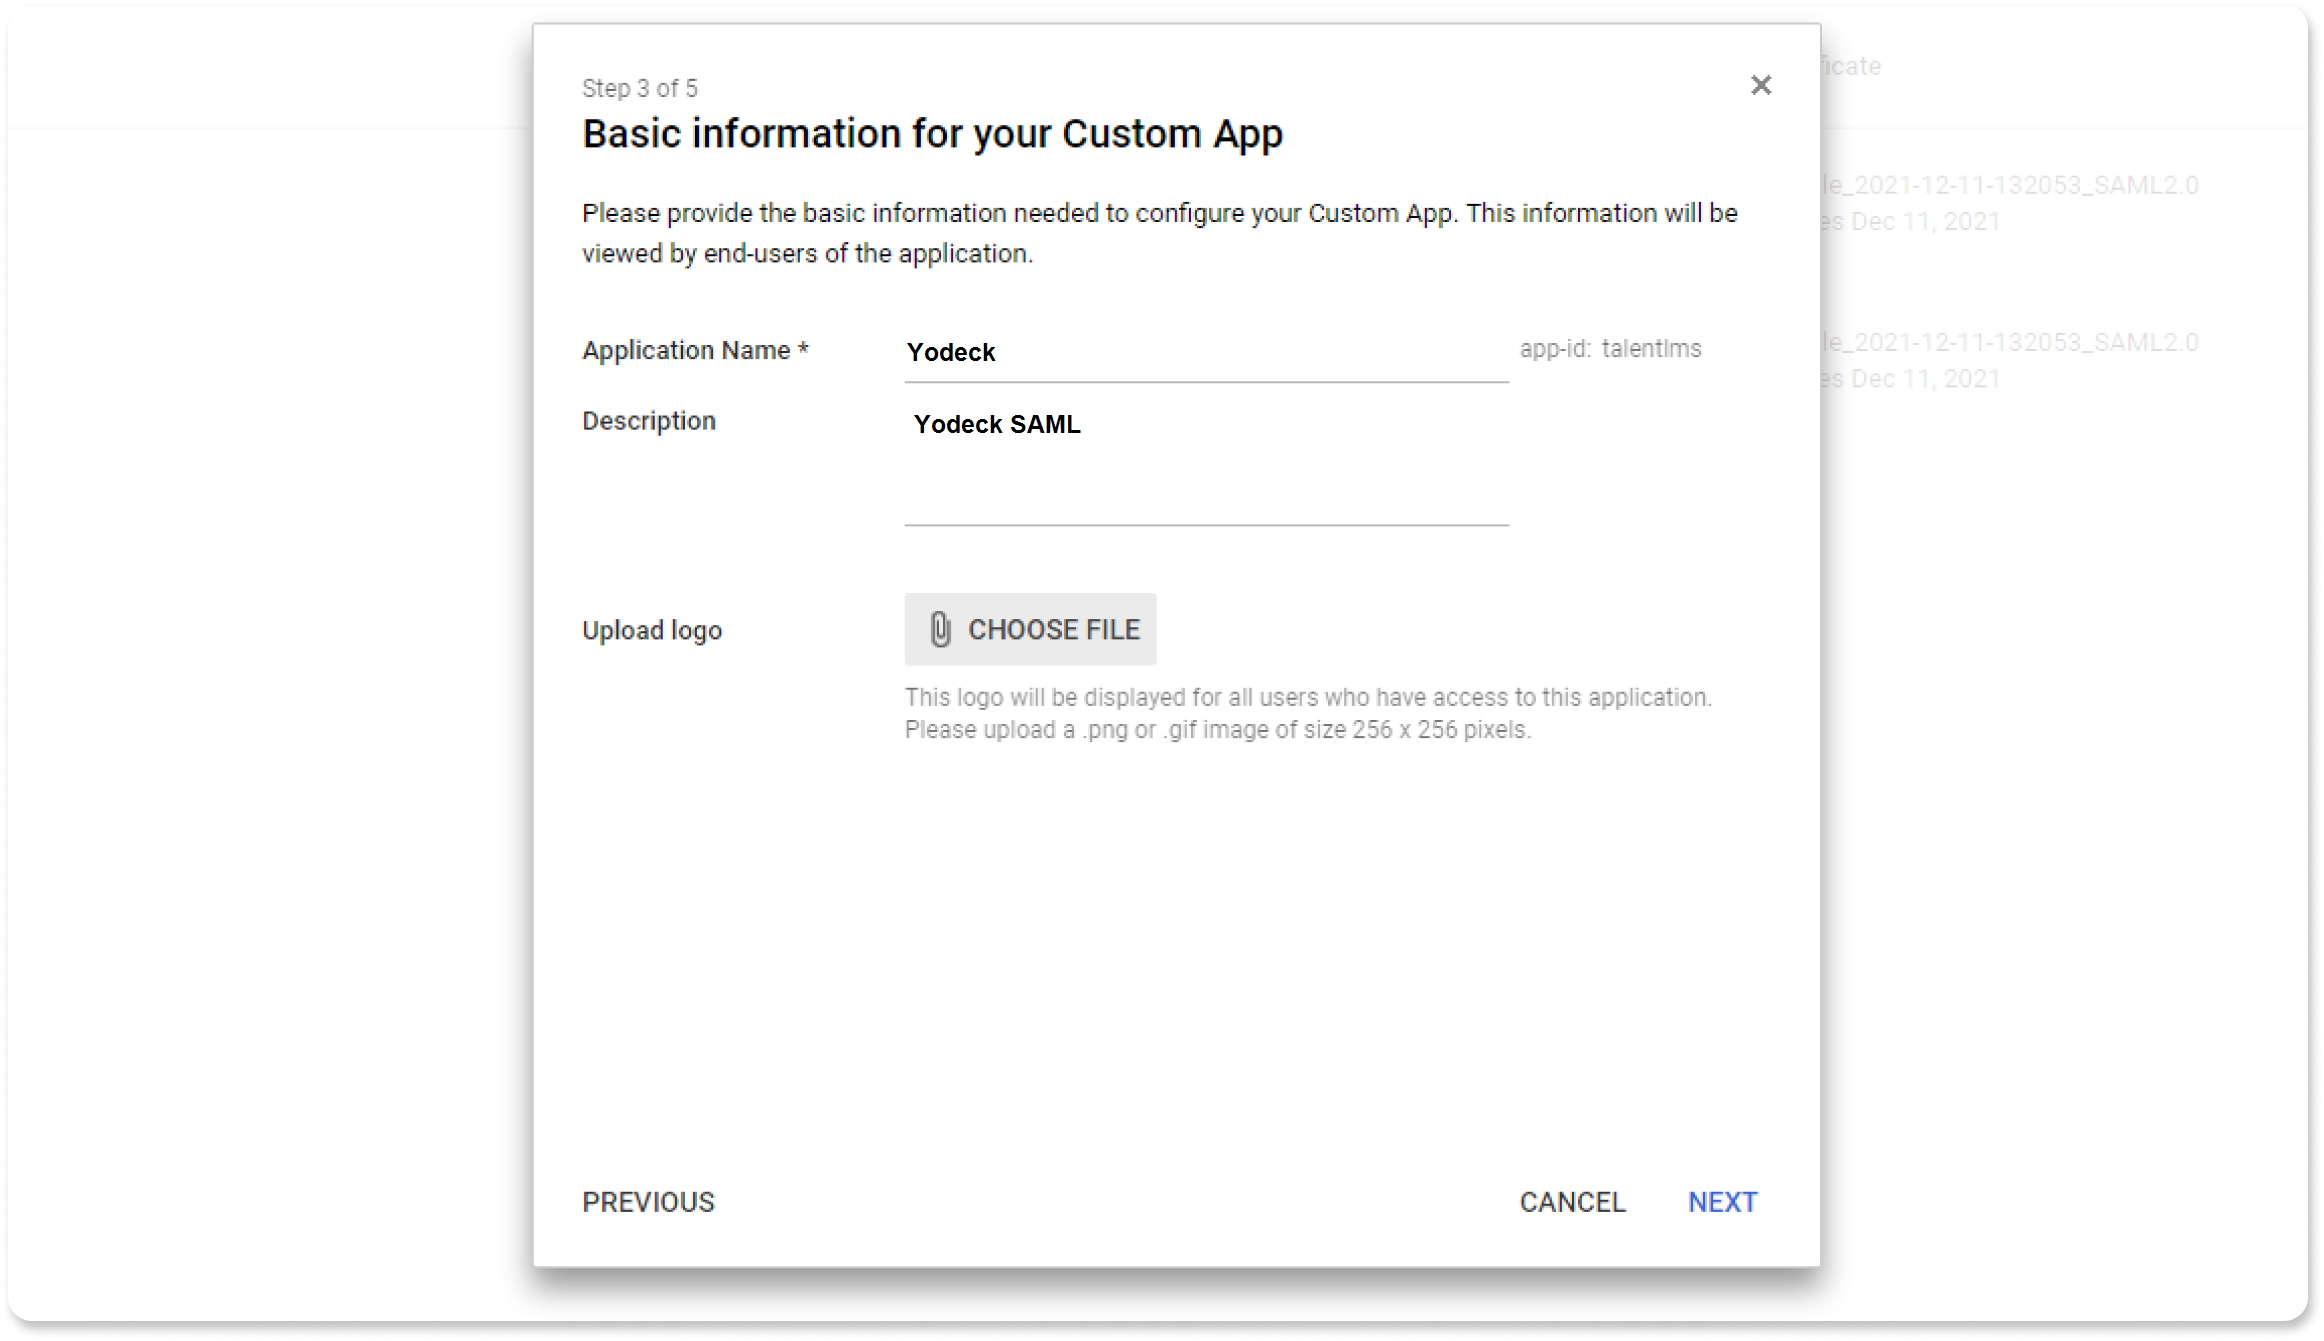
- On the next page give a name and a description for your SAML app and upload a logo image
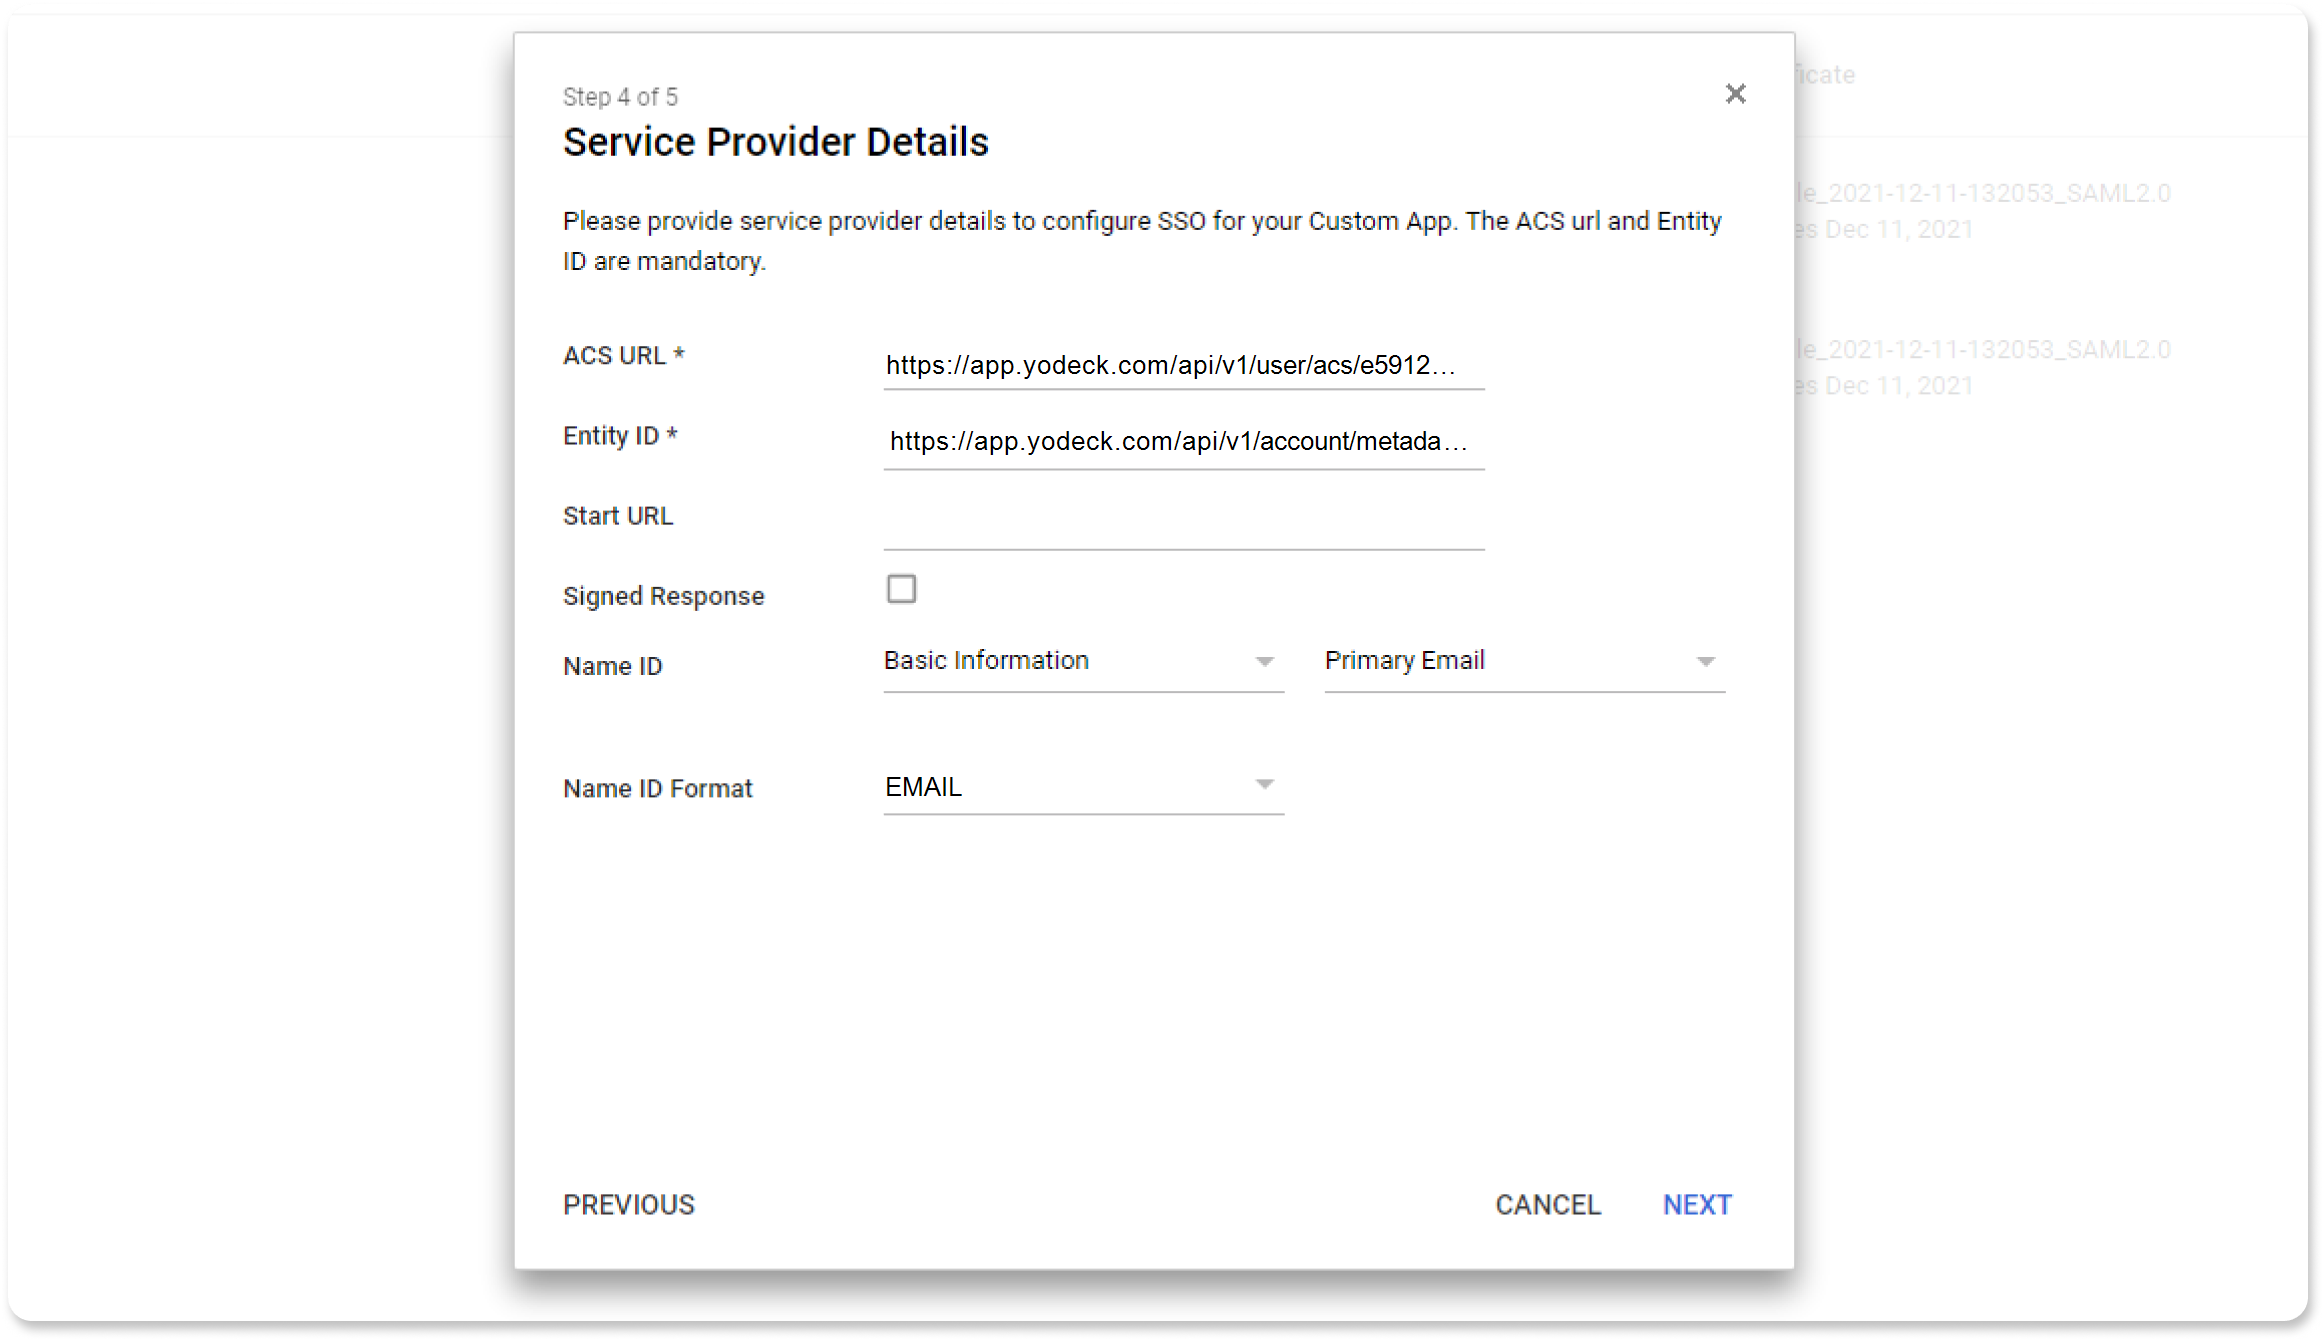
- On the next page you have to insert the Service Provider (Yodeck) details.
You will need to get from Yodeck the ACS URL, and Entity ID. Go to your Yodeck domain and navigate to Account Settings > SSO . - See Step 2 below for further information. Copy and paste them in this page.
- Leave the Start URL field blank.
- Uncheck the Signed Response checkbox.
- Choose Basic information and Primary Email for the Name ID option and finally set Name ID Format to EMAIL.
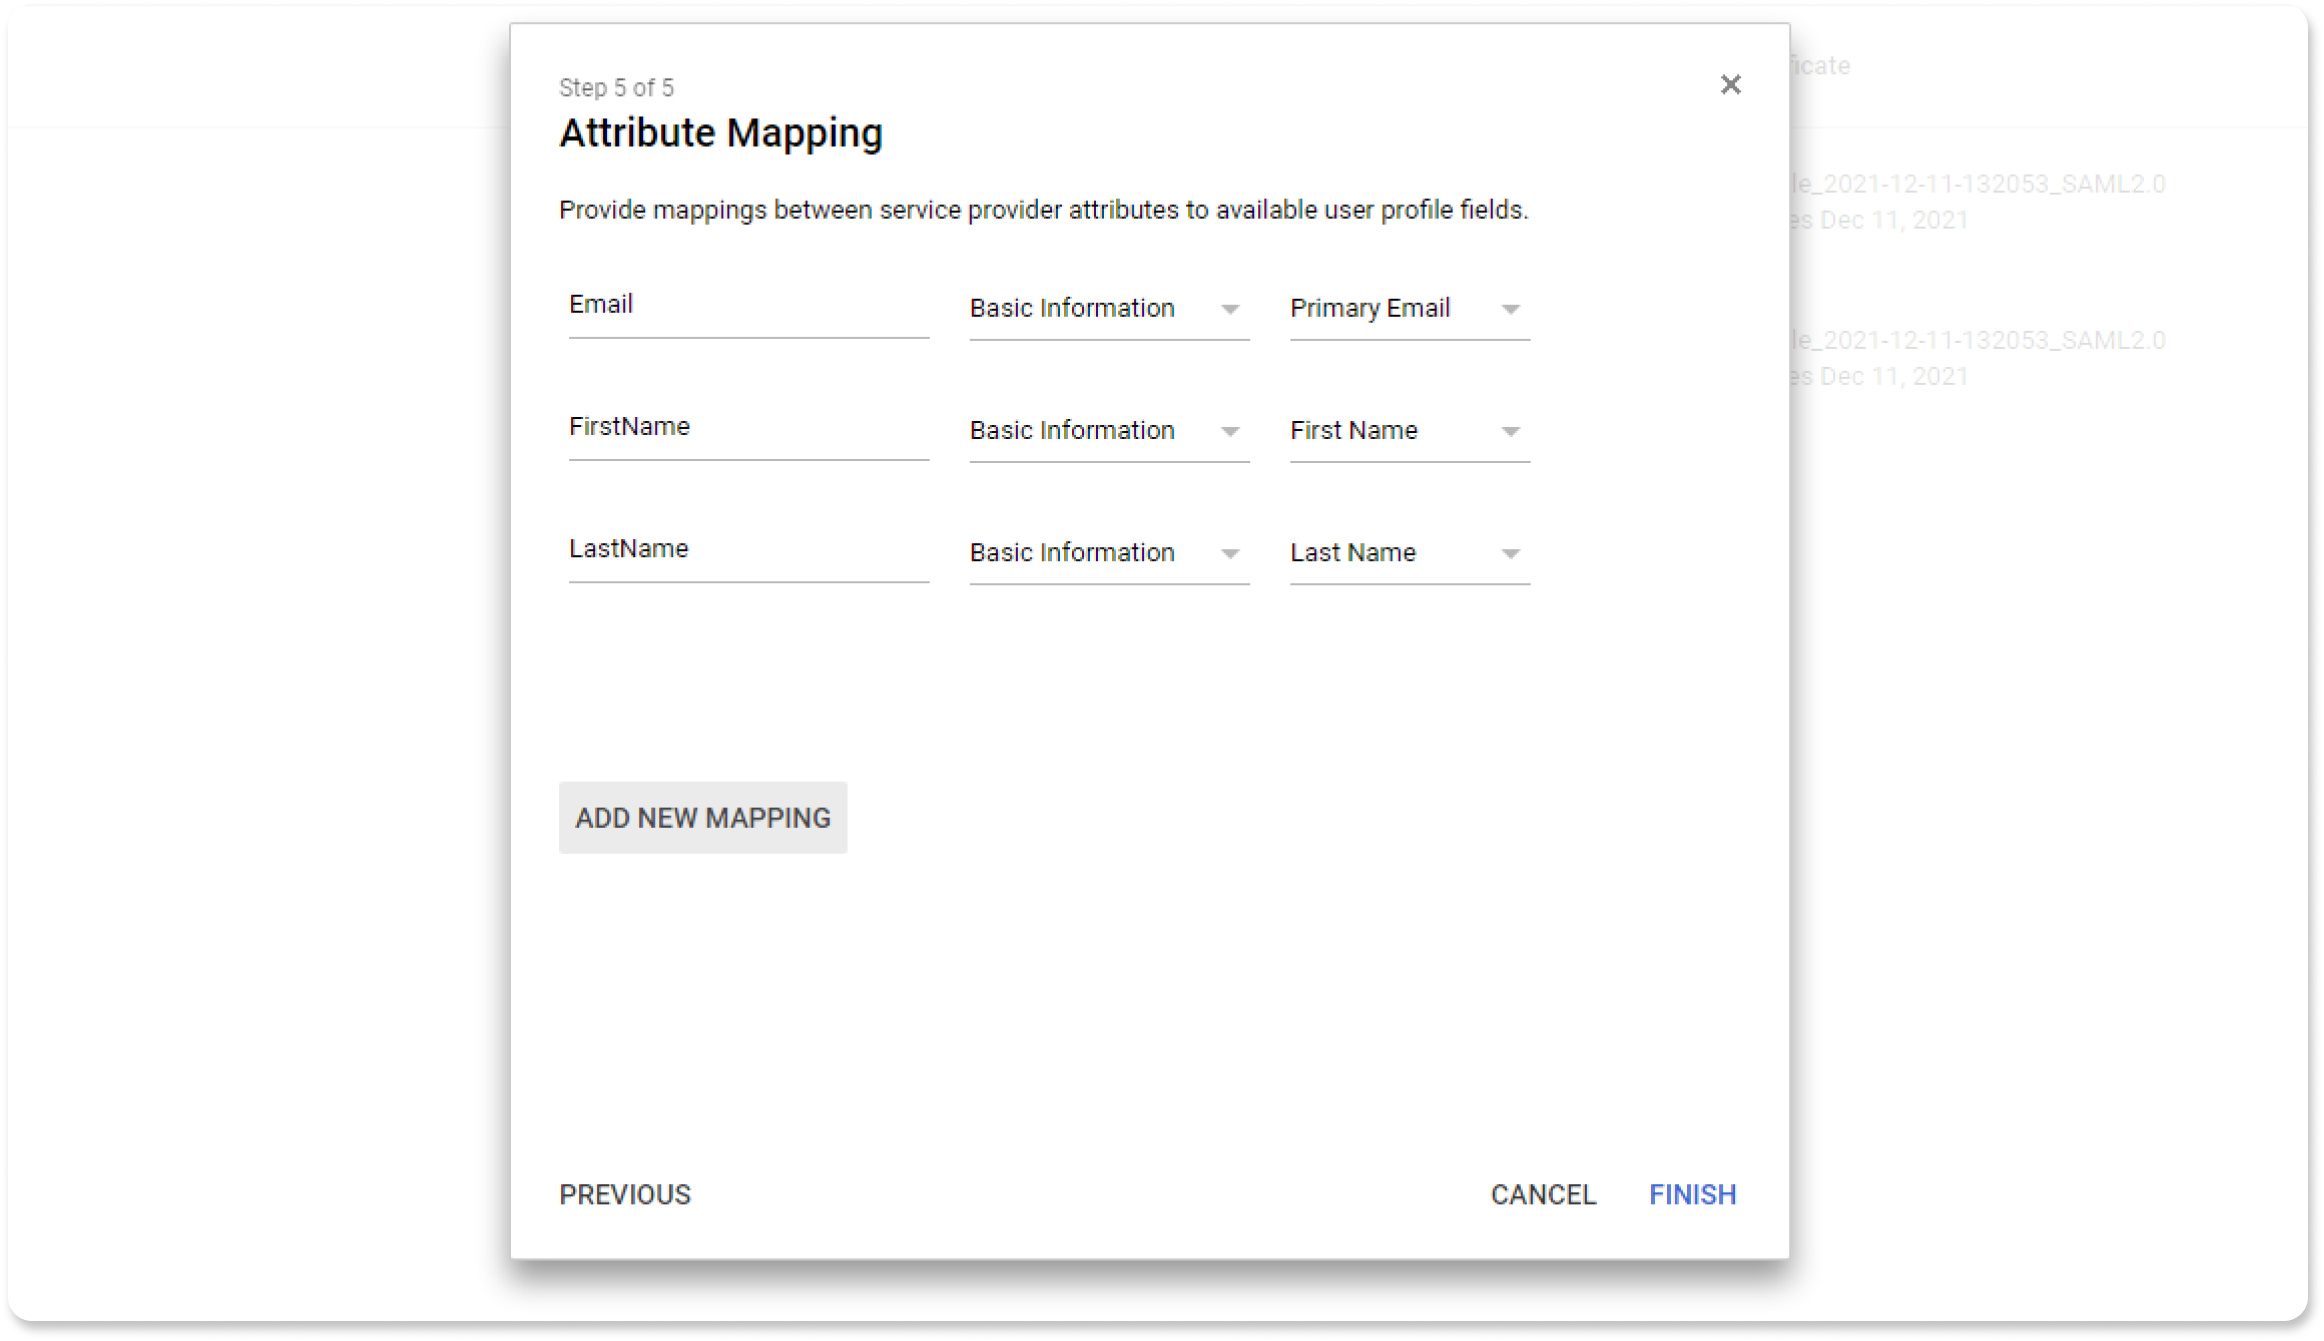
- On the next page you have to configure the mapping of user’s account values to SAML attributes . The image below is just a suggestion. You can name your SAML attributes as you like. However you should use the exact same names when configuring Yodeck.
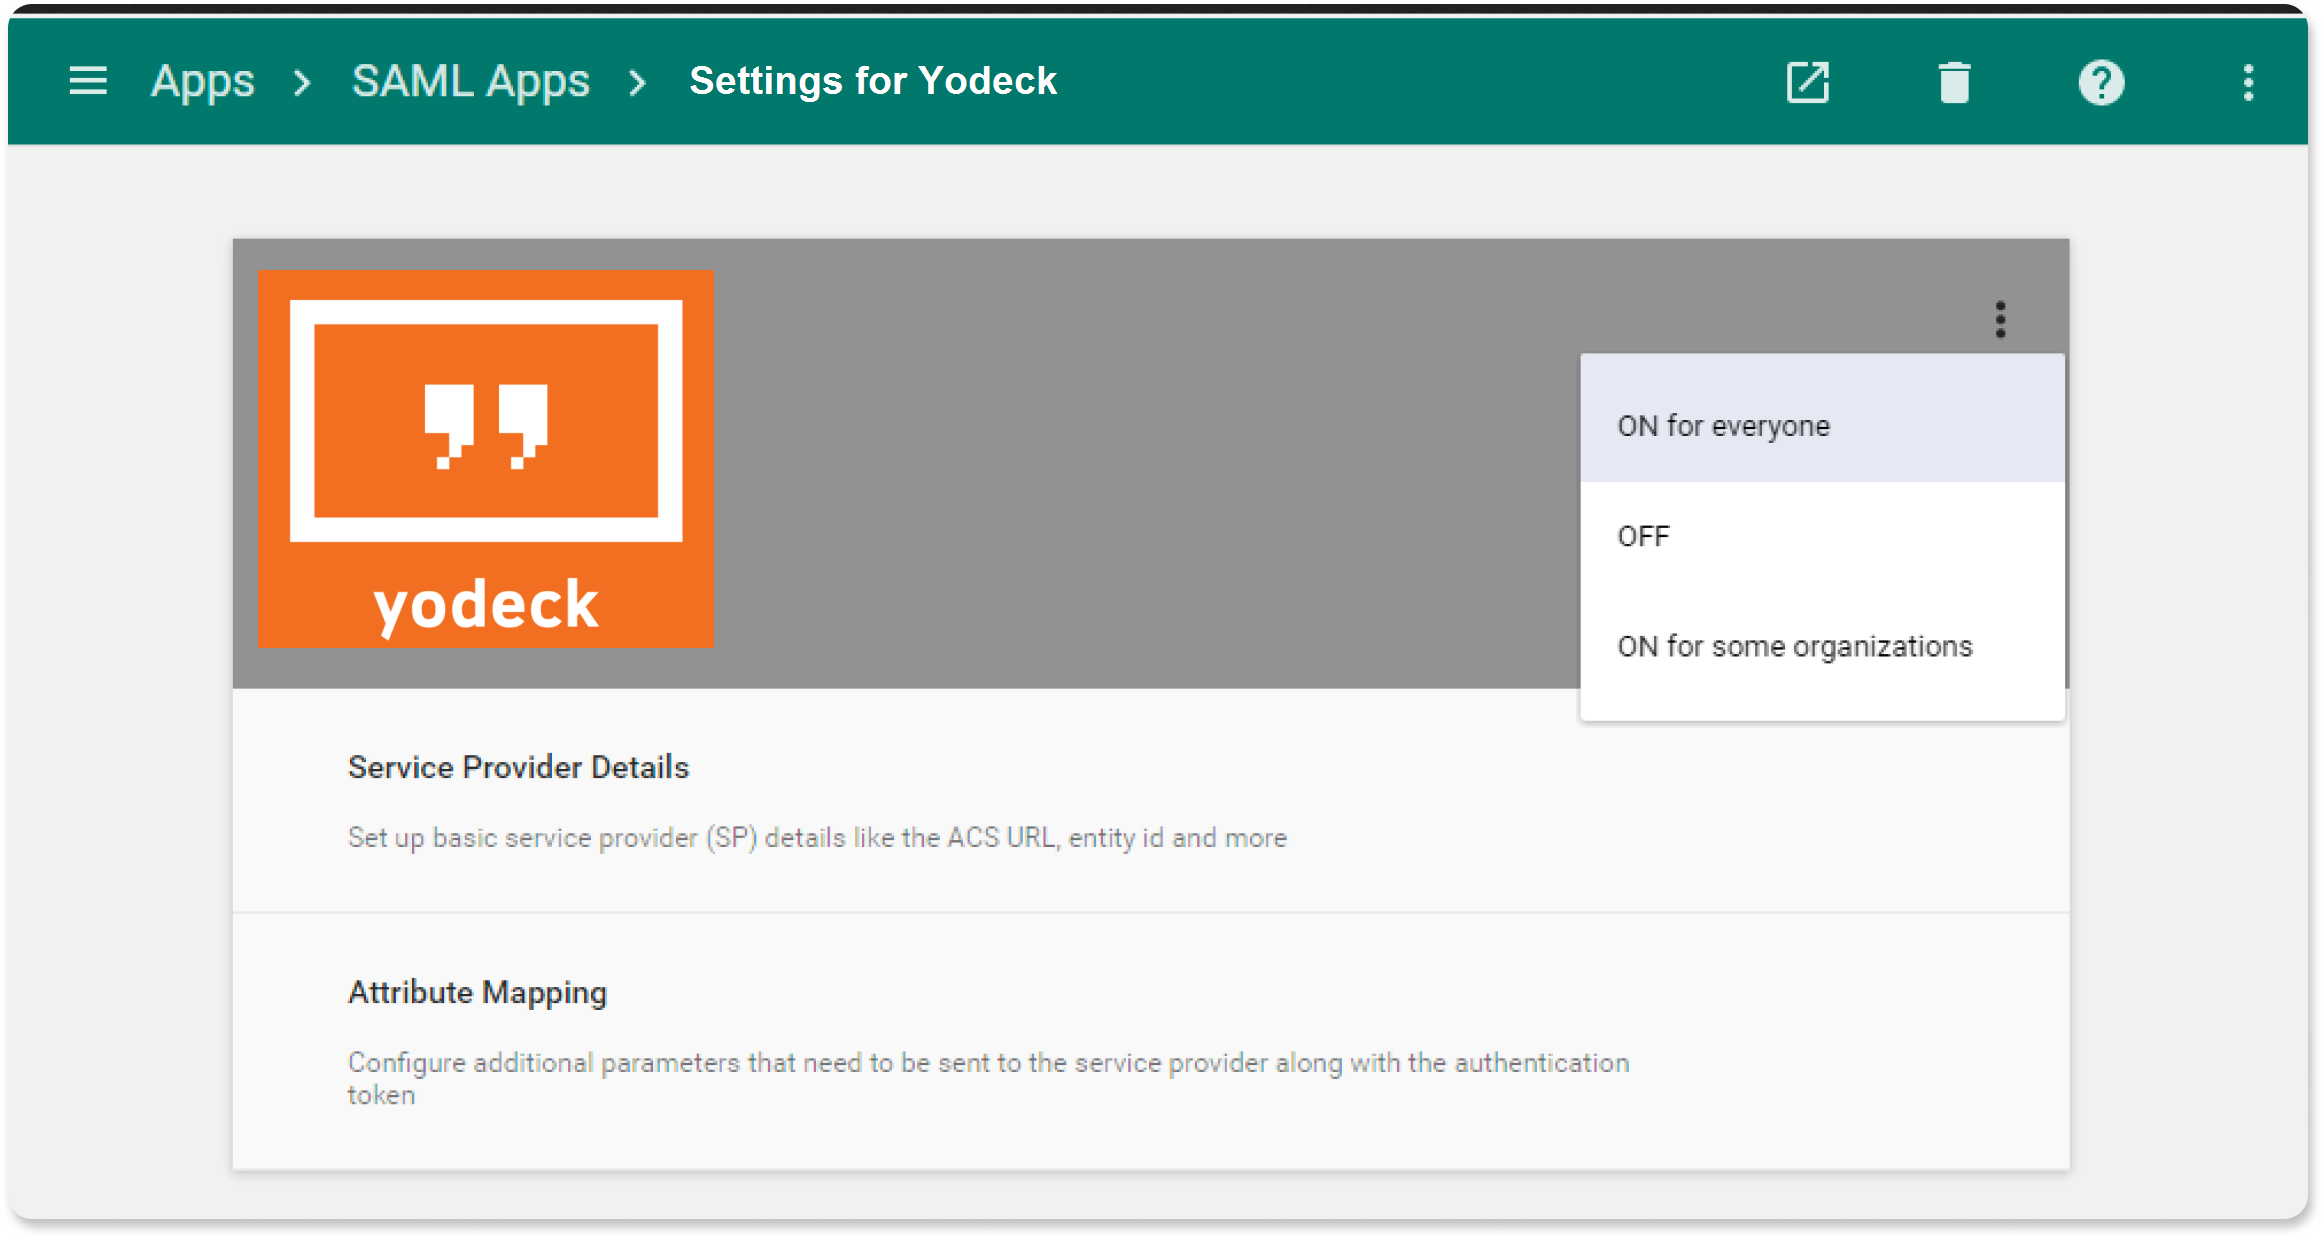
- Once the app is configured, it will not work until you turn it on for your domain. You can turn it on for everyone in your organization or for specific organizations.
Configure SSO in the Yodeck Portal
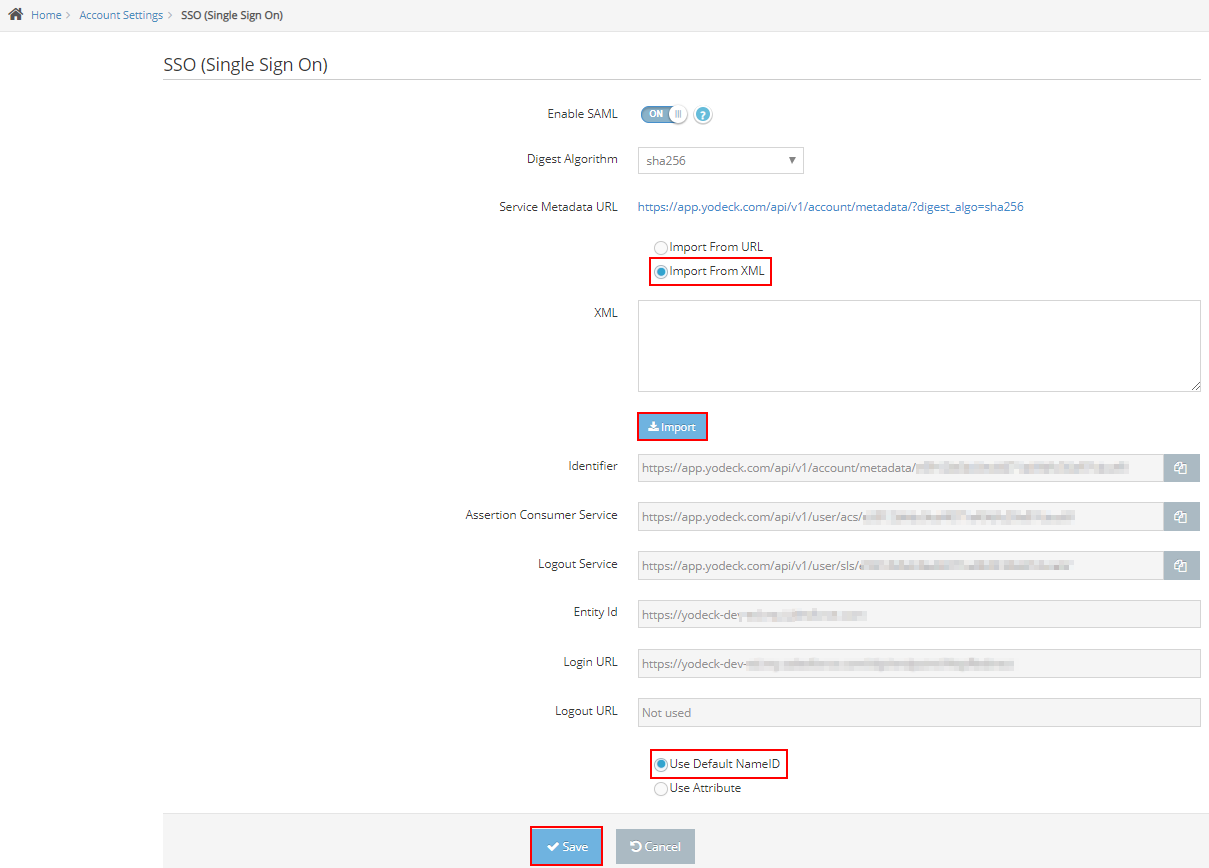
- Login to your Yodeck account as an administrator.
- Navigate to Account Settings > SSO from the top right drop-down menu.
- Enter the following:
- Toggle the Enable SAML switch to ON .
- Digest Algorithm : Select sha256 .
- Select the Import From XML radio button.
- Open the downloaded Metadata file with Notepad or any text editor and copy the whole text and paste the copied text in the XML field and click Import . Now you will see the URLs that have been pre-configured.
- Select the Use Default NameID radio button.
- Click Save :

- A new tab with a prompt for your credentials will appear in your browser.
Bear in mind that the email of the Yodeck user and the Gmail user must be exactly the same. - Enter your credentials and wait for the SAML test login was successful and SAML SSO has been enabled for your account message.
- Close the tab.
- Done!