Table of Contents
Overview
Overview How Schedules Work A Schedule is a collection of one or more Events, and each Event tells your Player when and what to display. Users can view events displayed visually on a calendar at the center of the screen, while the list on the right side prioritizes them logically, determining their order in case […]
How Schedules Work
A Schedule is a collection of one or more Events, and each Event tells your Player when and what to display. Users can view events displayed visually on a calendar at the center of the screen, while the list on the right side prioritizes them logically, determining their order in case of conflicts. The Event configuration allows you to select the Event type, choosing between displaying content or setting screen-off times. Moreover, you can choose the types of content to display and define the start and end dates and times for that content. Additionally, there are various options available for repeating the Event as needed. In the following sections, we analyze the settings for the Event Schedule, discussed earlier, in detail.
Creating a Schedule
To create a new schedule, navigate to the Schedules main menu tab and click the “Add Schedule” button on the Schedules list overview page. Proceed with the following step-by-step guide for actually creating Events for your Schedule(s):
- The next step is to name your new schedule.
- Afterwards, you must click the
 (plus) icon to create a new Event.
 - In the Event’s settings pop-up window, you can configure the following options:
- Event Type: This option includes Schedule Content and Turn Screen Off, and is the primary option for selecting whether an event will display content or just turn off your screens. Specifically, with the “Schedule Content” option, you can set up a scheduled event specific to a display. The “Turn Screen Off” option allows you to specify the date, time, and frequency for when you want your screens to turn off.
- Content type: This option allows you to select the content (Media, Layout, and Playlist) you wish to display on your screens.
- Event Starts/Ends (Date and Time): These date fields allow you to set the date and time when you want your layout, media, or playlist to be displayed and when you want it to stop being displayed, respectively. To schedule the time, click on the corresponding icon.
- Repeat: You now have the option to configure the desired repeat frequency, which options are analyzed below:
- The next box, “Repeat“, indicates the frequency at which your content will be displayed. Click to choose one of the options provided:
- Does not repeat (Never): If you want the schedule to be displayed once and never repeat itself.
- Daily: If you want to set which days of the week you wish your content to be displayed.
- Weekly: If you want your content to be displayed once per week.
- Monthly: If you want your content to be displayed once per month.
- Yearly: If you want your content to be displayed once per year.
- Ends:
- Never: The event will never expire.
- On: Set the specific date on which the event will expire. In other words, it will stop displaying on the screen.
- After: Set the number of occurrences for which the event will expire.
- Lastly, the “Repeat Until” indicates the time frame you want to set your schedule. You can select a specific date and time, or you can choose Forever to have your schedule displayed as specified.
- The next box, “Repeat“, indicates the frequency at which your content will be displayed. Click to choose one of the options provided:

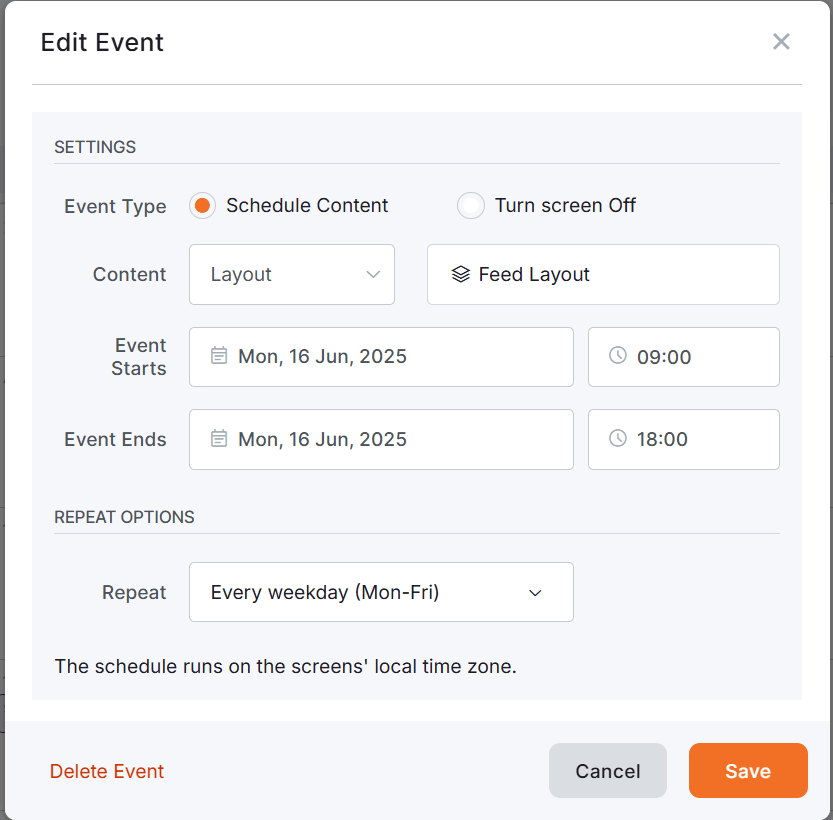
Once you have completed the Event’s configuration, click the Save button to create the event and utilize it inside your schedule.
Repeat Options Explained
Repeat options let you automate playback so you don’t have to recreate events manually.
- None (Does not repeat): Plays once at the selected date/time.
- Daily: Plays every day.
- Work Days: Plays Monday through Friday.
- Weekly: Plays on a selected weekday(s) once a week.
- Monthly: Plays on the same day of the month (e.g., 15th).
- Annually: Plays on the same day each year.
- Custom: Offers advanced recurrence logic:
- Repeat Every: X days/weeks/months/years
- Ends: Never, On a specific date, or After X occurrences
Example (click to expand): Custom Repeat
You want a playlist to play every Tuesday and Thursday at lunchtime, from 12:00 to 13:00, until the end of the quarter.
- Repeat: Custom
- Frequency: Weekly
- Days: Tuesday, Thursday
- Repeat Until: On (select end of quarter date)
This saves you from recreating the event each week.
Alternative Method of Placing Events on the Schedule’s Calendar
Alternatively, you can drag and drop Event(s) to schedule the content on the calendar.
Prioritization & Rules of Listed Events
The Event listed higher on the right-hand side “Events List”, inside the Schedules overview page, always takes precedence over events below it if they overlap in time.
When two events overlap, the one placed higher in the “Events List” will play. You can change priority simply by dragging events up or down in that list.
Timezone
The schedule will run according to the timezone of the player to whom it is assigned. This means that a schedule that starts at 9 a.m. and ends at 9 p.m. gets assigned on a screen with the timezone America/New York configured; it will start at 9 a.m. New York time. Find out how to configure your player’s timezone.
Viewing & Managing Schedules
Now that you have created a schedule along with at least one event, let’s analyze how you can manage them based on what you see on each related page:
Schedule’s Overview Page
Upon landing on the Schedules overview page, you will find two main elements: a calendar and an Events List.
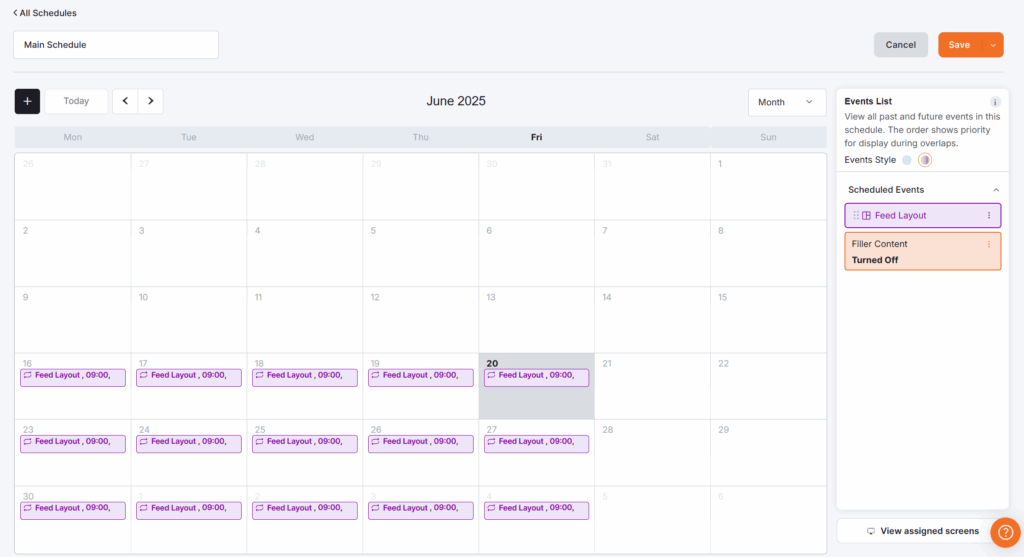
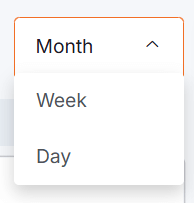
- Located on the main part of the page, the calendar lets you view the month, week, or even day of your choice by clicking the relevant drop-down button. You can see the current date; however, you can move to the previous or next month/week/day by clicking the arrows next to the “Today” button, to have a better preview of your schedule across the different views for better planning.
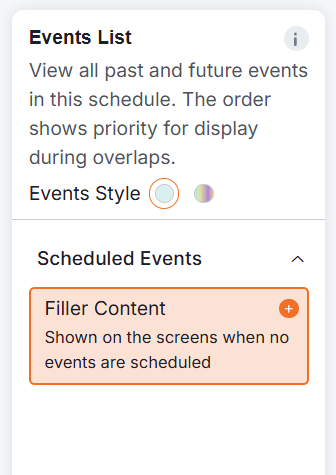
- Located on the right part of the page, the Events List is where all the scheduled events exist, both current and past. Of course, you can edit any Event you wish by clicking on the three-dot icon.
The Εvent listed higher on the right-hand side always precedes events below it if they overlap in time.

Schedule’s List Page
In the Schedules List page, you can see a list of the schedules currently created in your Yodeck account. The following columns organize the schedule information:
- The Name of the schedule.
- The Timestamp (date and time) of the schedule was modified for the last time.
- The Workspace (for accounts in the Enterprise plan), the schedule belongs.
- The Filler Content column displays the actual filler content used for each schedule.
- The quick Actions column.
Click the three-dot icon in the Actions column to see a list of actions you can apply to your schedules.
💡Click on each tab below to see a short description.

Change the details of a schedule by clicking the” Edit” button.
Check out the “Creating a Schedule” section for details on the fields.
Setting the Schedule as the content for a particular screen.
Create an exact copy of the schedule with a new name.
You can move schedules to other Workspaces (for accounts in the Enterprise plan).
Displays the Feed’s creation date and time, along with the user’s information. You can also access detailed logs for this Feed via the “See Log Details” option.
Delete the schedule.
Additional Control Settings
In the top-left corner of the Schedule’s List page, you can use the Search box to sort out your Schedule listings quickly.
- You can search using any of the columns by name, date, workspace, etc.
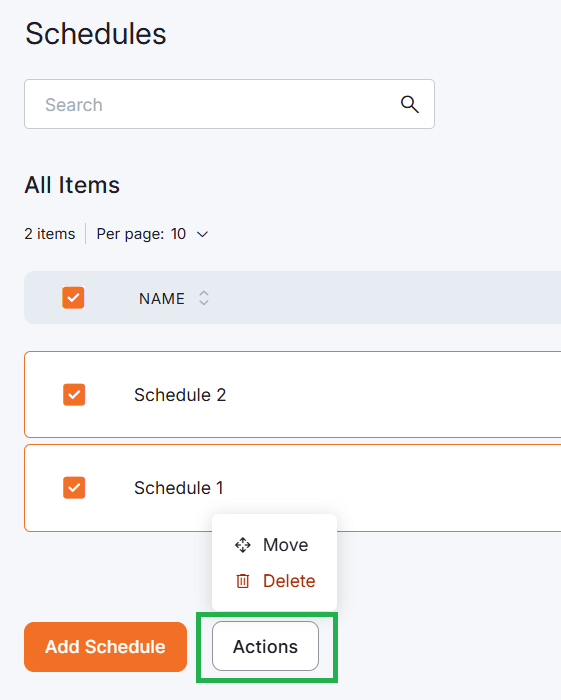
- You can select one or more schedules by clicking the square box left to their thumbnail.
- You can then click the Actions button at the bottom to Move or Delete all the selected schedules simultaneously.
Understanding Schedule Behaviors
When using Yodeck’s Schedules feature, it’s essential to grasp how the system manages event priorities (A), handles default content (B), and respects the time zones of players(C). This section provides a detailed breakdown of the scheduling logic to help you design reliable and predictable playback plans.
A. Priority in Overlapping Events
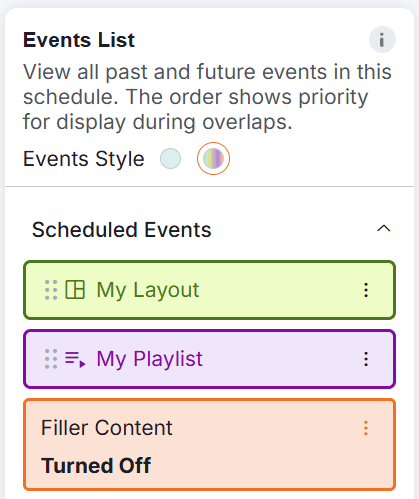
Sometimes, you may schedule two events to take place at the same time. In these cases, the order of events on the right-side panel determines which content plays.
- The platform organizes events by priority, placing the highest priority at the top and the lowest at the bottom.
- The event higher on the list will always override the lower one during overlapping times.
Example (click to expand): Prioritizing Events
- Event A: Layout from 08:00–20:00
- Event B: Playlist from 10:00–14:00
If Event B (Playlist) is higher in the list:
- 08:00–10:00 → Layout (Event A)
- 10:00–14:00 → Playlist (Event B)
- 14:00–20:00 → Layout (Event A resumes)
This logic allows you to stack fallback content behind higher-priority campaigns.
B. Filler (Default) Content
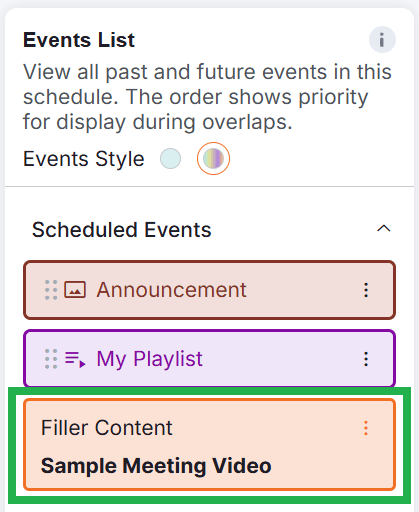
If there’s a gap between events, or no content scheduled, Yodeck automatically displays Filler Content to ensure your screens never go blank.
- Filler content often serves as your default content, meaning it is where your scheduled content resides when there is no other content to display.
- It only activates when no scheduled event is active.
- As soon as an event starts, Filler Content pauses.
Example (click to expand): Filling Gaps
- Event A: Media from 09:00–11:00
- Event B: Playlist from 14:00–18:00
11:00–14:00 is a gap → Filler Content will play.
This helps ensure brand consistency or informational signage remains active even outside specific campaigns.
C. Time Zone Behavior
Every Yodeck Player uses its own local time zone to interpret Schedules.
- You don’t need to convert time zones manually.
- A single schedule will adapt to each Player’s location.
- This makes managing global deployments easy and consistent.
Example (click to expand): Time Zone Awareness
Schedule: 09:00–18:00
The first Player A is in Tokyo, while the second Player B is in Paris.
- Player A plays the schedule from 9 AM to 6 PM Tokyo time.
- Player B plays it from 9 AM to 6 PM Paris time.
This ensures viewers always see content at the correct local time.
Real-World Examples
You can view multiple real-world practical examples of configuring Schedules here!
Viewing Assigned Screens of the Schedule
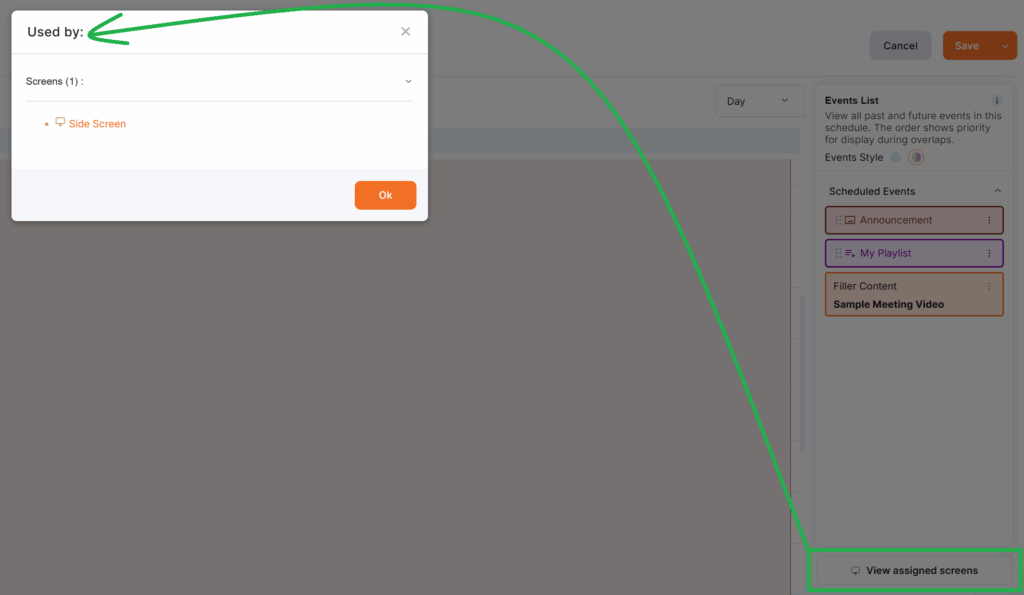
Click the View Assigned Screens button located below the Events List. A pop-up window appears, displaying the names and numbers of the screens associated with the selected Schedule.
Schedules vs Working Hours
The “Working Hours” feature is much simpler in its use case, as it only defines when your screens are physically ON or OFF.
- It applies a global on/off rule to your Players.
- If enabled, Working Hours override all other schedules.
- We use it to enforce operating hours, regardless of the content schedules.
Example: Working Hours Limit
- Working Hours: 09:00–17:00
- Event scheduled from 08:00–18:00
Even though content is scheduled at 08:00 and 18:00, the screen turns on at 09:00 and off at 17:00.
Wrapping Up
By mastering the logic behind Schedules—especially how priorities, repeat patterns, filler content, and time zones interact—you’ll unlock powerful control over your content delivery with minimal effort.
If you have any questions, please check the F.A.Q. section below and the Yodeck Help Center. Moreover, if you need further assistance, our support team is always happy to help. We strive to make your experience with Yodeck smooth and enjoyable.
F.A.Q.s
Got questions? We’ve got answers! This section addresses common questions about Schedules.
Yes, there are the following ones!
– Always check time zone settings on your players before scheduling.
– Avoid overlapping events unless intentionally using priority for control.
– Use Custom Repeats for advanced timing like biweekly or odd schedules.
Yes. Use the “Turn Screen Off” event type to automatically switch off screens at specific times. You can also repeat these off periods and customize their frequency.
If there are no active events, Filler Content automatically plays to keep screens from going blank.
Deleting a Schedule removes it from the system. If this change is pushed to the Screens and the Schedule was assigned to any screen, the Player will display a message saying “No content assigned to player.” However, if the Schedule is deleted but the change is not pushed to the Screens, the Schedule will continue to play normally until a push is made to the Screens.
Yes. You can assign a single schedule to one or more players (screens).
Yes. Within a single Schedule, you can create multiple Events that display different types of content.
Yes, if you are on the Enterprise plan, you can move Schedules between Workspaces.
Need Help?
The Yodeck Support Team can help you out! Log in to your Yodeck account and send us a message from the bottom right corner!