Table of Contents
Intro
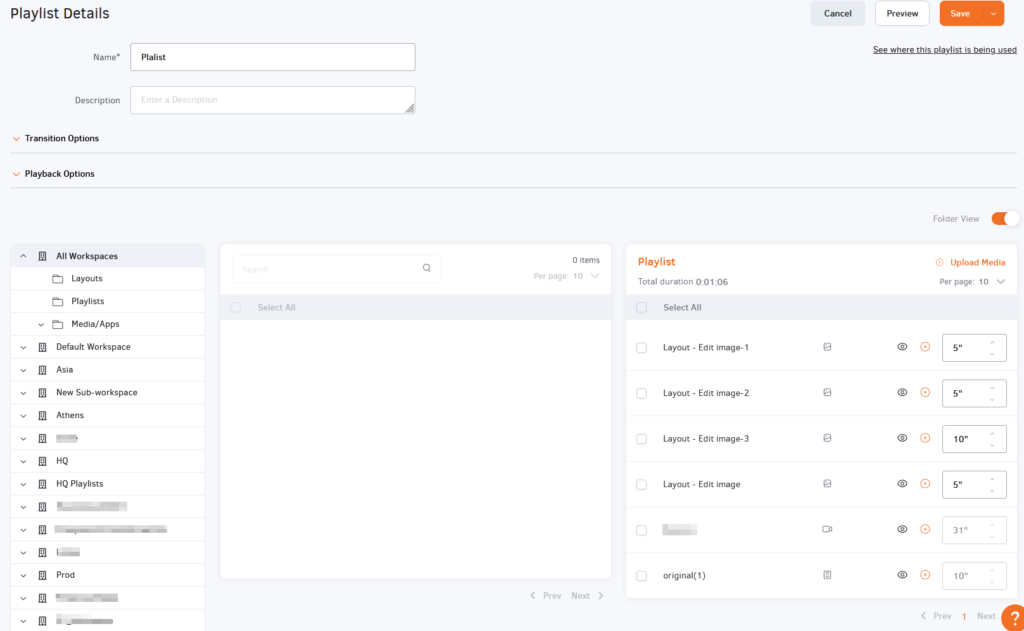
Activating Folder View can be very helpful when you handle a large number of media files. The toggle button to turn the Folder View option on and off is located at the top-right corner of your screen when you edit Playlist mode.
Moving from left to right, there are three (3) column sections:
- Media Folders, where all folders and sub-folders appear (Workspaces will also appear if you are in the Enterprise plan).
- The contents of the selected folder (or Workspace) will appear in the middle section.
- The actual playlist contents appear in the third column on the right.
How to manage the contents of the folders
- To preview the media file, click on the “eye” icon or the arrow to move it into the playlist.
- You can use the Search box to find a specific media file in a folder.
- To simultaneously move several media files to the playlist, select multiple media files and click on the arrow of just one of the selected items.
- To move ALL items in a folder to the playlist on the right, check the box next to the folder’s name and click on the arrow of just one of the items.
How to manage the contents of the playlist
Once moved, the media files are listed in the right column. This is your new playlist.
- To delete a single media file, click the “X” button next to it
- To delete multiple media files from the playlist, first check the boxes of the files you want to remove and then click the “X” button from one of them
- To delete ALL media files, check the Playlist box; all items will be selected, then click the “Remove Selected” button.
- To change the media files’ position, just drag and drop them in the order you want
- To change the default display duration of the files in the playlist, either type in the box the display duration or use the blue “UP/DOWN” arrows, respectively
Finally, click ”Save” to create your playlist.