Table of Contents
Introduction
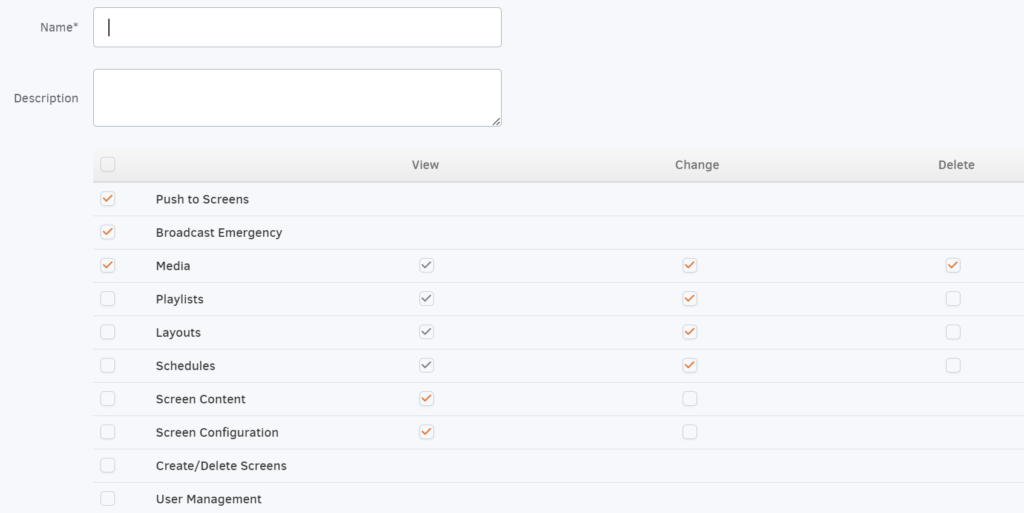
If the prefined user roles do not provide the permissions you want for your users and you need to be more specific about what certain users can do, you can use our Custom Roles feature with the Enterprise Plan. This allows you to define exactly what items users are allowed to view, change, or delete.
To set up a custom role, go to your Account settings, navigate to Custom Roles, click the Add Custom Role button, and fill out the table with the actions that you want a user to be able to perform.
Available only on the Premium/Enterprise plan!
This feature is only available on the “Premium/Enterprise” Plan. You might not see some menus below if you are not on the “Premium/Enterprise” Plan.
Remember that the “Premium/Enterprise” Plan is free if you only manage 1 screen to evaluate these features quickly.
Custom roles are commonly used in software platforms that require detailed access control. These custom roles allow for more granular control over permissions and access rights tailored to the specific needs and structure of the organization or system. Here are some key aspects of custom roles:
- Flexibility and Granularity: Custom roles can be created to match particular job functions or responsibilities within an organization, allowing for a finer granularity of access control. This means permissions can be more accurately aligned with the actual duties and needs of each role.
- Security and Compliance: Custom roles can help enhance security and ensure compliance with regulations and internal policies by enabling the creation of roles with access only to the necessary content/screen resources.
- Efficiency and Scalability: Custom roles can improve efficiency by providing users with the access they need to perform their tasks without overloading them with unnecessary permissions. This can also make the system more scalable, as new roles can be created as the organization grows or evolves.
- Customization to Business Processes: Organizations often have unique business processes that don’t always align neatly with generic roles. Custom roles allow for the system to be tailored to these processes, supporting more effective and streamlined operations.
- Management and Administration: While custom roles offer significant benefits, they also require careful management to avoid complexity and potential security risks.
Custom Roles
If you need to provide a User with customized Permissions, you need to create a Custom Role. To access the Role Management screen, follow this link and click the “Add Custom Role” button.
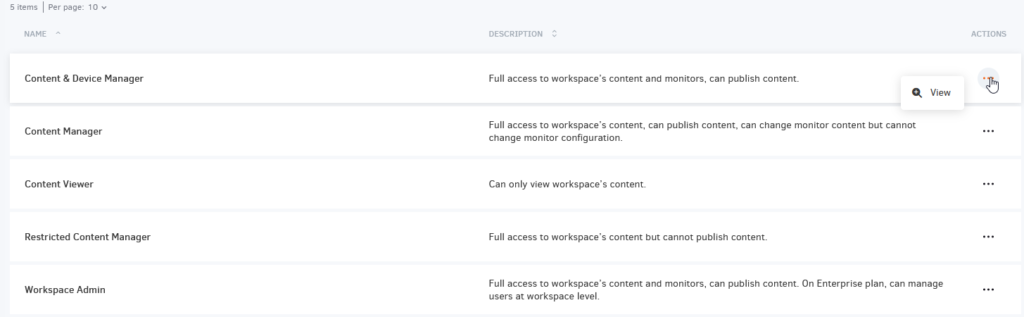
You can see all the Predefined Roles and the Custom Roles you created on this screen.
The Standard Roles, clicking on the magnifying glass button, shows you the detailed Permission for that Role.
You can add a Custom Role and define the detailed Permissions this Role will provide.