Table of Contents
Overview
Effective internal communication is key to engaging employees and driving success in today’s fast-paced world. That’s why we’re excited to introduce Teams Channels—an app designed to amplify your communication efforts within your organization.
Teams Channels offer a streamlined way to display Posts & Announcements directly onto your screens from your Microsoft Teams channels. Save time and elevate your communication with dynamic, auto-updating content, ensuring your team stays informed and aligned.
Available only on the Premium/Enterprise plan!
This app is only available on the “Premium/Enterprise” Plan. You might not see some menus below if you are not on the “Premium/Enterprise” Plan.
Remember that the “Premium/Enterprise” Plan is free if you only manage 1 screen to evaluate these features quickly.
Display Formats in Teams Channels
With the Teams Channels app, the first attachment in your Microsoft Teams posts and announcements dictates how your content is visually presented on your screens, ensuring the most important information catches the eye first. Here’s a quick guide to the display formats:
- Text-Only Format (Title, Description): This is applied when there are no attachments or when the first attachment is a document (like PDF), a link, or a presentation (PowerPoint). This format focuses on delivering your message through text.
- Image/GIF Format (Image/GIF, Title, Description): When the first attachment is an image or GIF, this format takes precedence, combining visual appeal with your message.
- Video Format (Video, Title, Description): This format is chosen to provide a dynamic and engaging viewer experience for posts where the first attachment is a video.
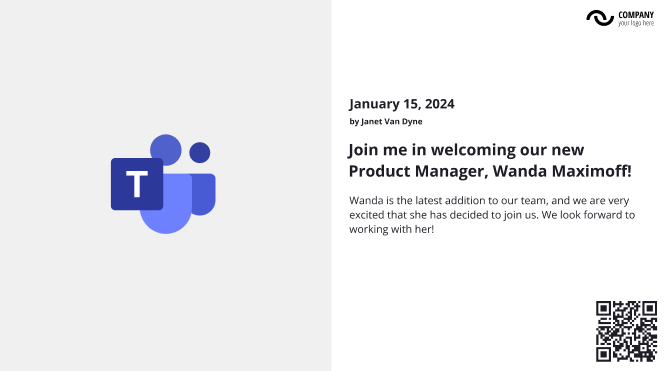


Each post displayed through the Teams Channels app includes a QR code. This unique feature allows viewers to engage with the original Microsoft Teams post or announcement directly. By scanning the QR code, viewers are redirected to the Teams post, where they can see all attachments, reply to, and react to the content of interest. This integration enhances your content’s visual presentation and fosters interactive communication, ensuring your team remains connected and engaged.
Please Note the Following Points
– To ensure your Microsoft Teams content shines on digital signage, we simplify posts for clarity. Please note the Teams Channels app does not support Teams’ bullet points, styling, and formatting. This ensures messages are clear and impactful, tailored for quick, easy viewing on any screen.
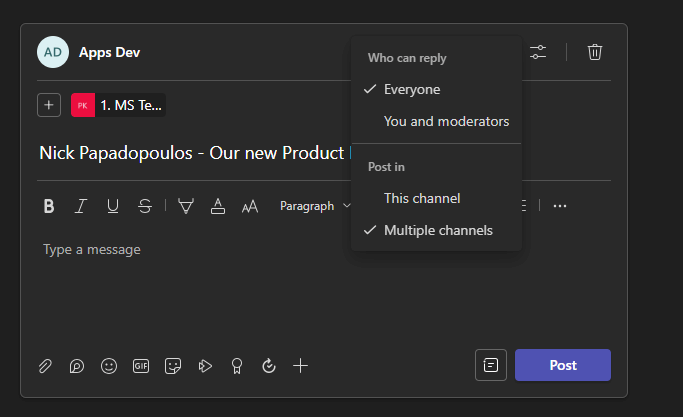
– We recommend setting up dedicated channels within Microsoft Teams specifically for your signage content for optimal control and impact on your digital signage. Whether you create a new channel in an existing team or establish a new team altogether is your choice.
– Select your dedicated digital signage channel and any other intended recipients when posting new announcements or updates. This approach ensures your digital displays always feature targeted, relevant content.
Creating a Teams Channels App
Setting Up Your Teams Channels App
- Assign a Name to your app.
- Optionally, a Description can be added to provide more context about the content your app will showcase.
- Click the Login with Microsoft button to authenticate your Microsoft account securely.
- After logging in, select the appropriate Team and Channel.
- Using the dropdown menus to specify the source of your posts and announcements.
- From the Language drop-down menu, select your preferred language.
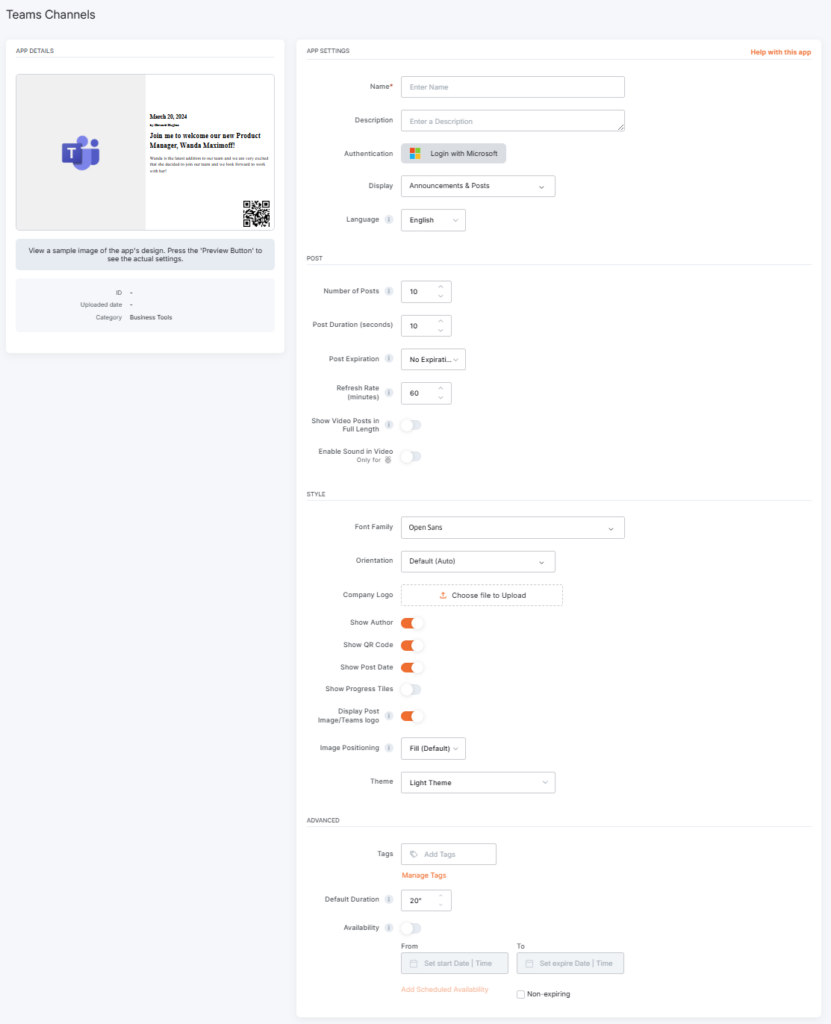
Under ‘Post Settings’:
- Determine the Number of posts to display on your signage.
- Set the Post Duration to control the visibility time for each post.
- Select a Refresh Rate to define how often your app fetches new content.
In the ‘Style Settings’ section:
- Choose the Orientation and Font Family to align with your branding.
- Optionally, Upload a Company Logo to make your content more recognizable.
- Toggle options like Show Author, Show QR Code, and Show Progress Titles to enhance the viewer’s experience.
- Select a Theme to apply a pre-designed color scheme that fits your brand or content tone.
- Create your Custom Theme by choosing your color palette for a more personalized touch. This allows you to tailor the visual experience to match your company’s identity or campaign specifics precisely.
Under ‘Advanced Settings’:
- Set a Default Duration for the app’s presence in your content loop.
- Manage Availability by selecting ‘From’ and ‘To’ dates to schedule when the app is active.
F.A.Q.s
Got questions? We’ve got answers! This section addresses common questions about the Teams Channels app.
– Only Yodeck’s built-in text is translated. This includes: labels, headings, and any text generated directly by the Yodeck app.
– Content coming from external platforms or APIs is not translated by Yodeck. This includes:
Data retrieved from external services (e.g., quotes, calendar events), posts or media from social platforms, text or metadata supplied by the API source, and system messages generated by external platforms.
Need Help?
The Yodeck Support Team can help you out! Log in to your Yodeck account and send us a message from the bottom right corner!