Table of Contents
Introduction

You are in the right spot if you need to create your own player based on
Brightsign using the Yodeck software.
Keep in mind, though, that this process requires some basic IT skills.
Prerequisites
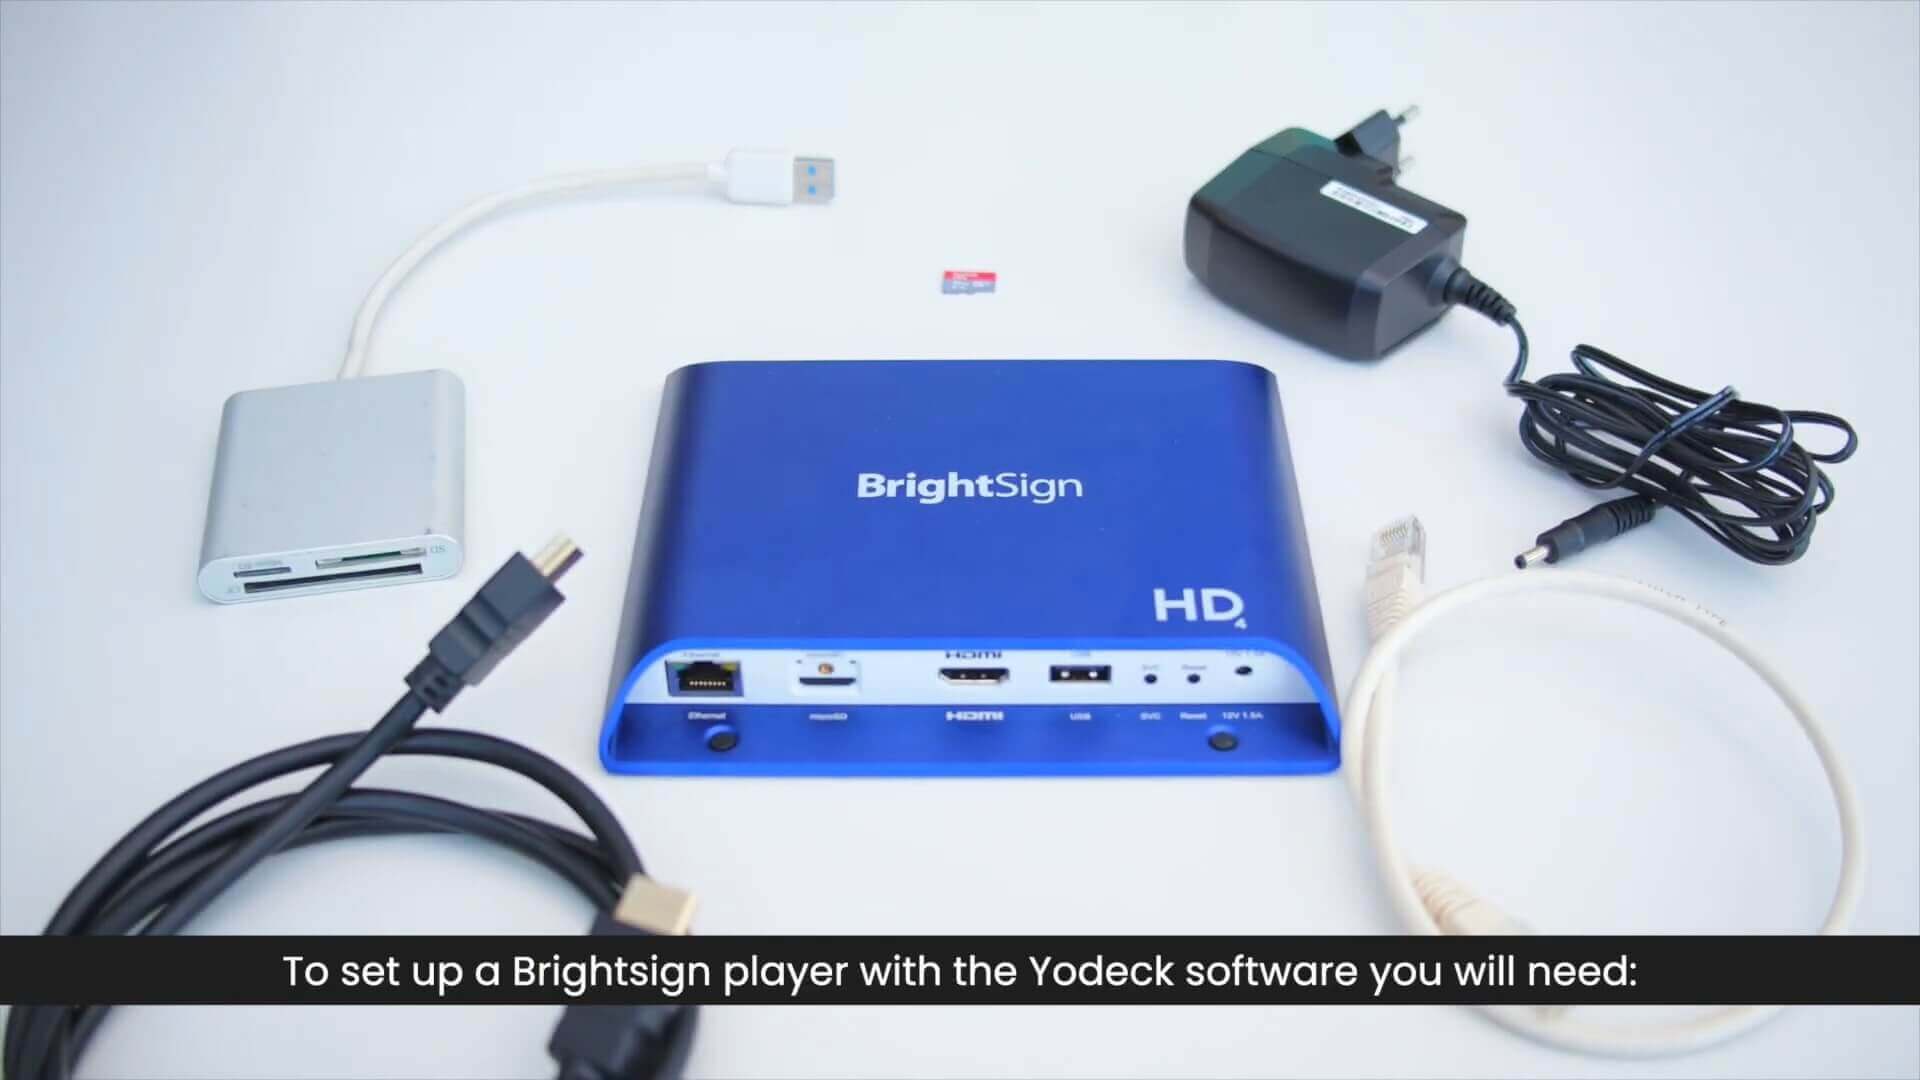
Make sure that you have everything you need:
Don’t know which Brightsign player to buy?
Follow this link, and answer a few questions to find the player that’s right for your installation.
- A Brightsign player, any version
- SD Card (known branding), Class 10, at least 8GB in size
- Power Supply Unit (PSU) for the Brightsign player
- An HDMI cable connected directly to the TV screen
- An Ethernet cable or the Brightsign WiFi module
- An SD card reader
Brightsign player’s Firmware Version
Before proceeding with the below setup, ensure that your Brightsign player’s firmware has a minimum version of 8. Learn how to update the Firmware via BrightAuthor.
Setup Option 1: BSN.clould Setup
You must first download BrightAuthor Connected app, and then you have to create a BSN.Cloud account.
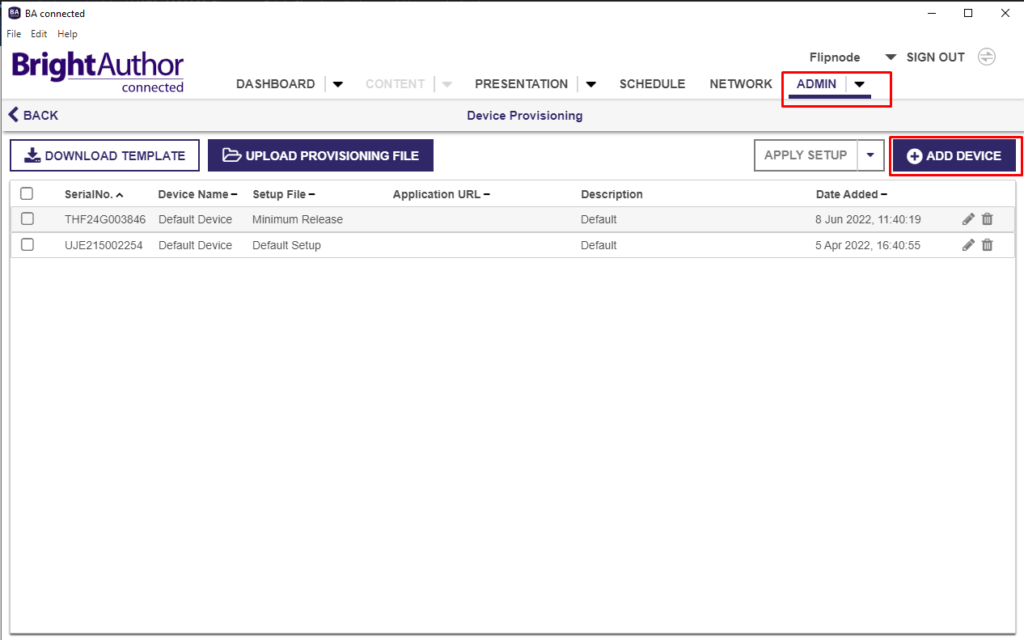
To activate your device, go to Admin→ Device Provisioning→ Add Device and enter the serial number you see on your screen.
Step 1 – Create Yodeck Setup
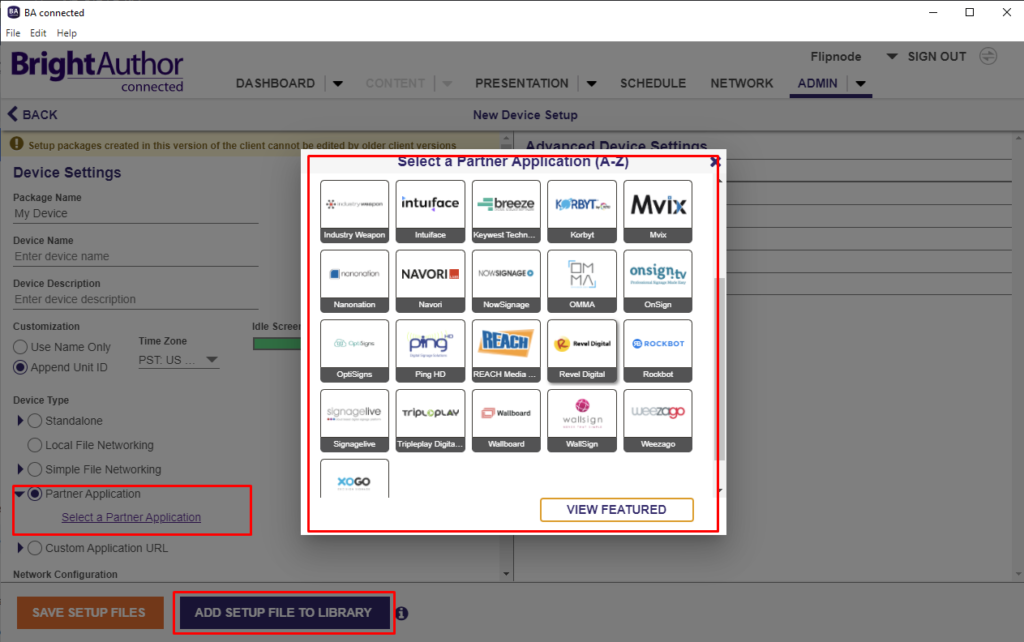
Go to Admin→ Device Setup and create a setup that you will save to your Setup Library. First, you have to add a name and a description for your setup, select partner application, find and select Yodeck and save the setup you have created to your setup library.
Step 2 – Apply Setup
Go to Admin→ Device Provisioning, click on the device you want to provision, click on the “Apply Setup” button, choose the setup you have previously created, and click on the “Apply Setup” button.

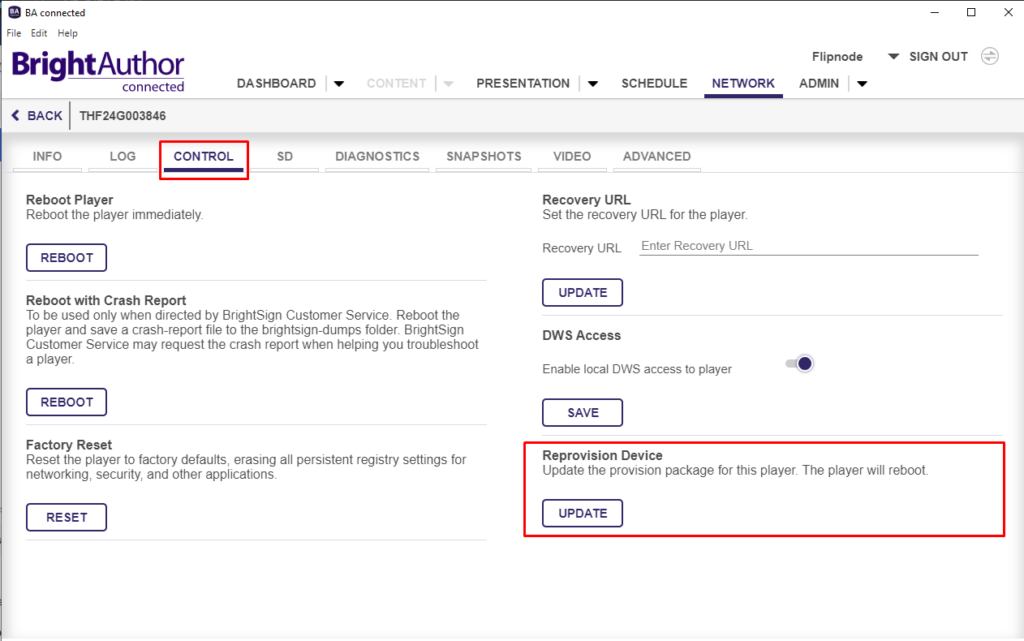
Step 3 – Reprovision the device
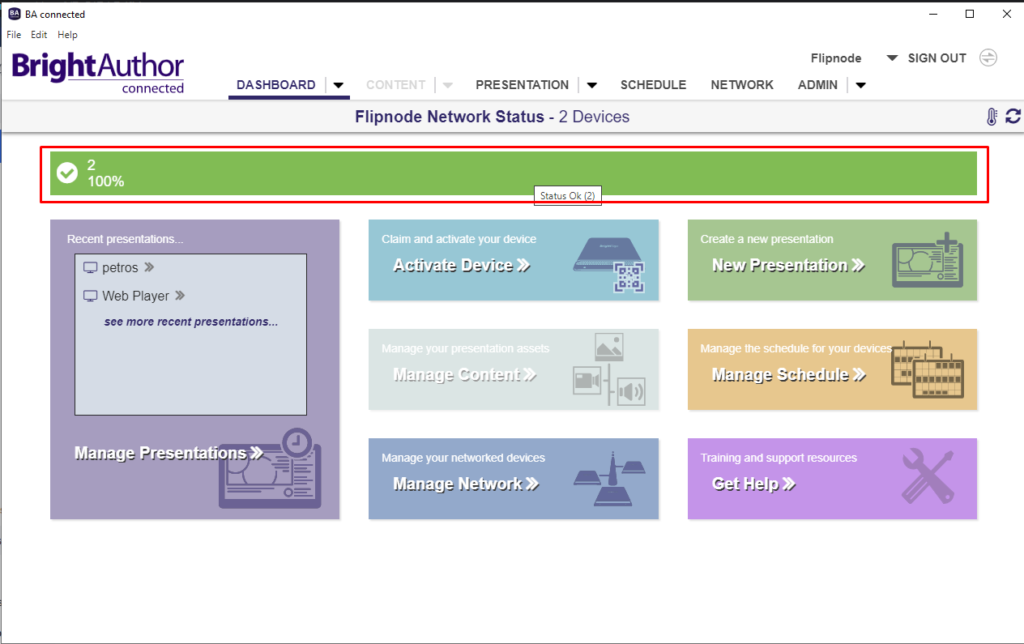
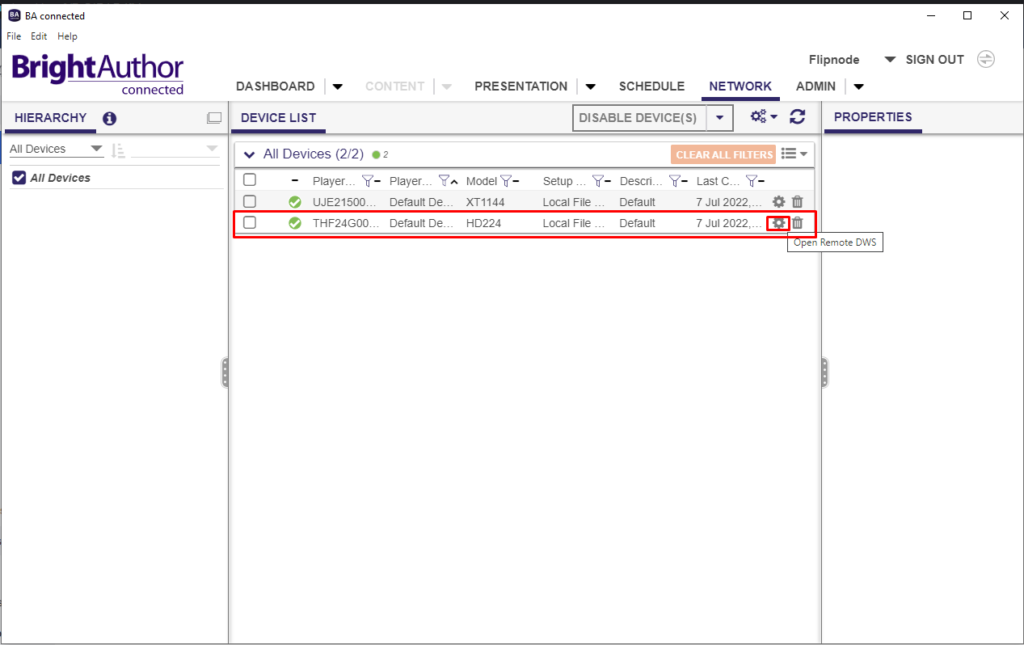
Click on Dashboard, and click on the colored bar to open the Device List. Once inside the Device List, you must click on the gear icon next to your device’s name.
(that opens the device settings). Once inside the device settings, go to the Control panel and click on the Update button to reprovision your device.
Step 4 – Get the Registration code
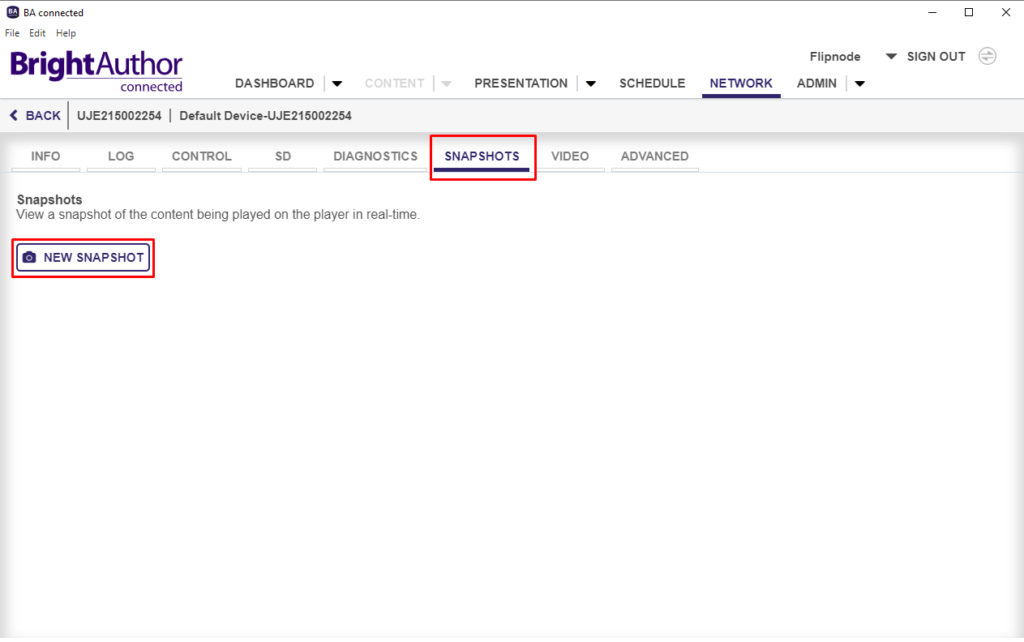
When the reprovision finishes, you will see the registration code on the screen connected to your BrightSign device. If you have no physical contact with the screen, you can register it remotely by following the steps described below:
- Inside BrightAuthor, find the device you want to register to Yodeck.
- Go to Snapshots.
- Click the New Snapshot button.
- You can view the snapshot to retrieve Yodeck’s registration code.
Setup Option 2: URL Setup
How-to Video
Step 1 – Get the registration code
Prepare a Micro SD Card with a minimum of 8GB of storage. Make sure to format the Micro SD Card in FAT32 format with default allocation size if possible. Here are guides on how to do that: Windows, macOS
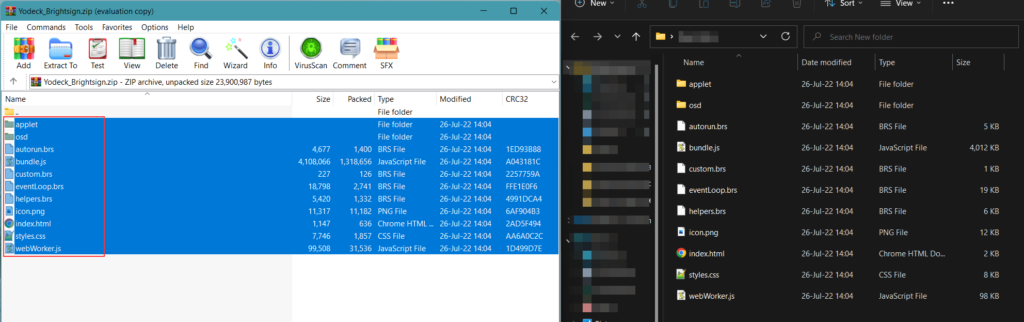
- Download the Yodeck BrightSign Player app and extract it on your computer.
- Copy ALL the extracted files to the SD card’s root folder as shown below.
 Please do not add the extracted files to any other folder before copying them to the root folder.
- While the BrightSign Player is powered off (PSU unplugged), insert the Micro SD Card into the BrightSign Player.
- Power on the BrightSign player.
- Please ensure your BrightSign player is connected to the internet via an Ethernet cable.
- Please ensure your BrightSign player is connected to the TV screen via an HDMI cable.
- The setup will take a few minutes and may reboot a few times. Once it is complete, you will see the Yodeck Brightsign player running on your screen, with the 9-digit registration code displayed.
- Check the below section on registering your BrightSign player under your Yodeck account.
 Please do
BrightSign Software for Whitelabel Partners
Whitelabel partners can find the latest unbranded BrightSign software in the Partners Console.
Step 2 – Registering a Yodeck BrightSign Player on your Account
After seeing the registration code on your browser/TV screen, you must register the player to your Yodeck Account.
- Login to your Yodeck Account and Go to the “Screens” section.
- Create a new Screen entry by clicking the “+Add Screen” button.
- A new window will appear. You have two options for registration:
- 1. Follow the registration flow and select the BrightSign Player option. After that, you can fill in the registration code.
- 2. Alternatively, you can close the pop-up window and directly enter the 9-digit registration code displayed on your TV screen in the “Registration Code” field.
In both cases, the registration process will use the provided code to complete your registration, helping to minimize user errors and guesswork for new users.
ℹ️For more information, please check the New Screen Registration article.
- To finish the registration, click the “Save” button.
- After a minute or so, your player should register with your Yodeck Account, and the assigned content should start showing on the screen.
Limitations
💡Check the current BrightSign limitations.
Configuring NTP Server(s) – Optional Feature for Advanced Users
BrightSign devices running Yodeck support NTP configuration for maintaining precise device time. Setting custom NTP servers helps ensure predictable scheduling and aligned playback across BrightSign deployments. For more information, please refer to this guide.
Need Help?
The Yodeck Support Team can help you out! Log in to your Yodeck account and send us a message from the bottom right corner!