How to Flash an SD Card with Raspberry Pi Imager for Yodeck
Last updated on April 3rd, 2026
Table of Contents
Overview
In this guide, you’ll learn how to flash a Yodeck image to an SD card using Raspberry Pi Imager2.0 and prepare your Raspberry Pi for setup. We’ll walk you through the full process, from selecting your device and storage to writing the image and starting the player for the first time. Once the SD card is ready, you can insert it into your Raspberry Pi, power it on, and register it in your Yodeck account.
What is Raspberry Pi Imager?
Raspberry Pi Imager is the official tool from Raspberry Pi for writing operating system images to SD cards and other storage devices.
In this guide, you’ll use it to flash a Yodeck image to an SD card, so your Raspberry Pi can boot as a Yodeck player. The app guides you through selecting your device, choosing the image, picking the storage media, and writing everything to the card.
Before You Start
Before you begin, make sure you have the following:
A stable internet connection
A Windows 10/11, macOS, or Linux computer
A microSD card with at least 8GB storage space for the Yodeck image
A compatible SD card reader or adapter (or any SD card adapter compatible with your computer)
This tutorial uses both our custom Raspberry Pi 4 image file and our official Yodeck Digital Signage Software that is available inside the Imager’s list of Digital Signage OSs.
Your Raspberry Pi device
A Yodeck account to register the player after first boot
⚙️Backup: Flashing an SD card will erase all data currently stored on it. Remember to back up any important files before continuing.
ℹ️Good to know: Depending on your setup, you may either select Yodeck from the available OS list in Raspberry Pi Imager or load a Yodeck image file manually.
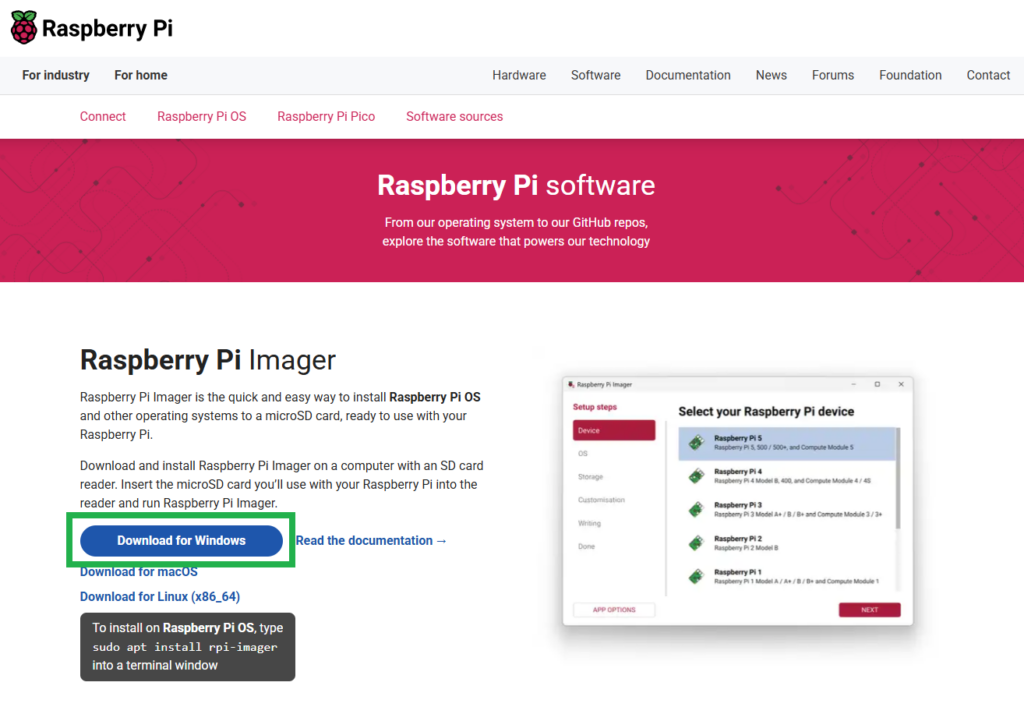
Next, click “Download for Windows” to download the Raspberry Pi Imager installer.
Run the installer and complete the setup.
Open Raspberry Pi Imager.
ℹ️Note: The exact installation steps may vary slightly depending on your operating system (Windows, Mac, Linux), but the setup process is straightforward on all supported platforms.
Flash a Yodeck Image to an SD Card
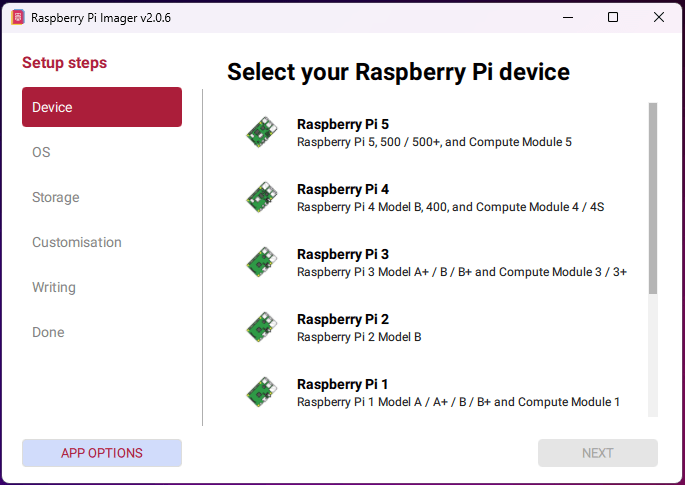
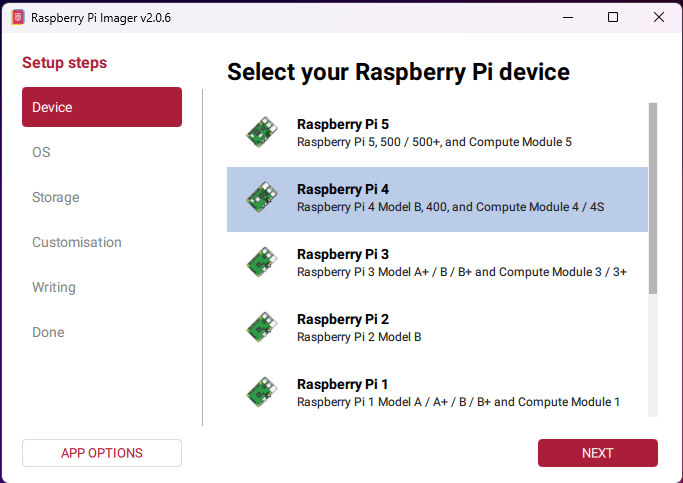
Step 1: Select Your Raspberry Pi Device
When Raspberry Pi Imager opens, the first step is to select your Raspberry Pi model.
Choose the device you want to use for your Yodeck player. This helps the app present the most relevant options for your hardware.
💡Tip: Select the Raspberry Pi 4 model you plan to use.
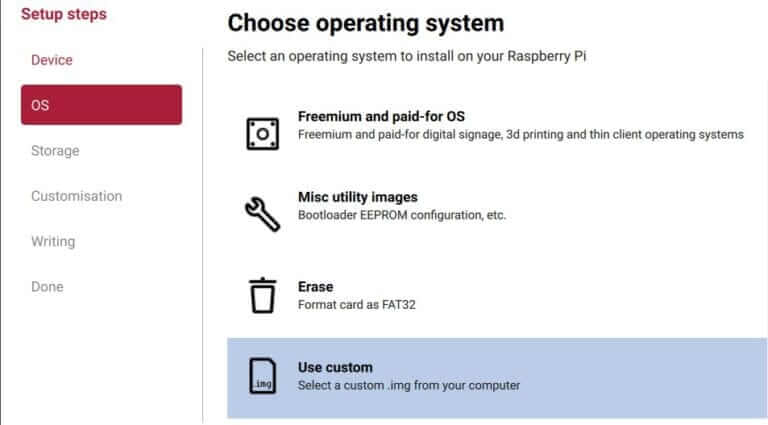
Step 2: Choose the Operating System
Next, move to the OS step. At this point, you can either select Yodeck from the available operating system options or load a Yodeck image file from your computer.
Option A: Use a custom Yodeck image file
If you have downloaded the Yodeck image file mentioned earlier, select the option to load a custom image and browse to the image file on your computer after unzipping it.
ℹ️Important: Make sure you use the correct Yodeck image for your Raspberry Pi model.
Option B: Select Yodeck from the available OS list
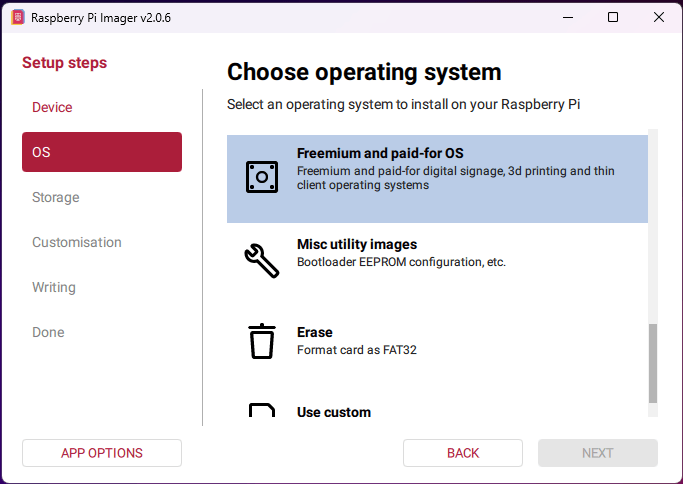
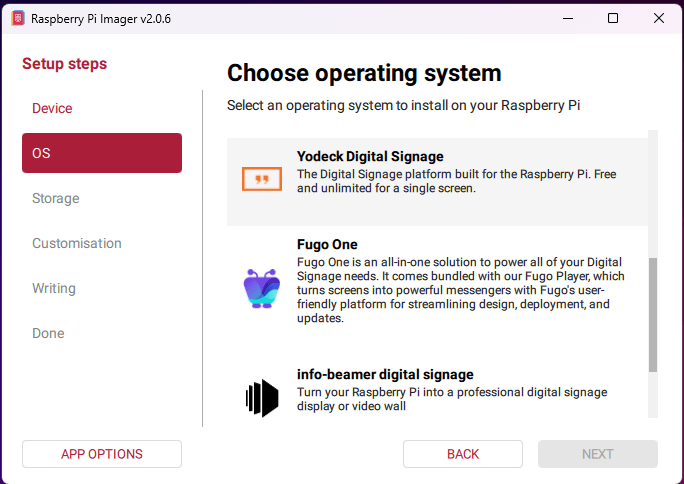
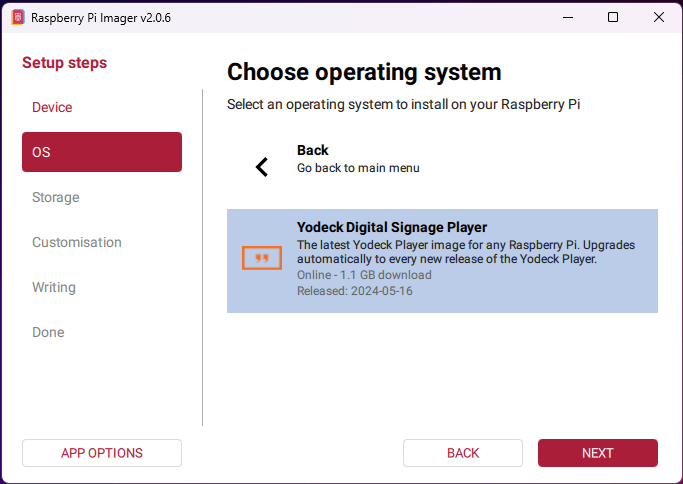
Since Yodeck appears in the list of available operating systems, select it by complete all four of the following operating system sub-steps in order from Freemium and paid-for OS (B1) to Yodeck Digital Signage Player (B4):
Select: “Freemium and paid-for OS” > “Digital signage OS” > “Yodeck Digital Signage” > “Yodeck Digital Signage Player“.
B1
B2
B3
B4
Afterwards, you can continue to the next step (#3).
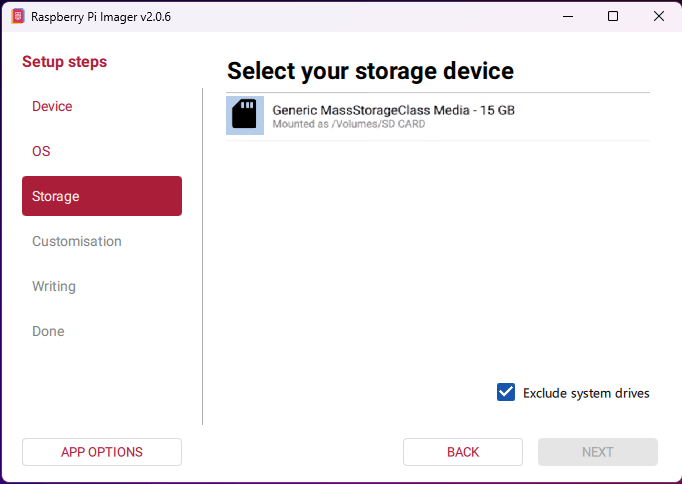
Step 3: Select the Storage Device
Insert your microSD card into your computer.
In the Storage step, choose the correct SD card from the list of available devices.
Before continuing, double-check that you selected the correct storage device, and that the checkbox option “Exclude system drives” is enabled (this option prevents you from accidentally selecting one of your operating system drives and formatting it).
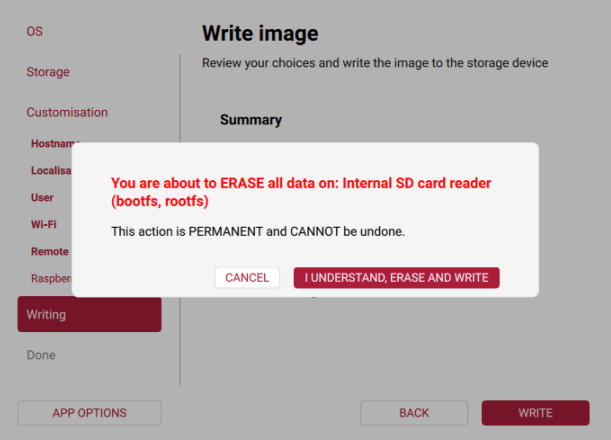
⚠️Warning: All data on the selected storage device will be erased during the flashing process.
Step 4: Review the Customisation Step (Optional)
Before writing the image, Raspberry Pi Imager may show a Customisation step.
This section can include options such as:
Hostname
Localisation
Username and password
Wi-Fi settings
Remote access settings
Raspberry Pi Connect (API)
ℹ️Depending on the image you are using, some of these settings may be available, limited, or unavailable.
Do you need to change anything here?
In most Yodeck setups, you can keep this step simple. If you are preparing a player for a standard deployment, you usually do not need to change anything unless your setup requires specific network or device settings. You may want to review these options if:
you are preparing multiple players in advance,
you need to preconfigure Wi-Fi,
the player will be installed in a hard-to-reach location,
or your environment has specific networking requirements.
ℹ️Best practice: Only change settings you actually need. Keeping the setup simple reduces the chance of errors.
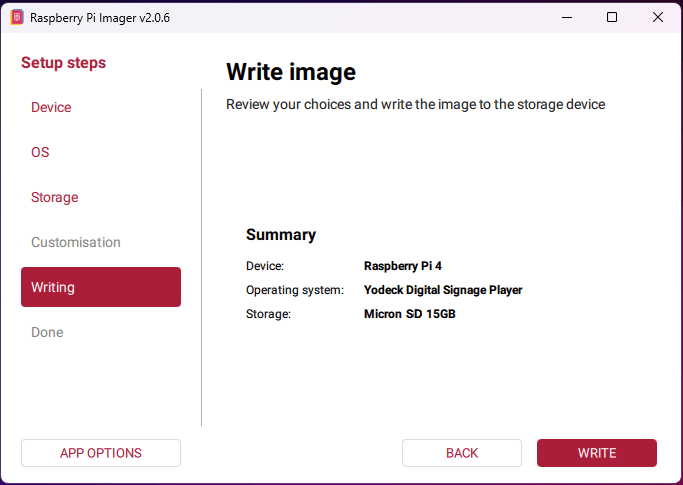
Step 5: Write the Image
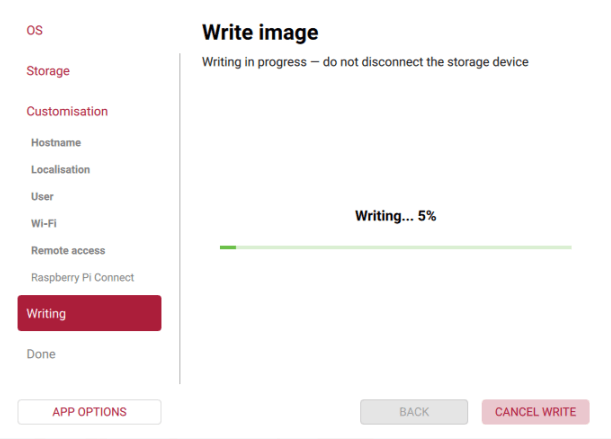
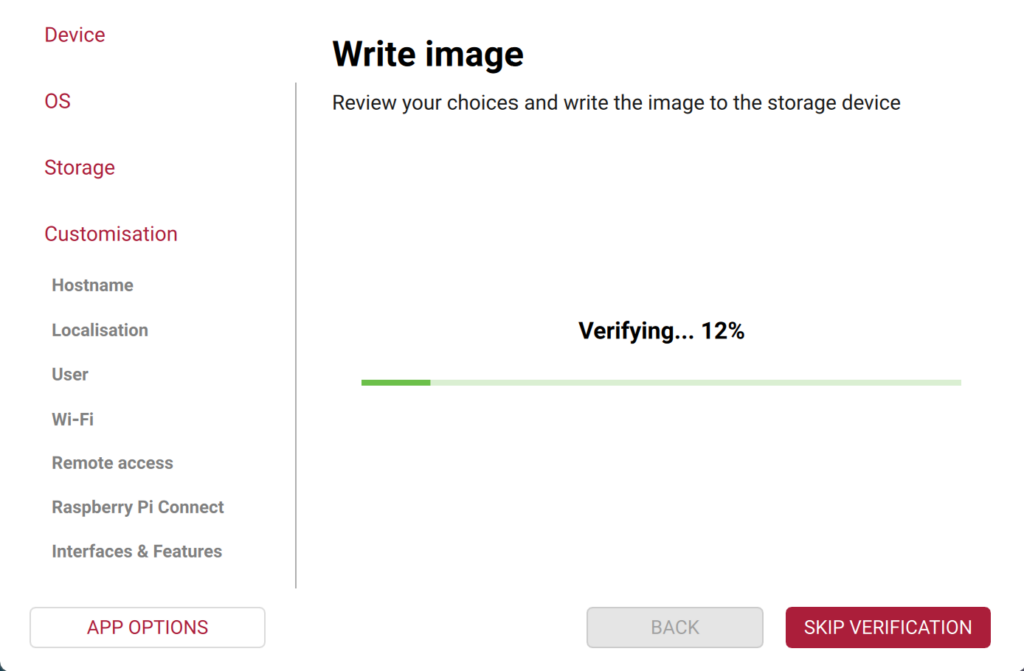
After reviewing your selections, continue to the final step and start the write process. Raspberry Pi Imager will write the Yodeck image to the SD card. Here, there are five sub-steps to the write process:
5.1: Visual verification of the Imager’s summary, prior to the writing.
5.2: Accepting the warning message on the SD card’s total erasure.
5.3: Initialization of writing the image to the SD card.
5.4: Automatic verification of the written data to the SD card.
5.5: Completion of the writing process with a success message.
5.1
5.2
5.3
5.4
5.5
⚠️Note: Wait until the process is fully complete before physically removing the SD card from the SD card reader. Do not remove the SD card while the write process is still running, since data corruption can occur.
Boot Your Raspberry Pi
Once the flashing/writing process is complete:
Safely eject the microSD card from your computer.
Physically remove it from the SD card reader device.
Insert it into your Raspberry Pi.
Connect the Raspberry Pi to your display using HDMI.
Connect the device to the network via a LAN cable if possible.
Finally, connect the power plug on the Raspberry Pi to power it on.
ℹ️The Raspberry Pi will begin its first boot and initialization process. This may take a few minutes, depending on the device, image, and network conditions.
⚠️Important: Do not unplug the Raspberry Pi while it is booting, configuring itself, or downloading required files.
✅If everything goes as expected, the player should eventually show a registration code on screen.
Register Your Raspberry Pi in Yodeck
Once the player finishes booting, you should see a registration code on the connected screen.
To register the Raspberry Pi player in your Yodeck account:
Log in to your Yodeck account.
Open the Screens section.
Click + Add Screen.
Enter the registration code shown on your display.
Click Save.
✅After a short while, your Raspberry Pi player should appear in your account and begin receiving content.
💡Tip: If you see a connectivity-related error instead of a registration code, check the player’s network connection first. Using Ethernet is often the fastest way to rule out local Wi-Fi issues.
F.A.Q.s
Got questions? We’ve got answers! This section addresses common questions about flashing an SD card with the Yodeck software via the Raspberry Pi Imager.
Can I use Raspberry Pi Imager with a downloaded Yodeck image?
Yes. You can load a custom Yodeck image file directly from your computer during the setup process.
Do I need to change anything in the Customisation step?
Not always. Most Yodeck setups can proceed without changing anything there. Only adjust the settings if your deployment requires it.
What should I do if I do not see a registration code on screen?
First, check the player’s network connection and make sure the Raspberry Pi has completed its first boot process.
Can I use Raspberry Pi Imager on macOS or Linux?
Yes. Raspberry Pi Imager is available for Windows, macOS, and Linux.
What happens if I select the wrong storage device?
The selected device will be erased during flashing, so always double-check the storage device before you continue.
Need Help?
The Yodeck Support Team can help you out! Log in to your Yodeck account and send us a message from the bottom right corner!