Table of Contents
Necessary tools
Some tools are needed:
- A micro-SD card. On the Raspberry Pi computer, all the software is on a micro-SD card. Thus the first step is to write the firmware (the device’s software) to the SD card.
- A Windows or Macintosh computer (with an SD port to access the SD card)
- The firmware you can download for free from the website,
- A particular application for the computer to write the downloaded firmware on the SD Card.
Buy a micro-SD Card

Recommended SD card: 16GB class 10
Download the firmware
The firmware is a file downloaded from the cloud and then written on the SD card inserted into the Raspberry Pi. This firmware runs on the Pi, and it is the same if you use Windows or Macintosh.
Unzipping the file
This part depends on your computer’s OS, so you must download the equivalent program. More details can be found here.
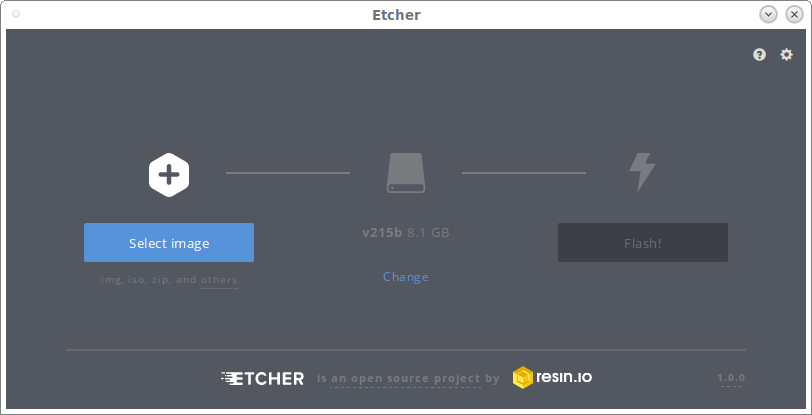
Downloading and using Etcher
Etcher turns the whole process of flashing an OS image file into three simple steps: Select Image, Select Drive, and Flash Image. More importantly, with the same interface, the same program is available on all three types of computers – Windows, Mac, and Linux – making it easy for everybody to understand.
More information on how to Burn SD cards with Etcher
- Download and install Etcher from the website.
Windows : Double-click the .exe file in Windows and follow the Etcher setup wizard. Run Etcher in Administrator Mode: right-click on Etcher and choose ‘Run as administrator.’
macOS: Drag the Etcher app to your Applications folder on a Mac and double-click to open it. - A common mistake is to flash the zip file to the SD Card: it should be unzipped first !!!
- Extract the firmware content from the zip file (It works well with Bitser or WinRAR on Windows and Stuffit on Mac, but other zip software should work).
- Click Select Image in Etcher.
- Use the file manager window and locate the image you unzipped in the previous step.
- Click Open.
- The image will appear under Select Image, and Connect a drive will highlight red.
Warning: the SD card will be totally over-written, so that this SD card will be used only for the Raspberry Pi. - Insert your SD card into the computer. Etcher will select it automatically. Etcher won’t write to your hard drives by default, but check that the SD card is listed correctly. Now click Flash! to write the image file to the SD card.
The Etcher will format the SD card before writing and verifying the image, shown in a progress bar. When done, remove the SD card, insert it into your Raspberry Pi, and power it up.
Use the SD Card
Note: Plugin the local network Ethernet cable and the HDMI cable BEFORE powering the device.
Insert the SD card in the Raspberry Pi, connect it to the local network, and switch it on. It takes about 50 seconds to boot, but the first boot can take a (long) while because it expands the SD Card.