Apps Management FAQs
How do I display my employees’ birthdays on my screen?
Nothing’s more heartwarming than when someone wishes you a happy birthday out of the blue. With our new widget, you can make your team members feel just as valued on their special day. Plus, it’ll warm the cockles of your HR department’s heart, too, as it’s easy to use and fully automated!
All you have to do is upload a CSV file with everyone’s date of birth, and you’ll automatically see a personalized message on your signage screens on their birthday, hassle-free. You can switch things up using several customizations, such as font and color.
✅ More details on creating a Birthday widget under your Yodeck account can be found here.
How do I display a Canva Design on my screen?
Learn how to link your Canva designs directly to Yodeck and display them on your screens without downloading or uploading files. This guide is ideal if you want to keep your content automatically updated by connecting Canva to Yodeck using a smart embed link.
In the full article, you’ll see how to add the Canva app from the widget gallery, where to paste the Smart Embed link from Canva, and how to configure key settings such as refresh rate, fallback image, duration, and availability. The guide also explains how to prepare your Canva designs for optimal playback, including animations, videos, autoplay behavior, and player compatibility.
How do I display my Facebook personal feed on my screen?
You can display your personal Facebook or page feed in a slideshow or a wall easily. Just log in with your Facebook account, select a page from the list of pages you own, and style the app to your preferences.
✅ More details on creating a Facebook App under your Yodeck account can be found here.
How do I display a Tableau dashboard on my screen?
Tableau Software is an interactive data visualization software company focused on business intelligence. It aims to provide interactive visualizations and business intelligence capabilities with an interface simple enough for end-users to create their own reports and dashboards.
✅ More details on creating a Tableau App under your Yodeck account can be found here.
How do I display my local weather on my screen?
Our new Weather Apps will give your TV screens a fresh look and inform your viewers about the local weather, temperature, and much more. We have created new weather apps, each with a different format from which you can choose.
Of course, you can customize the apps’ colors and create a more appealing weather app.
Click each section below for more details and a quick preview.
How do I display my calendar on my screen?
Our Calendar Apps will give your TV screens a fresh look and inform your viewers about the availability of a meeting room and much more. We have created new Calendar apps, each with a different format for you to choose from. Of course, you can customize the apps’ colors and create a more appealing Calendar.
With the Calendar Apps, you can use an ICS file from your calendar service and display it on the TV screen.
Click each section below for more details and a quick preview.
How do I display a Power BI dashboard on my screen?
Learn how to display Microsoft Power BI reports and dashboards on your digital signage screens using the Power BI widget in Yodeck. This guide is intended for users on the Enterprise plan who want to showcase live business intelligence data and visualizations on their screens.
In the full article, you’ll see how to add the Power BI app from the Yodeck app gallery, sign in with your Microsoft account, and link a specific Power BI report or dashboard using the correct URL. The guide also explains how to configure refresh intervals, optional display settings, availability dates, and advanced playback options for Raspberry Pi players.
How do I display SharePoint on my screens?
The SharePoint app in Yodeck provides a seamless display of SharePoint elements on your screens. This documentation offers a step-by-step guide on creating the app and additional information to help you make the most of it.
How do I display a Grafana dashboard on my screen?
Grafana is a multi-platform open-source analytics and interactive visualization web application. It provides charts, graphs, and alerts for the web when connected to supported data sources.
How do I display my Instagram profile on my screen?
You can easily display your Instagram pictures in a slideshow or on a wall. Just log in with your Instagram account and style your app with your preferences. By default, the app will refresh and receive new posts every 30 minutes.
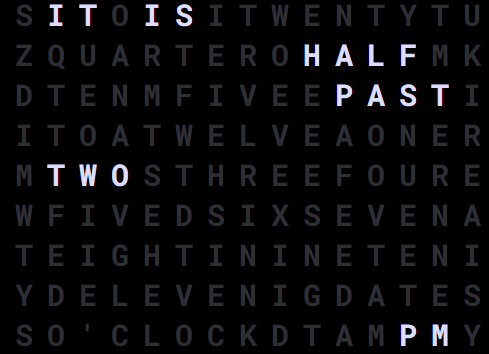
How do I display the Word Clock?
Creating a World Clock app
Click on the Word Clock app within your app gallery to add it, and fill in the app details as follows:
A name and an optional description are required for the app.
You can select a different timezone from your player’s timezone.
Select the Orientation and the Theme.
Set the Background Color, Font Color and the Secondary Font Color if you select the Custom Theme.
Click Save, and your app will be ready to use.
Word Clock Example
Display Custom RSS feed or any other RSS feed
How to Add a Custom RSS Feed to Your Yodeck Player
Would you like to add a custom RSS feed to your Yodeck player? Look no further! With Yodeck, you can easily display news and updates from your favorite websites on your digital signage. This article will guide you through the simple steps to add a custom RSS feed to your Yodeck player.
Step 1: Find the RSS Link
The first step is to find the RSS link to the website from which you want to get news. Most websites have an RSS link that you can easily find by searching for “RSS” on their homepage.
For example, to get news from FOXNews, go to their homepage and search for “RSS.”
Once you have found the RSS link, you can just click on it. You will be taken to a page with a list of RSS feeds for different categories. You can choose the one that you want to display on your Yodeck player and copy the link.
Step 2: Create a Custom RSS App
After you have copied the RSS link, the next step is to create a custom RSS app on Yodeck. This will allow you to display the news from the website on your player. To create a custom RSS app, follow the link below:
Once you click the link, you will be taken to the Yodeck app page. Here, you can create a new Custom RSS app by clicking on the “New Custom RSS” button.
On the next page, you will see a form where you can enter the details of your custom RSS app. In the “RSS Feed URL” field, paste the link that you copied earlier. You can also customize the title and description of your app if you wish.
After you have entered all the details, click on the “Save” button to create your custom RSS app.
Step 3: Assign the App to Your Screen
The final step is to assign the custom RSS app to your Yodeck player. To do this, go to the “Screens” section on your Yodeck account and select the screen to which you want to assign the app. Then, click on the “Apps” tab and select the custom RSS app you created from the list.
Once you have assigned and pushed the app to your screen, it will display news from the website on your digital signage. You can also customize the app’s layout and design to match your branding and preferences.
Congratulations! You have successfully added a custom RSS feed for your Yodeck player! Now, you can update your audience with the latest news and updates from your favorite websites.
We hope this article has helped you add a custom RSS feed to your Yodeck player. If you have any further questions or need assistance, please don’t hesitate to contact our support team.
Happy Yodecking!
How to Get the ICS Link of a Google Calendar and Import It into Yodeck
Step 1: Open Google Calendar
Go to Google Calendar.
Sign in with your Google account credentials if you’re not already logged in.
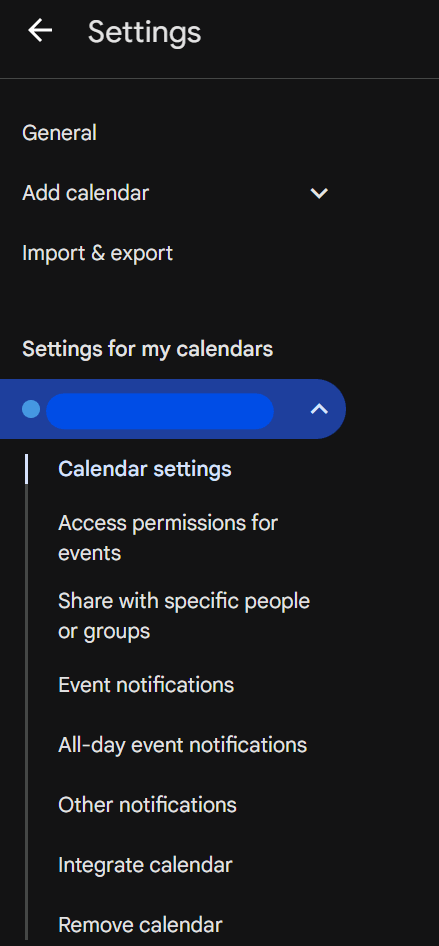
Once logged in, click the gear icon at the top right corner and select Settings.
Step 2: Select the Calendar
In the Settings for my calendars section, find the calendar you want to share.

Click on the calendar name to open its settings.
Step 3: Enable Public Access (Optional)
Scroll to the Access permissions for events section.
To make your calendar accessible to anyone with the link, check the box next to Make available to public.
Review and confirm the prompt that appears.
Note: If you don’t enable public access, the ICS link will not work with third-party apps.
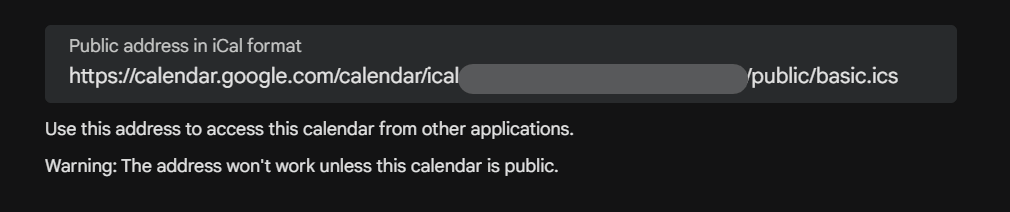
Step 4: Get the ICS Link
Scroll to the Integrate calendar section.
Find the Public address in iCal format.

Copy the provided link.
Step 5: Import the ICS Link into Yodeck Calendar Apps
Now that you have your ICS link, you can use it to display events in Yodeck’s calendar apps. Follow these steps:
Log in to your Yodeck account.
Go to the Apps section.
Create a new app and select the calendar app you want to configure.
Paste the copied ICS link into the Calendar Feeds field.
Save your changes and preview the app to ensure your events are displaying correctly.
For more details on setting up calendar apps in Yodeck, refer to our User Manual.
Need Help?
If you encounter any issues or need further assistance, our tech support team is here to help. Don’t hesitate to reach out to us via support@yodeck.com or use the chat feature on our website.
Embeddable Feeds
Yodeck’s Embeddable Feeds empower you to showcase your content anywhere—on websites, intranets, or public portals—without duplicating your work.
Exclusively available to account administrators and free until late 2025, this powerful add-on lets you create dynamic feeds with supported media, set controls, and securely share them via iframe or direct links.
Whether you’re enhancing a company webpage or powering internal dashboards, Embeddable Feeds make your digital signage truly go the distance—seamlessly, securely, and effortlessly. Just install, configure, and start embedding!
How to Display Your iCloud Calendar on a Yodeck Screen
🔐 Step 1: Make Your iCloud Calendar Public
This step allows Yodeck to access your calendar feed.
Go to www.icloud.com and log in.
Click the Calendar icon.
On the left side, find the calendar you want to show.
Click the small radio icon (📶) next to the calendar name.
Check the box Public Calendar.
Copy the link that appears — it will start with
webcal://and end in.ics.
Note: Making your calendar “public” simply allows it to be accessed via this unique link. It won’t appear publicly on search engines or be listed anywhere.
✏️ Step 2: Prepare the Link for Yodeck
Paste the link somewhere (e.g., Notepad or email).
Change the beginning of the link from
webcal://tohttps://Example:
webcal://pXX-caldav.icloud.com/...→https://pXX-caldav.icloud.com/...
Copy the updated link. You’re ready for Yodeck!
🖥 Step 3: Add the Calendar in Yodeck
Go to app.yodeck.com and log in.
From the left-hand menu, click Apps.
Click + Add App (if you haven’t added one already).
Search for and select the calendar app you want to use (e.g., Monthly Calendar, Weekly Calendar, Calendar Events Feed).
In the field labeled Calendar Feeds, paste your updated link (starting with
https://and ending in.ics).Click Save.
🖼️ You can now preview how your calendar will look and assign it to your screens.
🔁 If Your Calendar Stops Updating
Sometimes iCloud resets the calendar feed link.
If your events stop showing:
Go back to www.icloud.com.
Uncheck Public Calendar, then check it again.
Copy the new link that appears.
Change
webcal://tohttps://again.Update the link in your Yodeck calendar app and Save.
💬 Need Help?
If something isn’t clear or your calendar doesn’t show up, we’re here to help.
📧 Just send us an email at support@yodeck.com and we’ll get back to you as soon as possible.
Microsoft Apps Limitations
Outlook
- No known restrictions.
SharePoint
- No Multi-Factor Authentication (MFA) for login.
- Not supported on FireOS devices.
SharePoint News:
- Only supports one image per post.
- Does not support videos.
- Direct links to SharePoint News are not supported.
- Temporary Limitation: Images are not supported due to an ongoing issue with Microsoft
Team Channels:
- Supports video/image/gif uploaded to the channel or team.
- Only show 1 media (image/video/gif)
- Does not support images copied and pasted into posts.
- Images uploaded to other Teams directories or Microsoft services are not supported.
Viva Engage
- Only supports one image per post.
- Does not support videos from different Microsoft services.
- Does not support:
- At ordered and unordered list, no multi-depths supported (all items show as same depth)
- Record a video (could change with the update for the Raspberry Pi)
- Videos
- webp, pdf (And generally what does not get previewed at the website either)
- Code snippet view (text is still shown)
- Bold,Italics
Microsoft Azure Portal – Manage consent and permissions
Introduction
To use specific Yodeck apps (e.g., Outlook Calendar, Power BI, Viva Engage, etc.), you must give consent for specific permissions. Each Microsoft Yodeck app requires its own set of permissions and some of these permissions require admin consent by default or according to your organization’s settings. To use these apps, you must log in with an admin account or request consent from your organization’s admin if needed.
As an admin, you have two options for granting consent to non-admin users to use the app. Both options, along with tips for managing permissions effectively to ensure seamless use of our apps, are described in the documentation below.
Consent by Admin Login
The easiest way for an admin to grant consent is to log in to a Yodeck Microsoft app and ensure that the “Consent on behalf of my organization” option is selected during the initial login process.
Info
You can select this option only the first time you log in with your admin account. If you accept the permissions for yourself without consenting on behalf of your organization, you will need to either delete the app from your Enterprise Applications and log in again as an admin or use an alternative method..
- Create a Microsoft App by navigating to Yodeck apps.
- Click the Sign In button.
- When you reach the permission steps of the sign in process, please ensure you tick Consent on behalf of my organization as shown below.

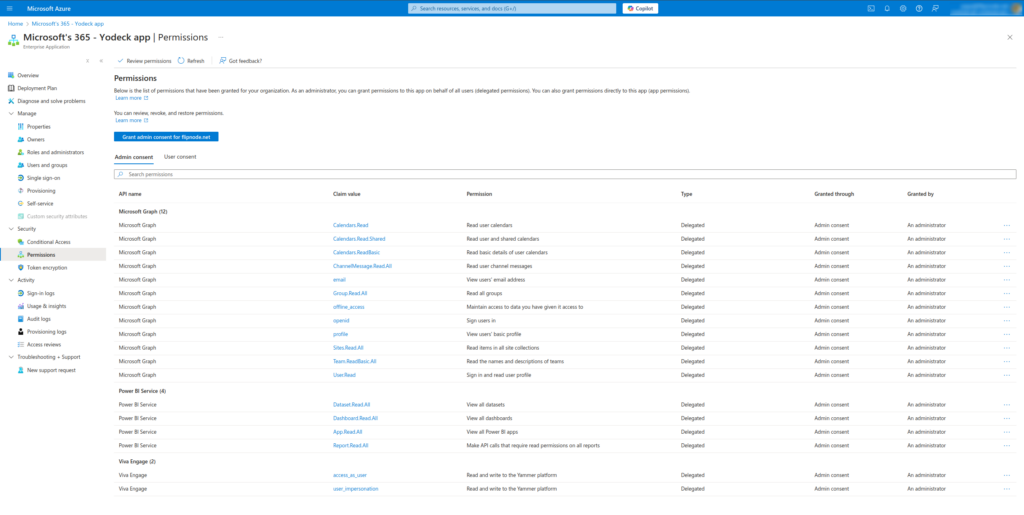
Consent in Azure Portal
This method is ideal for granting access to all Microsoft Yodeck apps across your organization permanently. It is also the only way to grant consent to a specific app on behalf of your organization if you previously logged in as an admin without granting consent.
- Login to the Azure Portal
- Navigate to Enterprise Applications
- Find our app named Microsoft’s 365 – Yodeck app
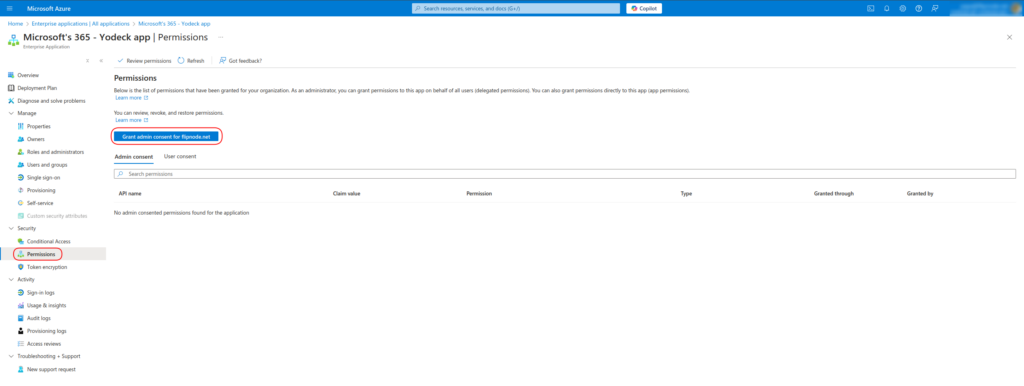
- Go to Security section and click Permissions
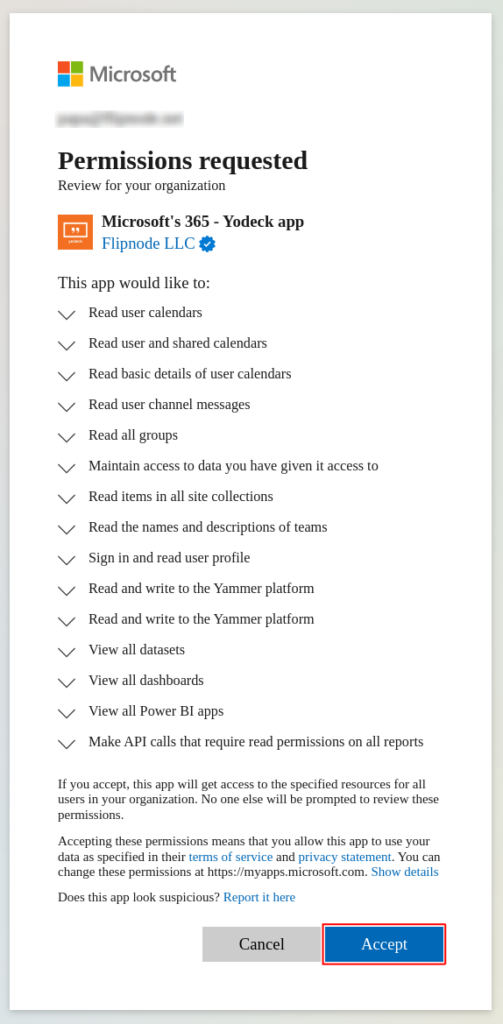
- Click the Grant admin consent button and accept the permissions
Info
By default, the ‘Grant admin consent’ button provides admin consent for all permissions used by all Yodeck Microsoft apps. If you prefer not to grant consent for all apps, you can either follow the first step or revoke unnecessary permissions individually afterward.
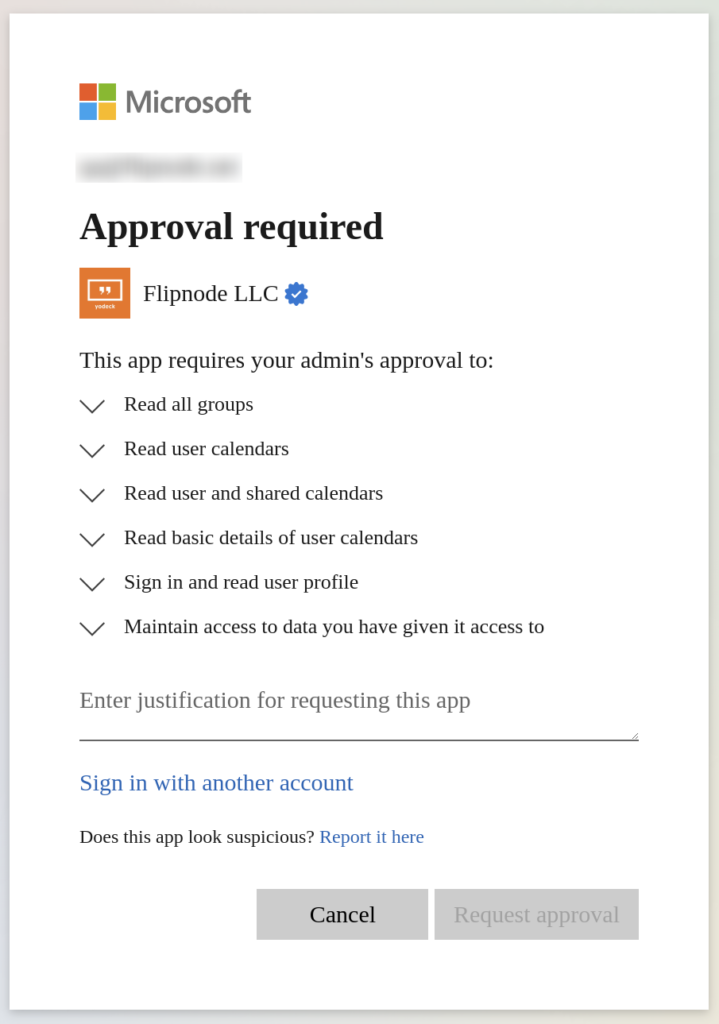
Need admin approval
If a non-admin user tries to connect to a Yodeck Microsoft app which is asking for permissions that require admin consent, they will encounter the error Need admin approval.
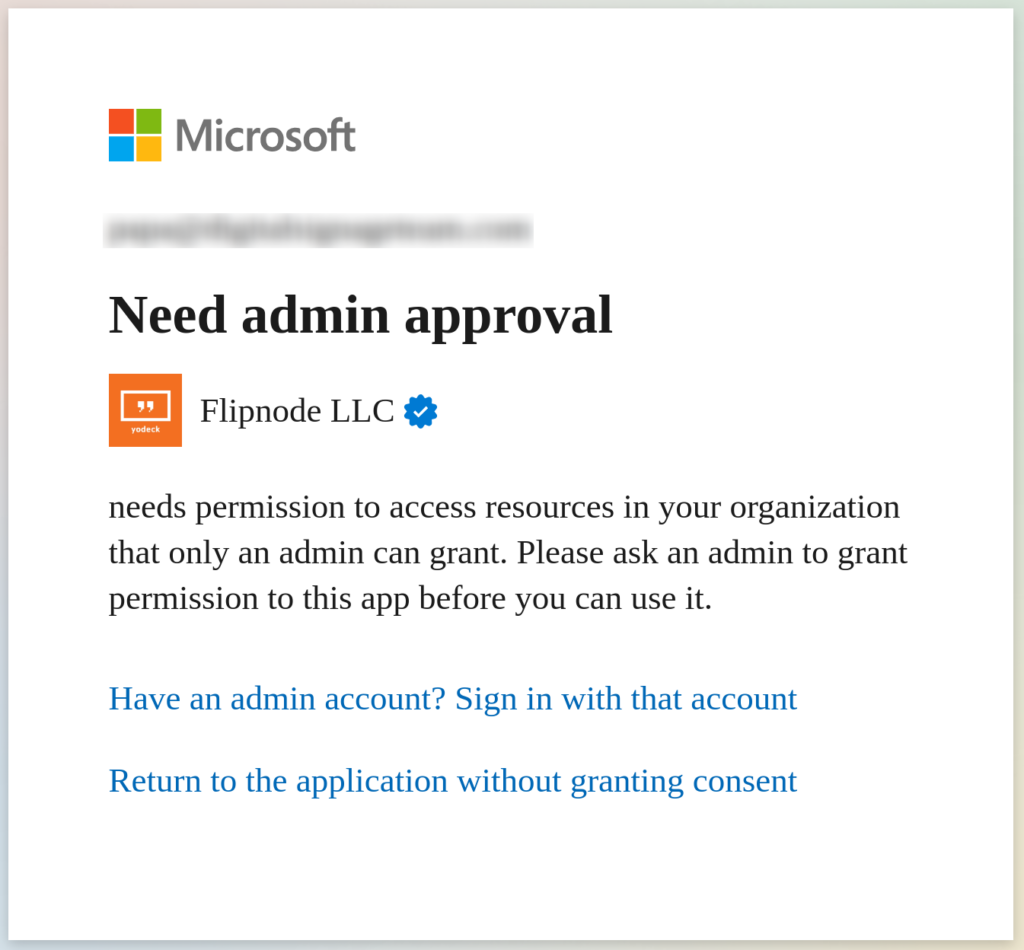
To avoid this, follow the steps below and seek help from one of your organization’s admins.
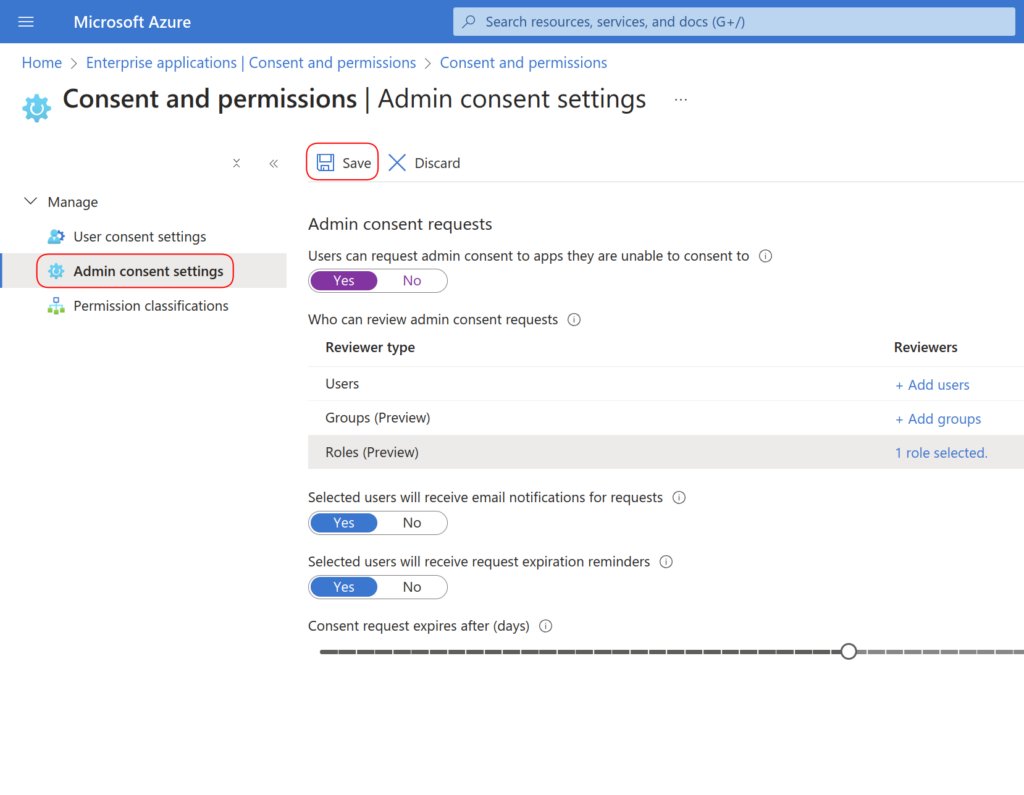
Enable Admin Consent Request
The first step is to change your Admin consent settings for your organization using an admin account. To do this:
- Login to the Azure Portal
- Navigate to Enterprise Applications
- Go to the Security section and click Consent and permissions
- Click Admin Consent Settings
- Enable the option Users can request admin consent to apps they are unable to consent to
- Add a reviewer. This can be a user, a group or a role
- Adjust any other settings as needed, then click Save

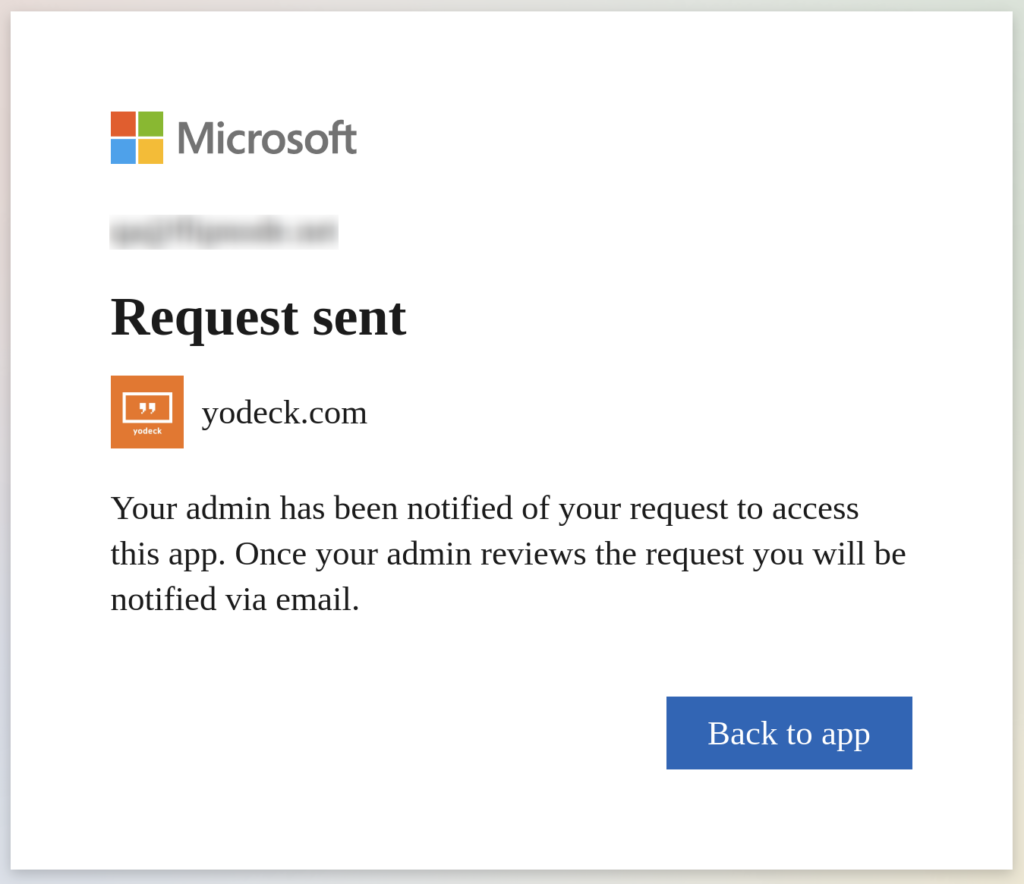
Request Admin Approval
After your admin has completed the previous instructions, log in to a Yodeck Microsoft app and request approval by providing a reason explaining why you need to use this app.
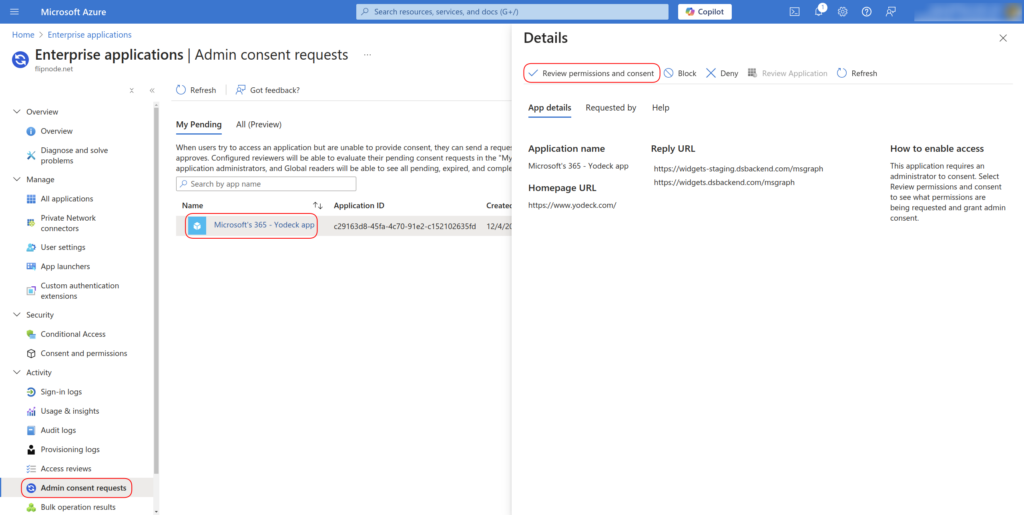
Approve Admin Consent Request
Once you request approval from your admins, they must approve your consent request by following the steps below:
- Login to the Azure Portal
- Navigate to Enterprise Applications
- Go to the Activity section and click Admin Consent Requests
- Click on the Microsoft’s 365 – Yodeck app
- Click Review Permissions and Consent, then accept the permissions in the pop-up window.
Instagram Basic Display API Discontinuation: How to Keep Your App Working
To avoid disruptions in your Instagram app displays due to the discontinuation of the Instagram Basic Display API on December 4th, 2024, please complete the following steps before December 4th:
Steps to Follow:
Re-Login to Your Instagram App in the Yodeck Portal
- Log in to the Yodeck portal.
- Find your Instagram app instances in the App Listing.
- Open each instance and re-login using your credentials.
- If your account is personal, you will be prompted to switch to a Creator or Business account during the process.
- Save & Push the changes to ensure your displays are updated.
🎉 Enjoy your favorite app once again!
Important Notes:
- If you already have a Professional (Creator or Business) Account: You only need to complete the re-login to your Instagram app in the Yodeck portal.
- Both steps are mandatory for users currently using a Personal Account to ensure compatibility.
Need Help?
The Yodeck Support Team can help you out! Reach out!
Troubleshooting Google and Microsoft Sign-In Issues
Intro
Experiencing issues when logging into services with your Google or Microsoft account can be frustrating. Getting locked out for email, documents, or any other service can halt your productivity. Here’s a quick guide to understanding why this might happen and what steps you can take to resolve it.
Why Can’t I Log In?
Common Causes:
- Incorrect Password: The most common issue is entering the wrong password. It’s easy to make typos or forget a password, especially if it’s been recently changed.
- Two-Factor Authentication (2FA) Issues: If you have 2FA enabled (as you should for enhanced security), issues with receiving your verification code can prevent login.
- Account Lockout: Repeated failed login attempts or suspicious activity might lead to a temporary lockout from your account as a security measure.
- Outdated App or Browser: Sometimes, older versions of apps or web browsers may not be compatible with the latest login protocols.
- Network Issues: Connection problems can prevent your login request from reaching Google or Microsoft servers.
Less Common Causes:
- Account Suspension: Violation of service terms can lead to account suspension, barring you from logging in.
What Can I Do to Log In?
The first thing you have to do is to remember if you have signed up with Google or Microsoft.
If yes, you need to click the below button:
Signed Up with Google or Microsoft
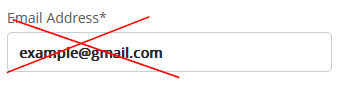
If you have signed up with Google or Microsoft, typing the email address from your Google or Microsoft account will not log you in. You need to click the above 2 buttons to sign in.
If not, try signing in with Google or Microsoft and checking if the system logs you in automatically after you click the button.
Tips
- Check Your Password: Make sure you’re entering the correct password. If unsure, use the ‘Forgot Password’ feature to reset it.
- Verify 2FA Setup: If you’re not receiving your 2FA codes, check your secondary email or phone number for service alerts or use backup codes if available.
- Wait It Out: If you suspect an account lockout, wait before trying again. Continuous attempts may extend the lockout period.
- Update Your App or Browser: Ensure you use the latest app or browser version. Outdated software can lead to compatibility issues.
Proactive Tips
- Always keep your recovery information (phone number, secondary email) current.
- Use a password manager to keep track of your passwords securely.
- Enable 2FA for an added layer of security, but keep backup codes in a safe place.
Conclusion
Login issues can stem from various factors, from simple typos to complex network or server issues. By systematically addressing the common causes listed above, you can troubleshoot most problems and regain access to your accounts.
Need Help?
The Yodeck Support Team can help you out! Log in to your Yodeck account and send us a message from the bottom right corner!
Tableau JWT connected App
Step-by-step procedure
- Login to your Tableau account and go to Settings -> Connected Apps.
- Create a new Connected App with ‘Direct Trust‘.
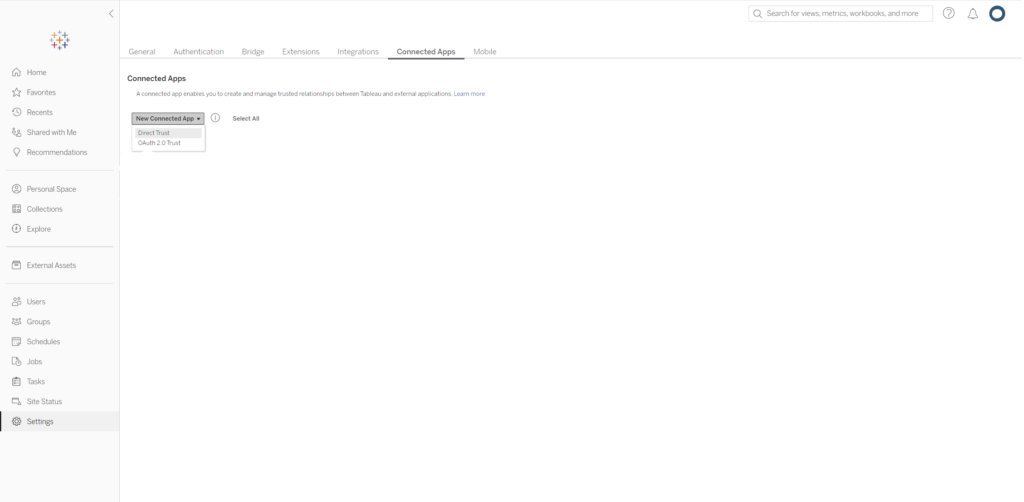
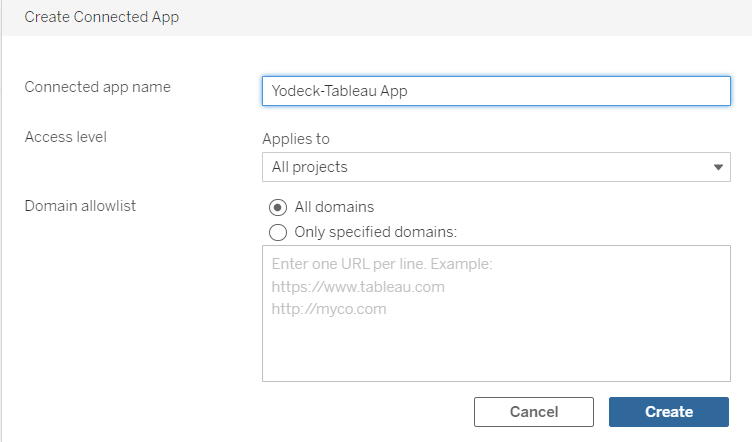
- Enter your preferred name (so you can tell which one is which) and the project(s) you want to display. Click Create.
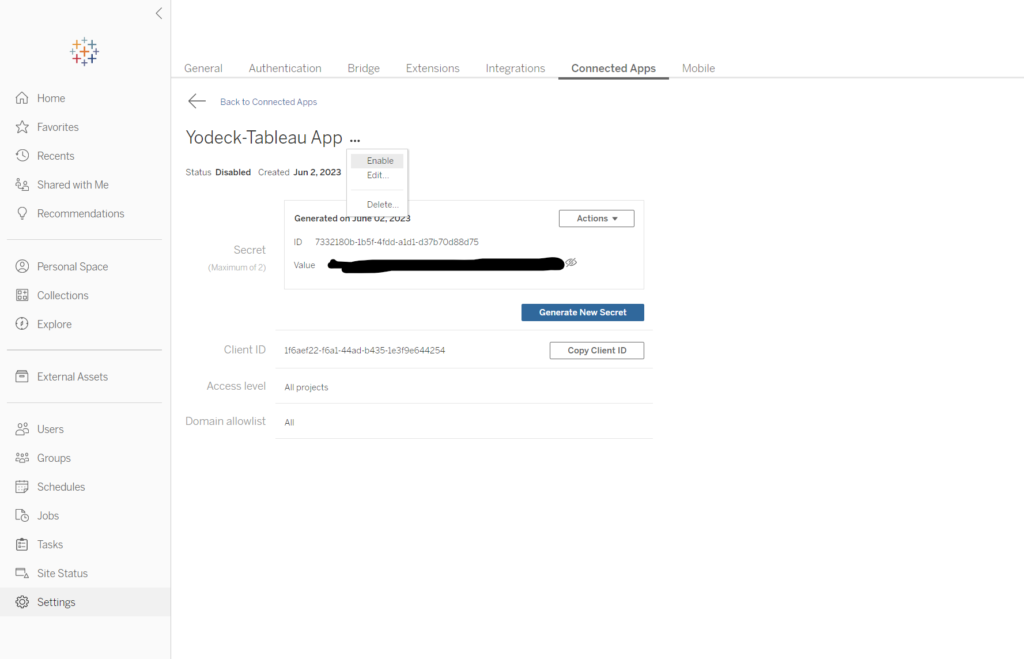
- Click ‘Generate New Secret‘.
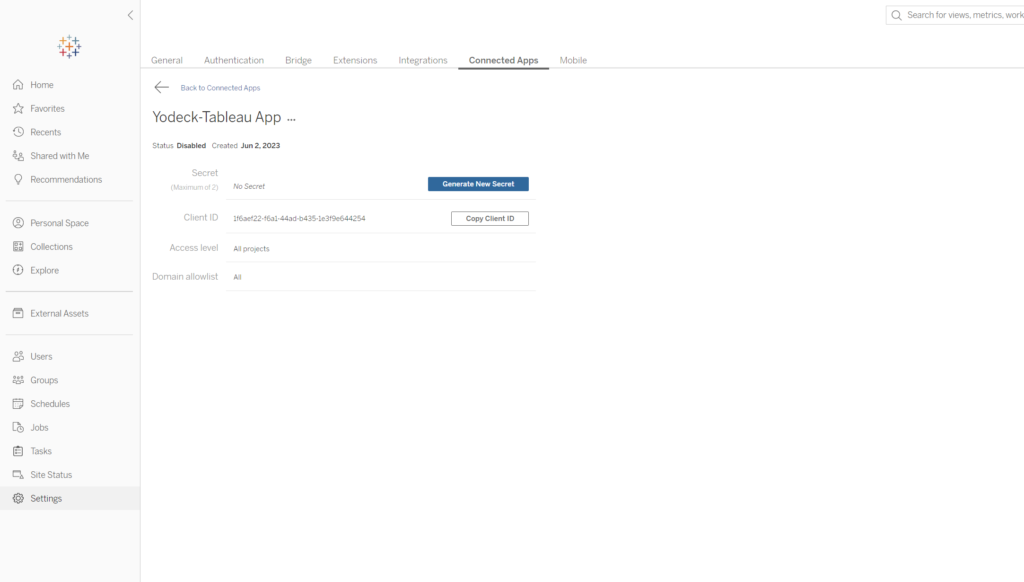
- From the three dots at the end of your app’s title, ‘Enable‘ the app.
- Copy the Client ID, Secret ID and Secret Value.
- Paste these values in our Tableau (JWT) app, along with your accounts Username/email.

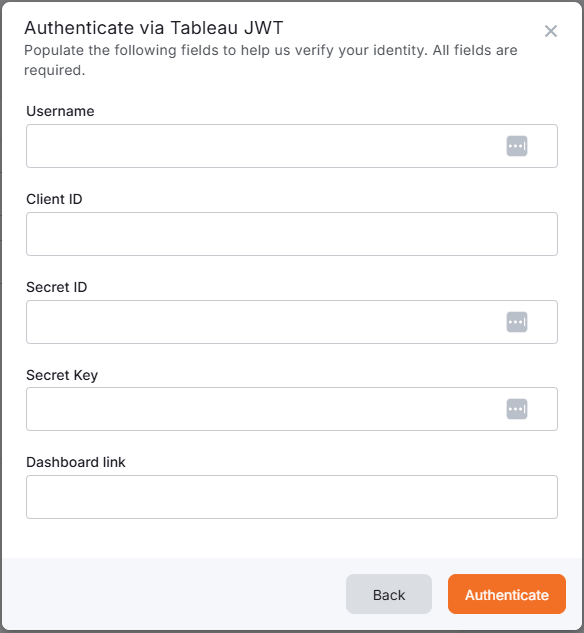
Tableau JWT Error Handling & On-Premise Limitations
Tableau JWT now includes error handling, allowing you to immediately verify whether the credentials you enter in the authentication modal are valid.
Keep in mind the following limitations:
– Error handling works only with publicly accessible Tableau Cloud URLs.
– If you use a Tableau on-premise URL, the system cannot validate your credentials because the URL is not publicly accessible. In this case, you can select Continue without authentication and save your Tableau app without confirming whether it will function properly.
Additionally, when you use a Tableau on-premise URL, your Yodeck Player must have network access to that URL. This means the Player must be connected to either the same local network or to a VPN that provides access to the Tableau server.
Multi-language Ticker (Japanese, Korean, Chinese)
If you want your ticker to support Japanese, Korean, and Chinese, follow these simple steps. A new image must be installed on your player to support the three languages for the App Ticker.
- Download the multi-language Yodeck SD card image
- Register the player under your account
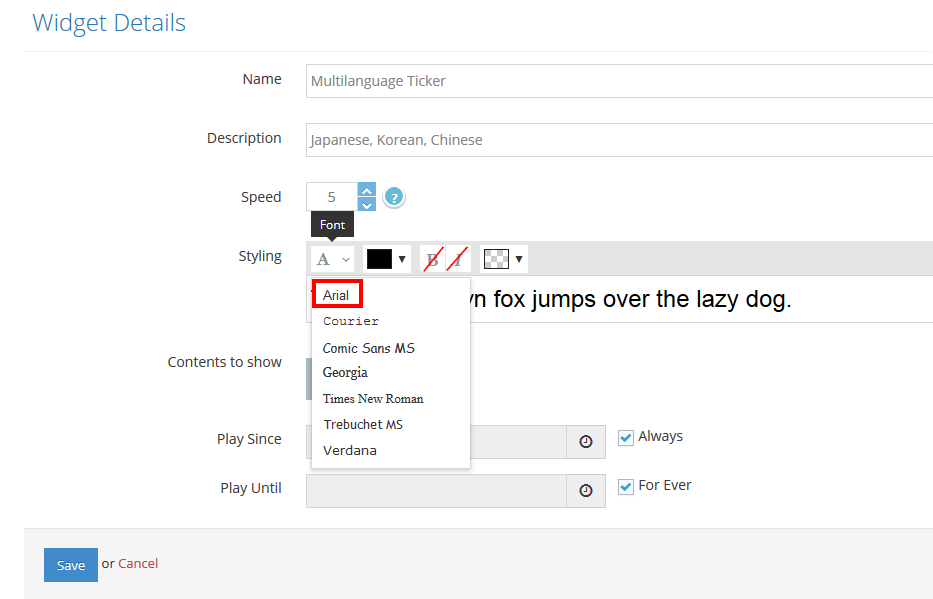
- Create a Ticker App with the following configurations only :
-
- The selected font must be Arial ( any other Font is not supported now ).
- Choose the Font Color of your choice.
- Do not use Bold or Italic format.
- Choose the Background Color of your choice.
4. Save your app and add it to your Show. Don’t forget to click the “ Push to players ” button.
Example image from the above configuration
Get your Google Calendar on a wall-mounted TV screen
Introduction
Users often ask us about new ways they can use Yodeck. And we love helping you use your digital signage solution best. Displaying a Google calendar on a wall-mounted TV screen is one such frequent request.
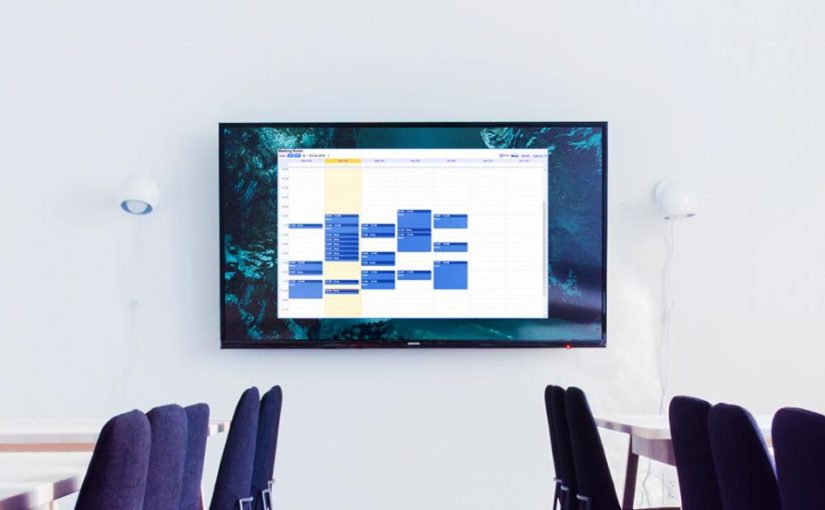
Showing a calendar on display can be very useful for various reasons. The most common scenario is mounting a TV screen outside a meeting room to show availability. Another use is internal communications in offices; or showing a calendar with corporate events in recreation areas, like cafeterias and reception areas.
Getting that Google calendar on a wall-mounted TV screen
Most calendars have a web version. We use the power of our scripting engine to run custom code on the web page that shows the calendar. Why? Here are a couple of reasons:
- Authenticate to display the calendar or details for the calendar events.
- Get only the calendar data for the TV screen. In that case, you must remove any surrounding buttons, links, service provider logos, and other stuff that gets in the way.
- Change the styling of the calendar to fit the rest of the content you might have on-screen better.
- Refresh content periodically in case the web version of the calendar does not refresh its content automatically.
With this technique, there is no limitation to what you can display on Yodeck; you can use any calendar provider, even a calendar from a local server, as long as it provides a link to view the calendar in a web browser.
This guide will show you how to display a Google calendar on a wall-mounted screen, which is our most frequent request (we use it internally, too!).
Creating a Google Calendar App
The first thing you have to do is to follow this link and create a Google Calendar within your account.

Click on the Google Calendar app to add it and fill in the app details as follows:
- A name and an optional description are required for the app.
- Type an email address and a password to log in to your Google Calendar account.
- Choose the refresh rate of your graph (the default one is 180 seconds)
- Choose the type of calendar that you want to display.
- Day
- Week
- Month
- Year
- Schedule
- Custom date
- Set the default duration for which the app will appear in a playlist.
All Set
Finally, click “Save”. Your Google Calendar app entry is ready! Now, go to “Screens” and assign this app to a Screen without assigning any Schedule to Playback. Push to your screens, and you are all set!
Your calendar should now be displayed. Since you are logging in using credentials, it might take 15-20 seconds for the login to complete and for the calendar to show up. We hope you find this guide to displaying a Google calendar on a wall-mounted screen useful.
Need Help?
The Yodeck Support Team can help you out! Log in to your Yodeck account and send us a message from the bottom right corner!
Get your Google Docs on a wall-mounted screen
How it works with Yodeck on Raspberry Pi
The easy way to display Google Docs on Yodeck with Raspberry Pi is to make it publicly available.
Below, you can find a few steps to make your Google Docs publicly available.
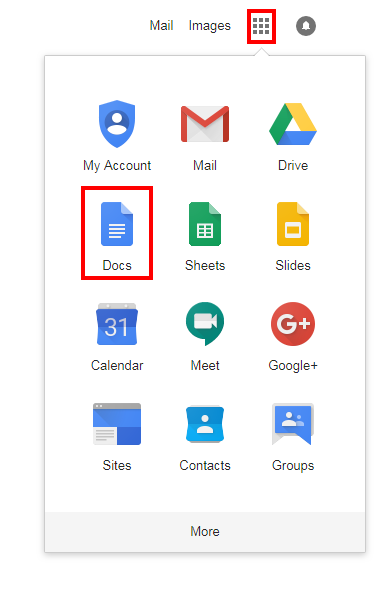
Step 1: Go to your Google account settings and choose Docs.
Step 2: From various default templates, you can choose one or create a new one.
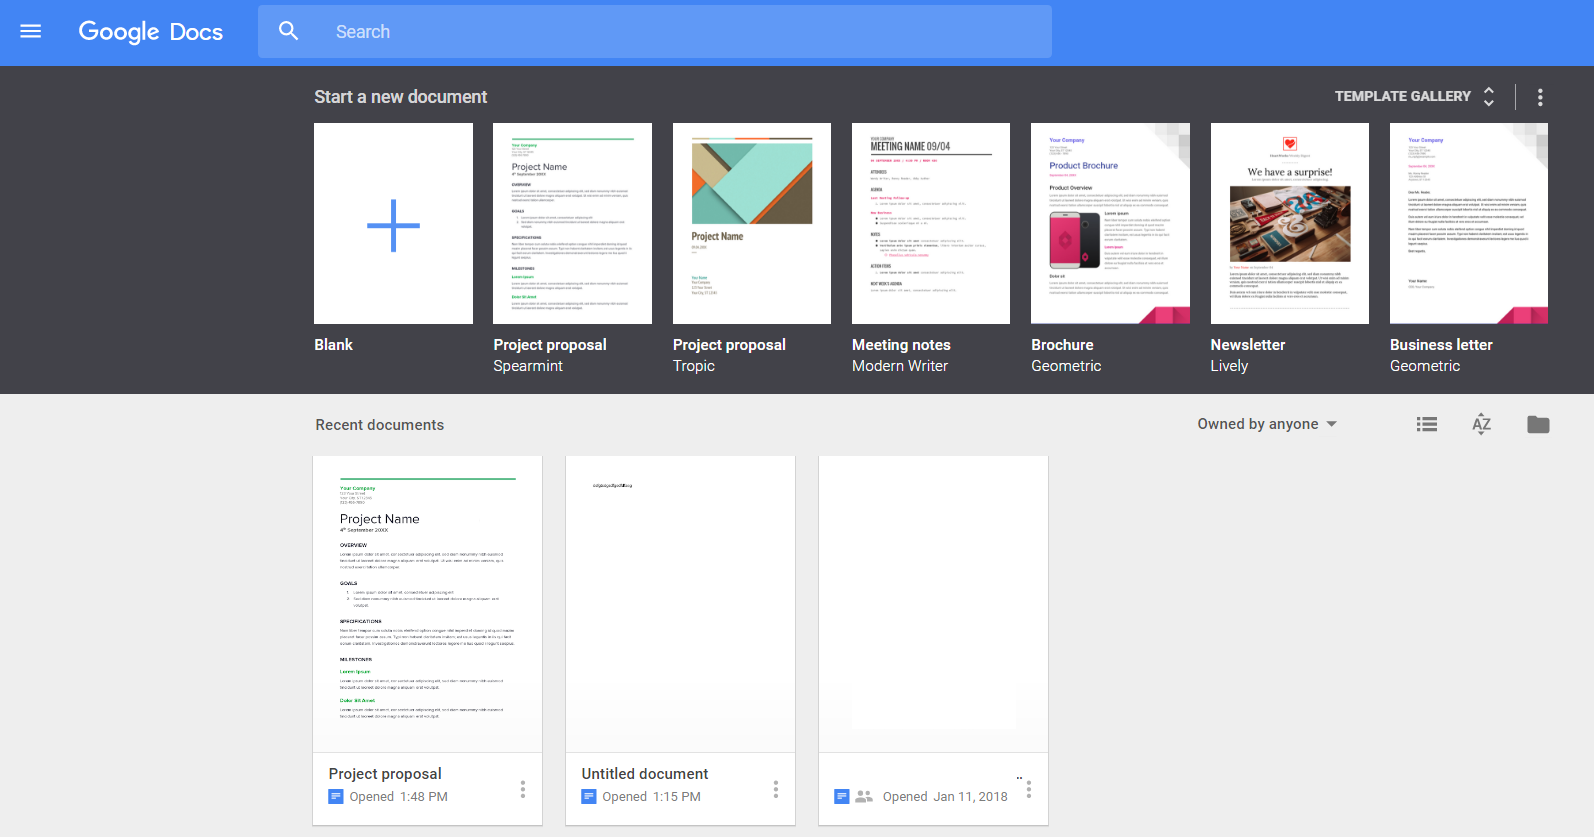
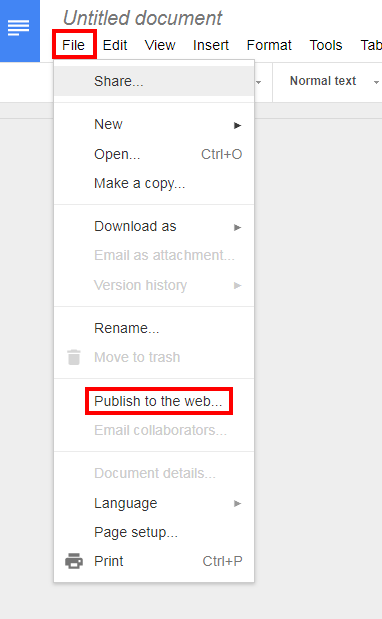
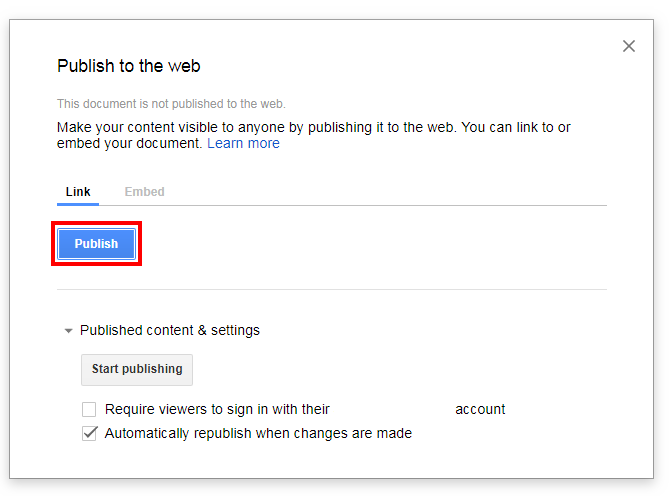
Step 3: After creating your template, Click File→ “Publish to the web” (a new window will pop up) →Publish.
When you click Publish, it will generate a new link. Copy that link.


Step 4: The final step is within your Yodeck Account. Go to the “Web Pages” section and create a new Web Page with the following details:
- As the URL address, use the link address you copied previously.
- As the Zoom Factor, this is up to you. You need to test 2-3 values to make it readable and look good. Start with the default 100% and go for 150% or even 300% if the text seems small.
- To remove the “Google” logo in the header and footer and refresh your Google Docs page, set the “Run Custom Script” toggle to “ON” and in the “Script Code”, type the following
Code Snippet
repeat(0){
runScript("""jQuery("#header").remove();""")
runScript("""jQuery("#footer").remove();""")
pause(300)
refreshAndWait()
}
Refresh Rate
Keep in mind that the default refresh rate of Google’s docs is 5 minutes. Any changes you make to the Docs will be published on your TV screen after 5 minutes (300 seconds).
Another option to refresh your Google Docs is to set up a playlist with the same web page (Google Docs) playing back-to-back (300s at least). Using this method, you will not have any pre-loading interruptions, and the changes will be much smoother.
Get your Google Sheets on a wall-mounted screen
How it works with Yodeck on Raspberry Pi
The easy way to display Google Sheets on Yodeck with Raspberry Pi is to make it available to the public.
Below are a few steps to make your Google Sheets publicly available.
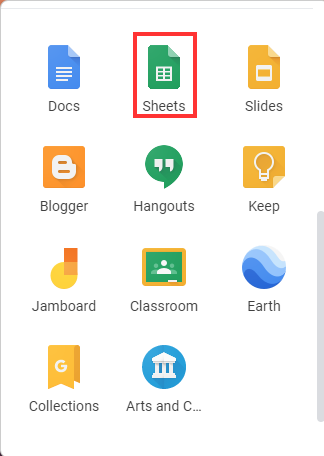
Step 1: Go to your Google account settings and choose Sheets.
Step 2: From various default templates, you can choose one or create a new one.
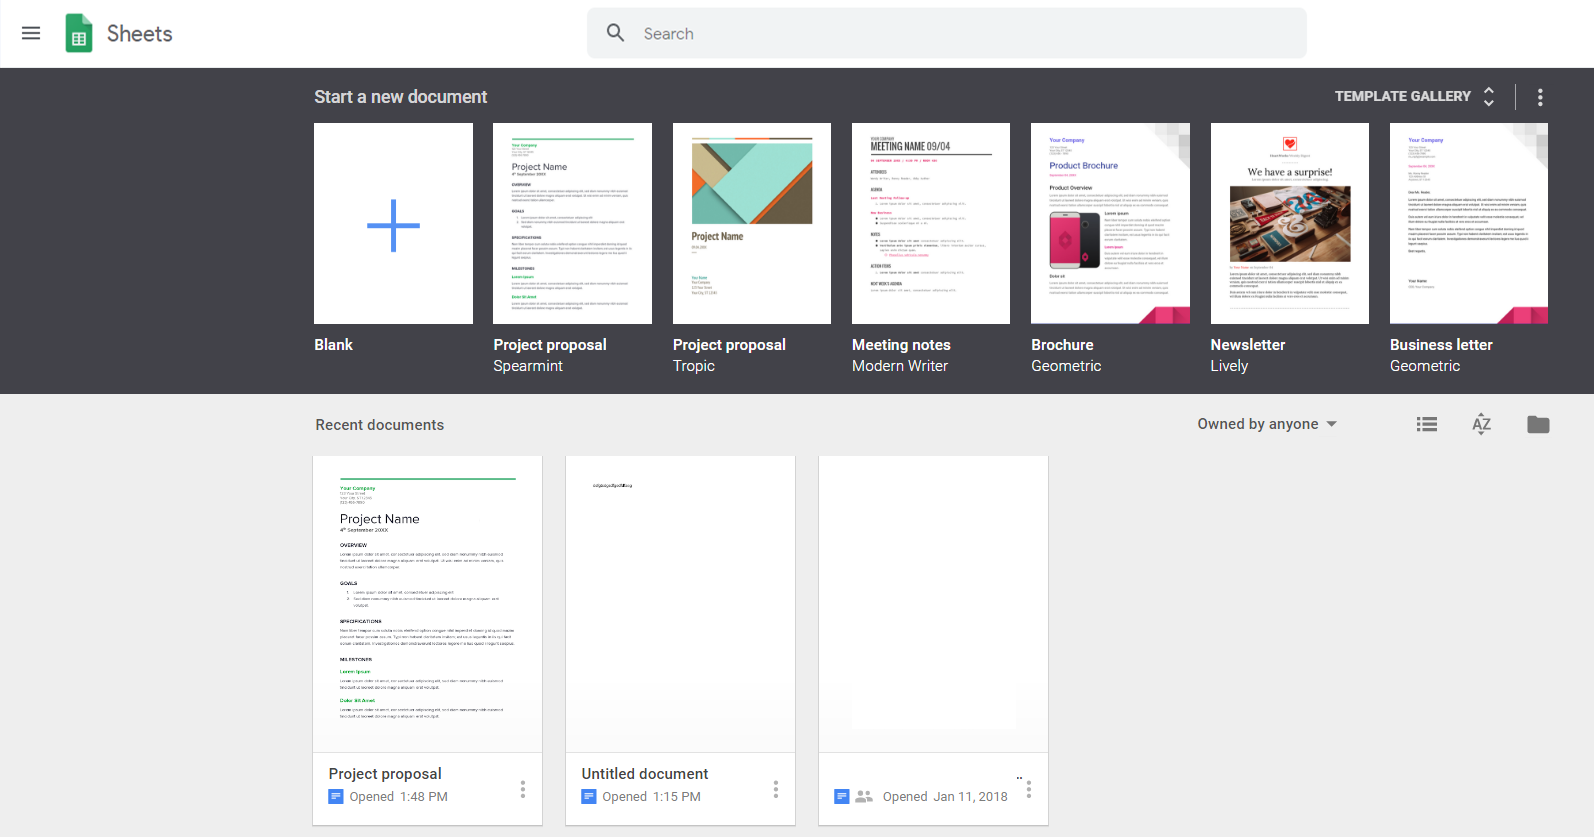
Step 3: After creating your template, click File→Publish to the web (a new window will pop up) →Publish.
When you click Publish, a new link will be generated. Copy that link.
Step 4: The final step is within your Yodeck Account. Go to the “Web Pages” section and create a new Web Page with the following details:
- As the URL address, use the link address you copied previously.
- As the Zoom Factor, this is up to you. You must test 2-3 values to make it readable and look good. Start with the default 100% and go for 150% or even 300% if the text seems small.
To remove the “Google” logo in the header and footer and refresh your Google Sheets page, set the “Run Custom Script” toggle to “ON,” and in the “Script Code”, type the following:
Code snippet
repeat(0){
runScript("""jQuery("#header").remove();""")
runScript("""jQuery("#footer").remove();""")
pause(300)
refreshAndWait()
}
Refresh Rate
Remember that the default refresh rate of Google’s sheets is 5 minutes. Any changes you make to the Sheets will be published on your TV screen after 5 minutes (300 seconds).
Another option to refresh your Google Sheets is to set up a playlist with the same web page (Google Sheets) playing back-to-back (300s at least). This method will not have any pre-loading interruptions, and the changes will be much smoother.