Getting Started FAQs
What is the Yodeck Web Player?
Think of the Web Player as a way to get Yodeck digital signage on your screens. Specifically, if a device, such as a tablet or PC, has a Chrome-based web browser, including Chrome, Chromium, and Edge, then the Web Player can turn it into a Yodeck-powered digital signage screen.
Essentially, the Web Player lets you playback content without an external Yodeck Player. However, it doesn’t offer the same kind of super-robust, super-reliable enterprise-grade solution you get with our Raspberry Pi Yodeck Player. We have thoroughly tested the Raspberry Pi Player. Therefore, we guarantee it performs stellarly as a digital signage player. Our trusty little Raspberry Pi Player also provides device management and control – something that the Web Player can’t do.
We created the Web Player because it offers easy setup and deployment. Some of you need that extra “magic” from our Raspberry Pi Players, while others won’t. So now the choice is up to you!
✅If you want to convert your Chrome-based browser to a Yodeck Web Player, please click here!
How to Set Up a BrightSign Media Player
Learn how to create and register a Yodeck player using a BrightSign device. This guide explains the required hardware and firmware prerequisites and walks you through the full setup process using either BSN.cloud or a URL-based method.
💡Applies to BrightSign players used with Yodeck.
In the full article, you’ll see exactly where to create a new player in the Yodeck Portal, how to connect your BrightSign device, and how to complete the initial registration and activation steps.
How to Set Up a FireOS Player with Yodeck
Learn how to turn an Amazon Fire TV or Fire TV Stick into a Yodeck digital signage player. This option is ideal if you want a simple setup using an Amazon device, with no additional hardware or cabling required.
In the full article, you’ll see how to install the Yodeck app from the Amazon Appstore, retrieve the on-screen registration code, and register the FireOS player in the Yodeck Portal. The guide also covers recommended setup steps, links to installation videos, and important limitations to consider when using Amazon FireOS devices for digital signage.
How to Set Up an LG WebOS Player
Learn how to turn a compatible LG webOS display into a Yodeck digital signage player. This guide is intended for users who want to run Yodeck directly on supported LG screens and are comfortable performing a one-time, IT-style setup on the display.
In the full article, you’ll see how to verify webOS compatibility, configure required system settings on the LG display, install the Yodeck webOS application, and register the player in the Yodeck Portal using a registration code. The guide also covers known platform limitations and optional advanced configuration, such as custom time (NTP) settings.
How to Set Up a Windows Media Player
Learn how to turn a compatible Windows PC into a Yodeck digital signage player. This option is ideal if you want to use existing Windows hardware and are comfortable performing a one-time, kiosk-style setup on the device.
In the full article, you’ll see how to install the Yodeck Windows application, obtain the on-screen registration code, and register the player in the Yodeck Portal. The guide also explains supported Windows devices, kiosk mode behavior, known platform limitations, and optional advanced configuration such as custom time (NTP) settings.
How to Set up a Samsung Tizen Player
Learn how to turn a compatible Samsung Tizen display into a Yodeck digital signage player. This guide is intended for users who want to run Yodeck directly on supported Tizen screens and are comfortable performing a one-time, IT-style setup on the device.
In the full article, you’ll see how to check Tizen version compatibility, install the Yodeck Tizen application, retrieve the on-screen registration code, and register the player in the Yodeck Portal. The guide also covers platform limitations, portrait mode considerations, and optional advanced configuration such as custom time (NTP) settings.
How to Register a DIY Yodeck Player based on Raspberry Pi
Learn how to register a DIY Yodeck player and connect it to your Yodeck account so it can start displaying content on your screens. This guide is intended for users who have built their own Yodeck player and want to complete the initial registration process.
In the full article, you’ll see how to connect the player to a display and the internet, retrieve the on-screen registration code, and register the player in the Yodeck Portal. The guide also explains the basic requirements needed for successful registration and what to expect once the player is linked to your account.
Setting Up a Yodeck ChromeOS Player
Setting up your Yodeck ChromeOS Player is quick and simple. Our step-by-step guide shows you how to enroll your device with Chrome Enterprise, set Yodeck as the default signage app, and adjust key settings for smooth performance. You’ll connect your Player to your Yodeck account in just a few minutes, and your ChromeOS digital signage will be ready to go.
Connect your Android phone to Android TV
On your Android target TV
Follow the below commands to pair and connect the target Android device TV to your Android phone.
⚠️ NOTE: Some of the settings below might differ on some devices.
- Enable Developer Options
- Go to Settings → About→ Software Information
- Tap “Build Number” 8 times until you see the “You are now a developer” prompt.
- Go back to Settings; you should now see the “Developer Options” tab.
- Scroll down and click on the “ADB” option
- Εnable the ADB and click on the “Always allow on this network.“
- Go back to Settings and find the Network Tab
- Find the Local IP of the device and store it for the next steps
On your Android Phone, open the Setup Helper App
- Type the IP address of the Android target TV you stored in the previous steps and click “connect.”
- Now, your phone is connected to the Android target TV.
Connect your Android Phone to an Android Device/Player
At your target Android device/player
Follow the below commands to pair the target device/player and connect it to your Android phone.
- Enable Developer Options
- Go to Settings → About tablet → Software Information
- Tap “Build Number” 8-times until you see the “You are now a developer” prompt
- Go back to Settings, and you should now see the “Developer Options” tab.
- Scroll down and click on the “Wireless debugging” option
- Once you see the above screen, enable Wireless Debugging and click on “Always allow on this network.”
- Click on the “Pair device with pairing code.“
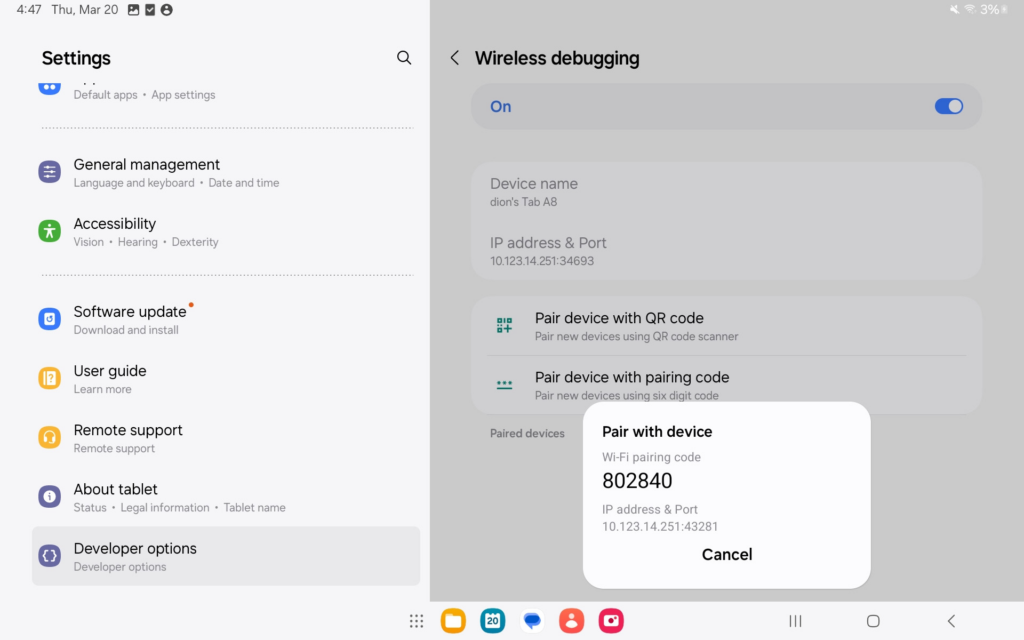
- From the above image, store the “WiFi pairing code” and “IP address & Port”.
- ⚠️ Do NOT close this popup and make sure the device will not lock until you finish the next steps. If device locks or popup is closed , you will need to copy the new code and port number for the next steps!
On your Android Phone, open the Setup Helper App
- Click on the “Pair Device First” button.
- Enter the IP Address & Port number you saved from the previous actions on the tablet.
- Enter the “WiFi pairing code” you saved from the previous actions on the tablet and click “Pair Device”.
- If you entered the IP:PORT & Pairing Code, the two devices will have been paired successfully.
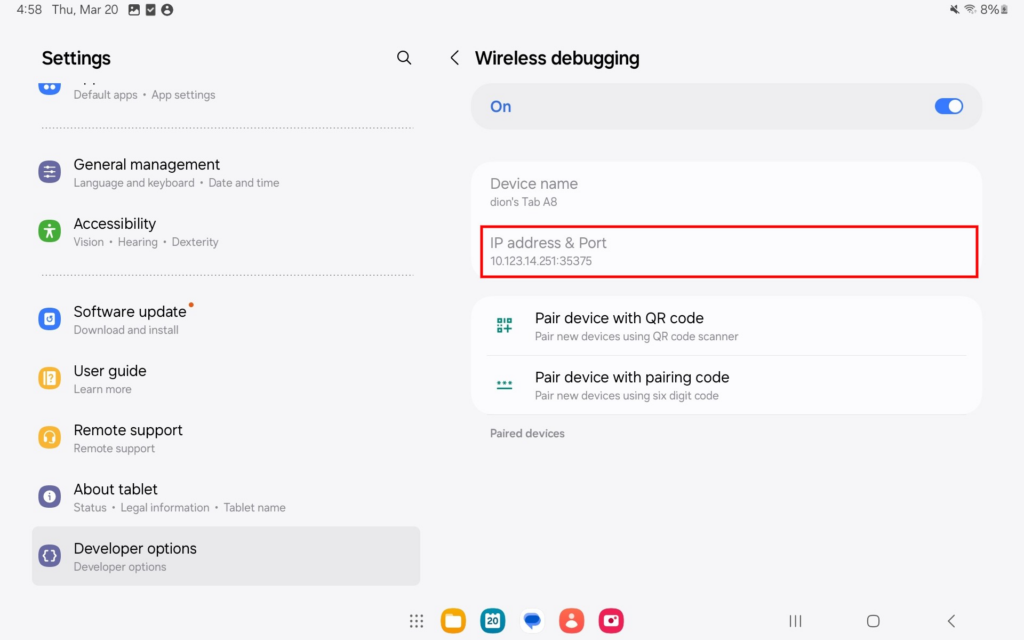
Back to the target Android device/player
Find the “IP Address & Port” from the Wireless Debugging setting
⚠️NOTE : Notice that this port number is different than the previous one you used to pair the devices
Back to Android Phone
- Enter the IP Address & Port you got from the previous step and click “connect”.
- Now your phone is connected to the target device/player.
How to Unzip the Yodeck image
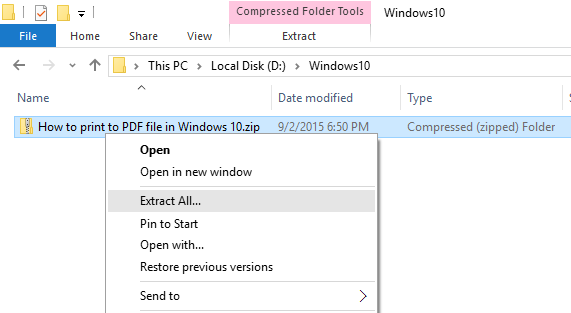
Unzip files on Windows 10
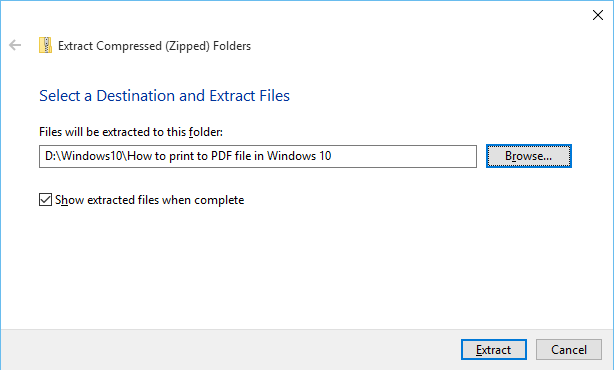
- Right-click on the .zip file that you want to unzip (decompress), and click on “Extract All” in the context menu.

- In the “Extract Compressed (Zipped) Folders” dialog box, enter or browse the folder path where you want files to be extracted. Check the “Show extracted files when complete” checkbox to open the extracted folder after zip extraction is complete.
Click on the “Extract” button to start the extraction.
Unzip files on Windows 7
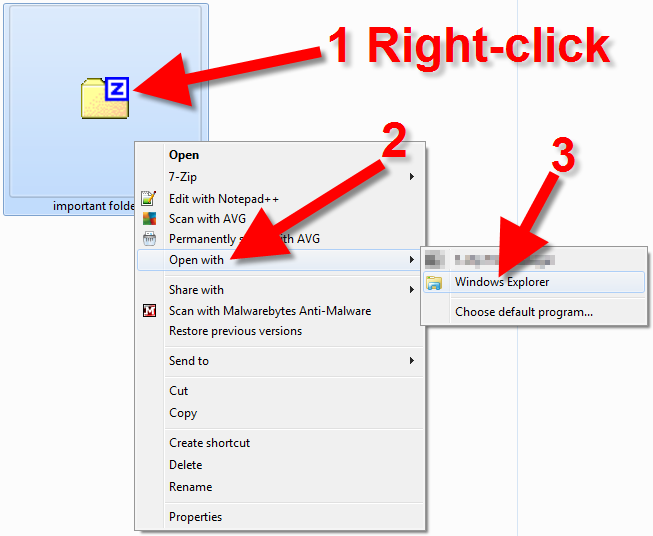
- In Windows 7, please navigate to the zipped (compressed) file you want to Unzip and right-click it.
- On the menu that pops up, roll your mouse over Open with , then click Windows Explorer .

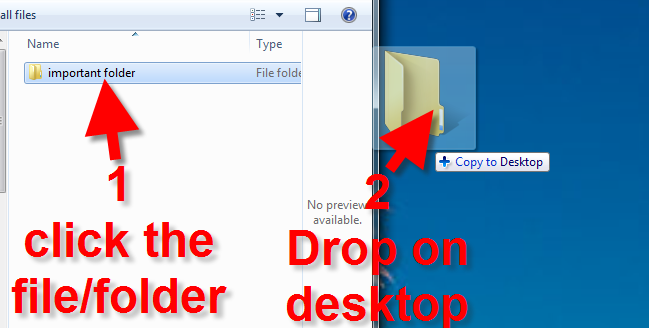
- You will then see the contents of the zip file. Click the file and drop it on your desktop or another file location. The contents of the file will be unzipped, and you can then use it as needed.

Unzip files on Mac
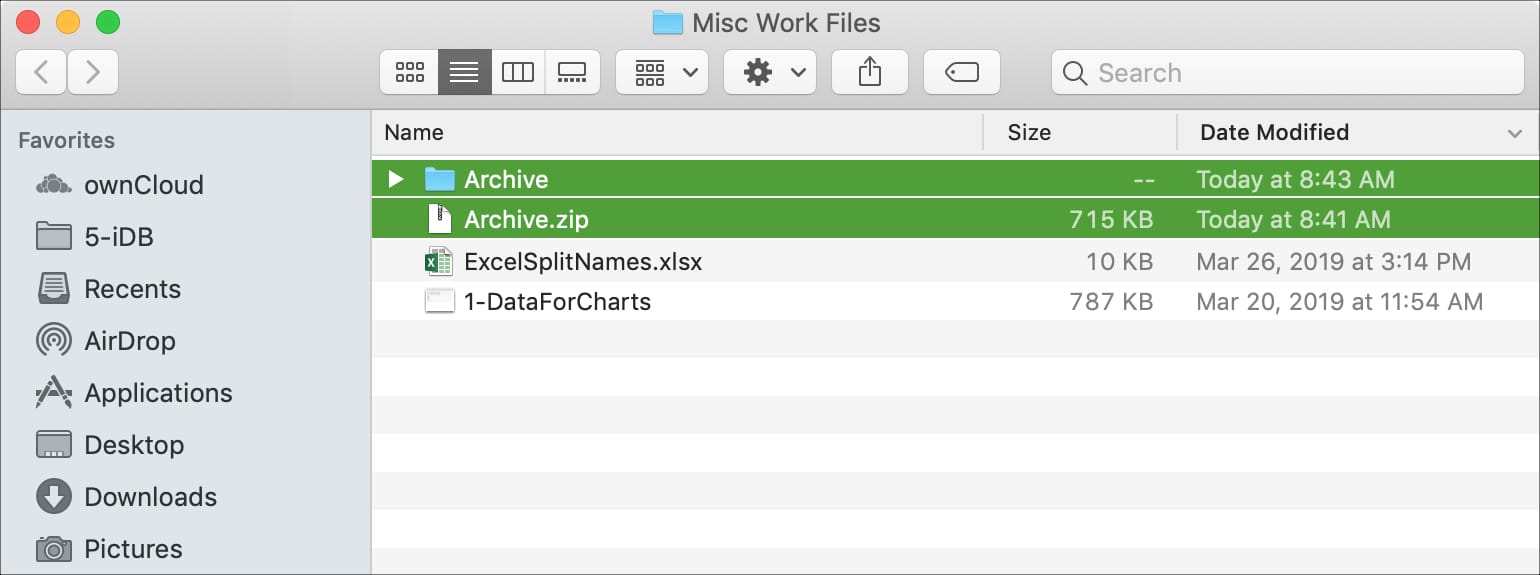
- Double click the zipped file.
- The file will automatically be decompressed by Archive Utility into the same folder the compressed file is in.
- Access the extracted files by clicking the appropriate icons.

Unzip files on Linux
Install Unzip
Unzip is not installed by default in most Linux distributions, but you can easily install it using your distribution package manager.
Install Unzip on Ubuntu and Debian
- sudo apt-get install unzip
Install Unzip on CentOS and Fedora
- sudo yum install unzip
Unzipping a ZIP file
In it’s simplest form, when used without any option, the unzip command will extract all files from the specified ZIP archive to the current directory.
- unzip filename.zip
To extract a ZIP archive in a specific directory, the user needs to have write permissions on that directory.
ZIP files do not support Linux-style ownership information, and all extracted files will be owned by the user that runs the command.
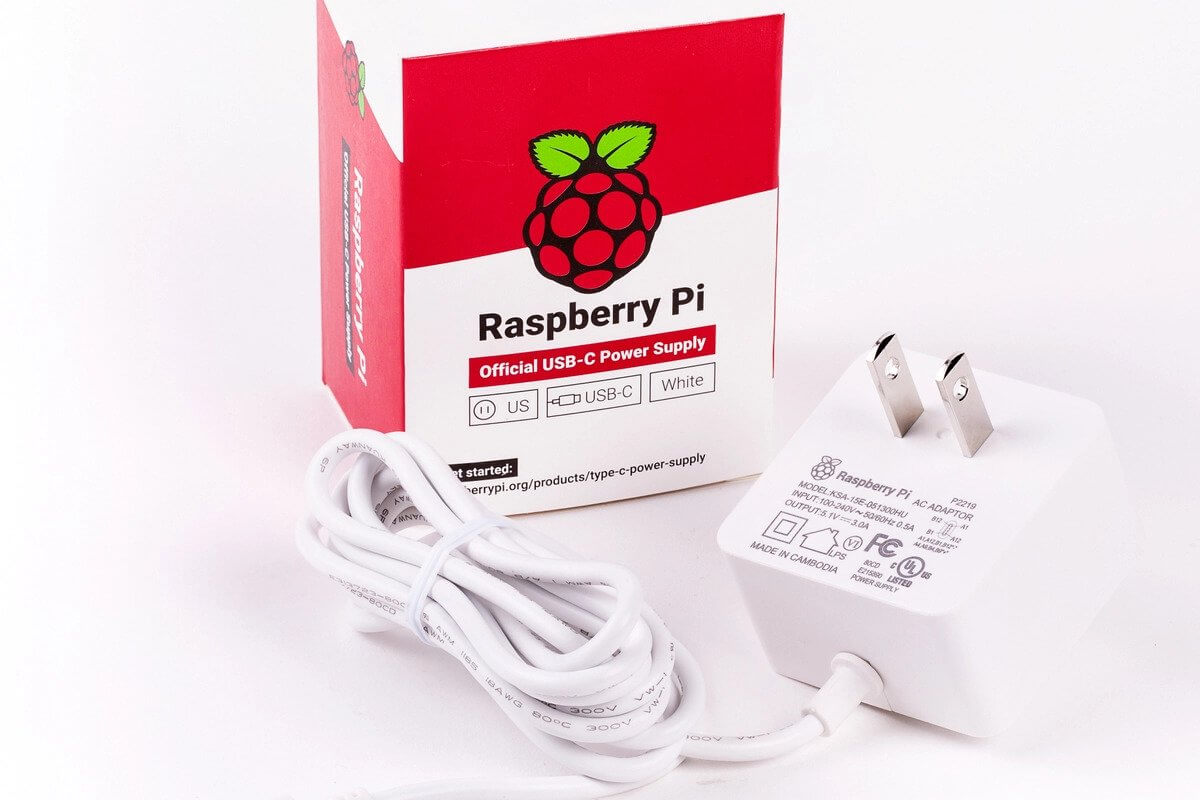
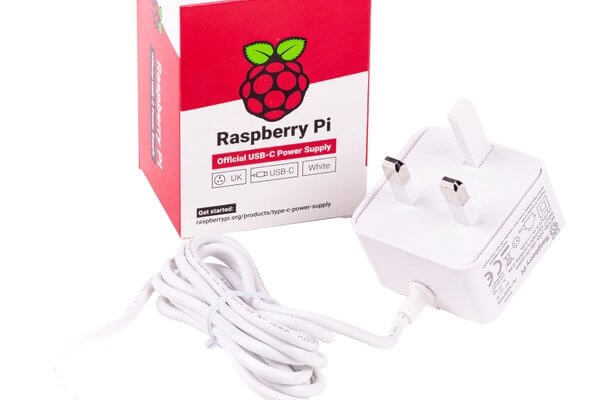
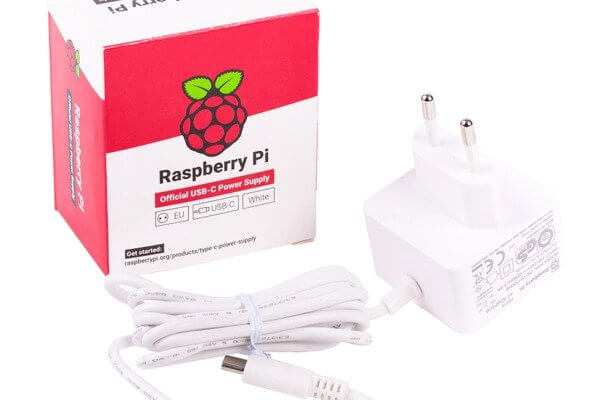
Plug Types
US Plug Type
UK Plug Type
EU Plug Type
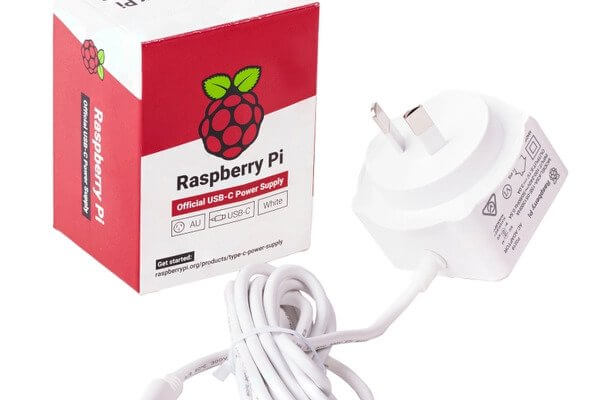
AU Plug Type