Table of Contents
Introduction

Tableau Software is an interactive data visualization software company focused on business intelligence. It aims to provide interactive visualizations and business intelligence capabilities, with an interface simple enough for end users to create their own reports and dashboards. In this guide, you will quickly learn how to create a Tableau app under your Yodeck account.
Available only on the Premium/Enterprise plan!
This app is only available on the “Premium/Enterprise” Plan. You might not see some menus below if you are not on the “Premium/Enterprise” Plan.
Remember that the “Premium/Enterprise” Plan is free if you only manage 1 screen to evaluate these features quickly.
Creating a Tableau(JWT) app
Step 1 – Locating & Selecting the App
Click on the Tableau app within your app gallery to create a new one.
Step 2 – Selecting One of the Two Main Options
After clicking the Use App button, a pop-up window presents you with two options for this app.
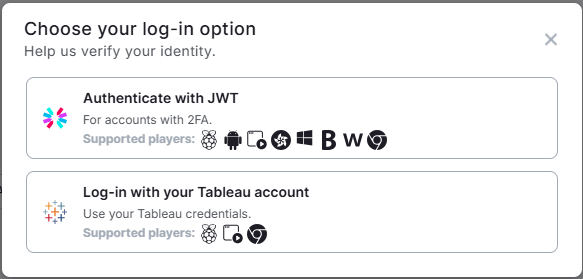
- The ‘Authenticate with JWT‘ option is supported by all players and is preferable when utilizing 2FA for your accounts.
- The ‘Log-in with your Tableau Account’ option is supported only by Raspberry Pi players, Web players and Chromium OS players and is preferable when you wish to connect using your Tableau credentials.
Step 3 – Filling in the App Details
Depending on your previous choice (either to use the Authenticate with JWT[1] or Logging in[2]), you can proceed to fill in the app details as follows (click on the appropriate tab based on your choice):
- A Name is required for the app and an optional Description.
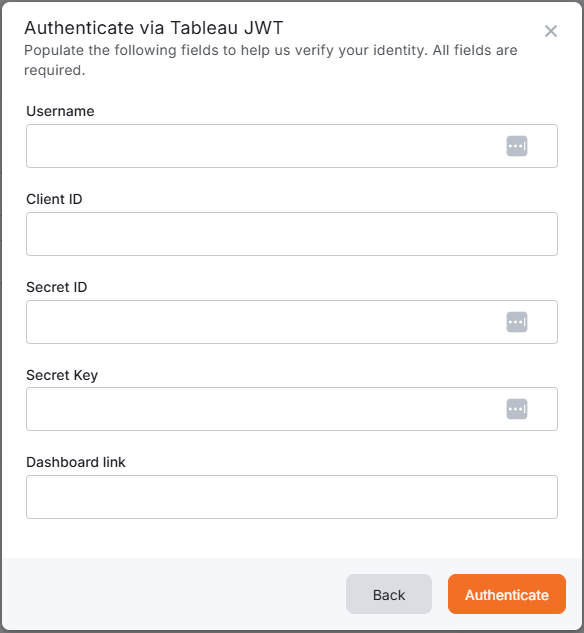
- In the Authentication button, you have to first click it, and then in the following pop-up window, provide the following credentials: Username, Client ID, Secret ID, Secret Key, andDashboard link.**

- Then, choose the Refresh Interval of your graph (the default rate is 15 minutes).
- You can also add a tag for this app to better manage it in the future.
- Choose the Default Duration in seconds.
- You can set the Availability. More details can be found in the Media Availability guide.
- Click “Save,” and your app is ready to use. Assign it to your player, and the player will display the relative graph.

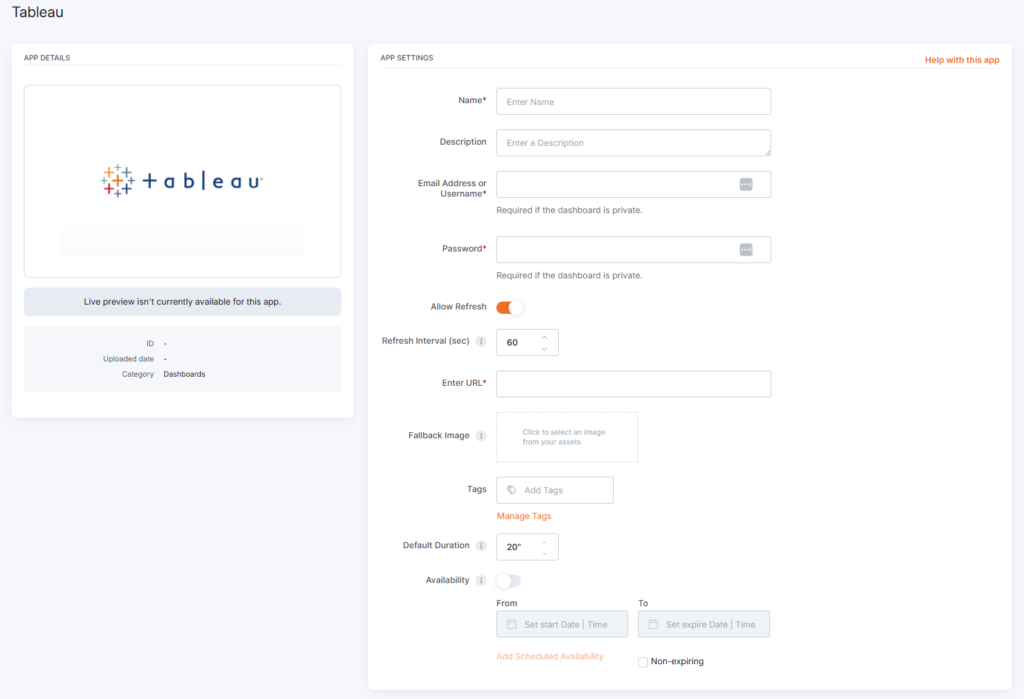
- A Name is required for the app and an optional Description.
- In the Email Address or Username* field, you have to first fill it in with the respective Tableau account username or email. This field is required if the dashboard is private.
- In the Password* field, you have to first fill it in with the respective Tableau account password. This field is required if the dashboard is private.
- The Allow Refresh toggle button lets you enable or disable refreshing Tableau data.
- Then, choose the Refresh Interval of your graph (the default rate is 15 minutes).
- Afterwards, you need to provide the Tableau URL graph under the Enter URL field of the app.
- At the Fallback Image you can upload an image in case the app fails to load.
- You can also add a Tag for this app to better manage it in the future.
- Choose the Default Duration in seconds.
- You can set the Availability. More details can be found in the Media Availability guide.
- Click “Save,” and your app is ready to use. Assign it to your player, and the player will display the relative graph.
JWT Authentication Settings
What is a JWT?
JSON Web Token (JWT) is a popular user authentication standard, used to exchange information online securely. This token is made up of three components; a header that specifies the algorithm used to encrypt the contents of the token; a payload that contains “claims” (information the token securely transmits); and a signature that can be used to verify the authenticity of the information.
** Type your Tableau Username, Client ID, Secret ID, Secret Key, and Dashboard link to log in to your Tableau account.
You will need to connect the Tableau App with the Yodeck App. Find a step-by-step guide here.
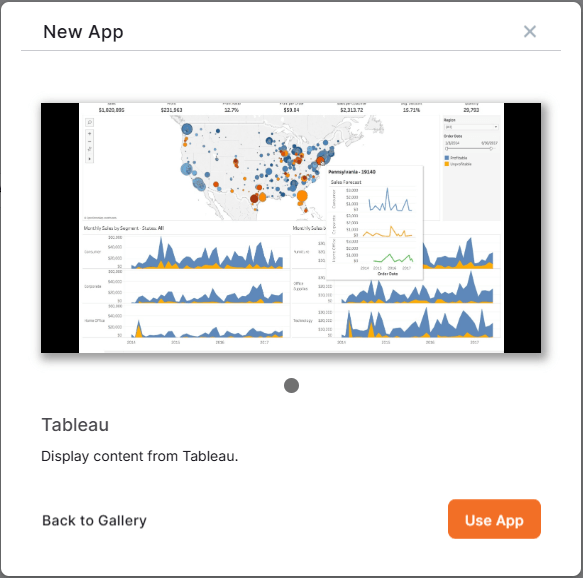
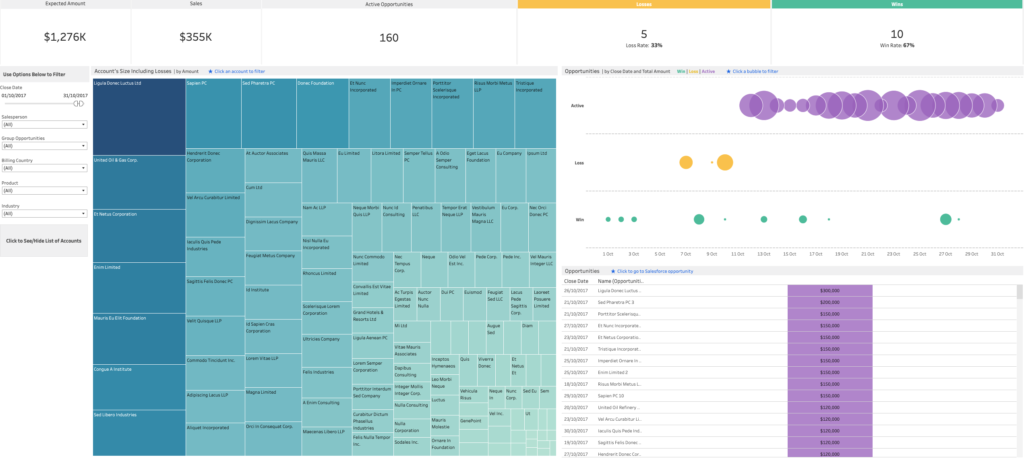
Tableau’s Final result
This is how your graph will display on your TV screen.
Need Help?
The Yodeck Support Team can help you out! Log in to your Yodeck account and send us a message from the bottom right corner!