Table of Contents
Overview
As a whitelabel, you can integrate Google Drive as a media source for your customers by creating a Google Drive App and linking it to your platform. Follow the steps below to set up a secure and functional Google Drive playlist integration.
Disclaimer for Google’s App Validation Period of One Month!
The Google Drive application you are about to create needs validation from Google, due to the app’s scopes, which may take nearly one month.
Getting Started
Please complete the following step-by-step guide to create a Google Drive app, link it to your platform, and offer it as a playlist to your customers.
Step 1: Create the Google App
Log in to your Google account at Google Cloud Console.
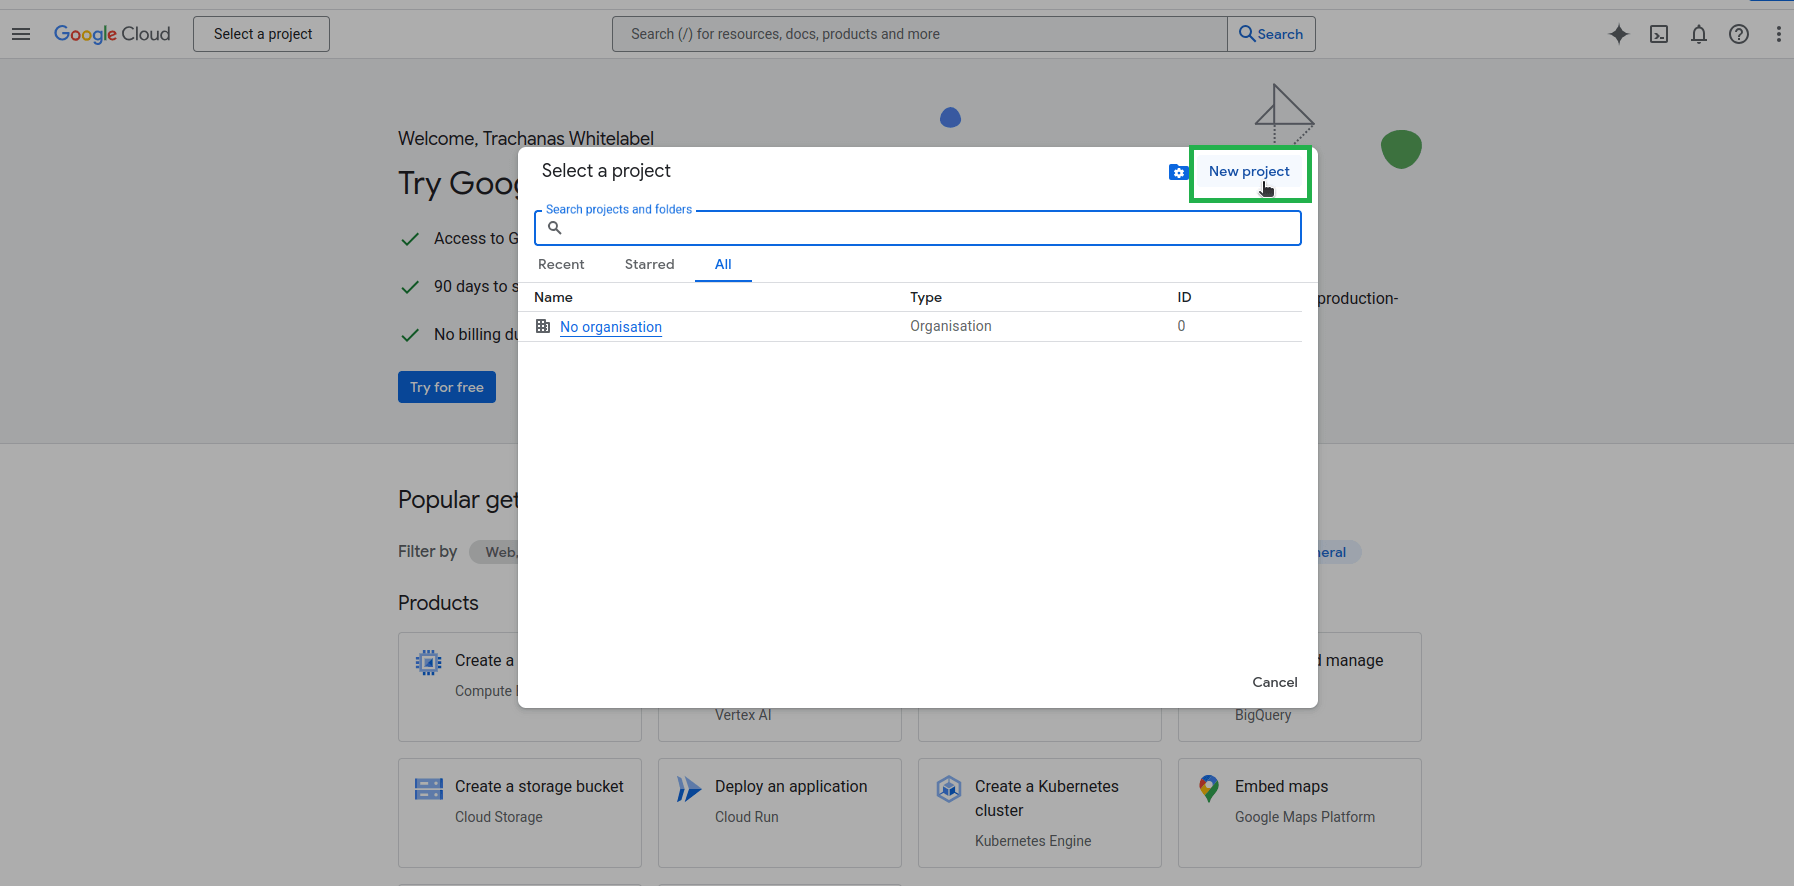
- Click the Select a project button in the top navbar.

- Afterwards, click the New Project button.

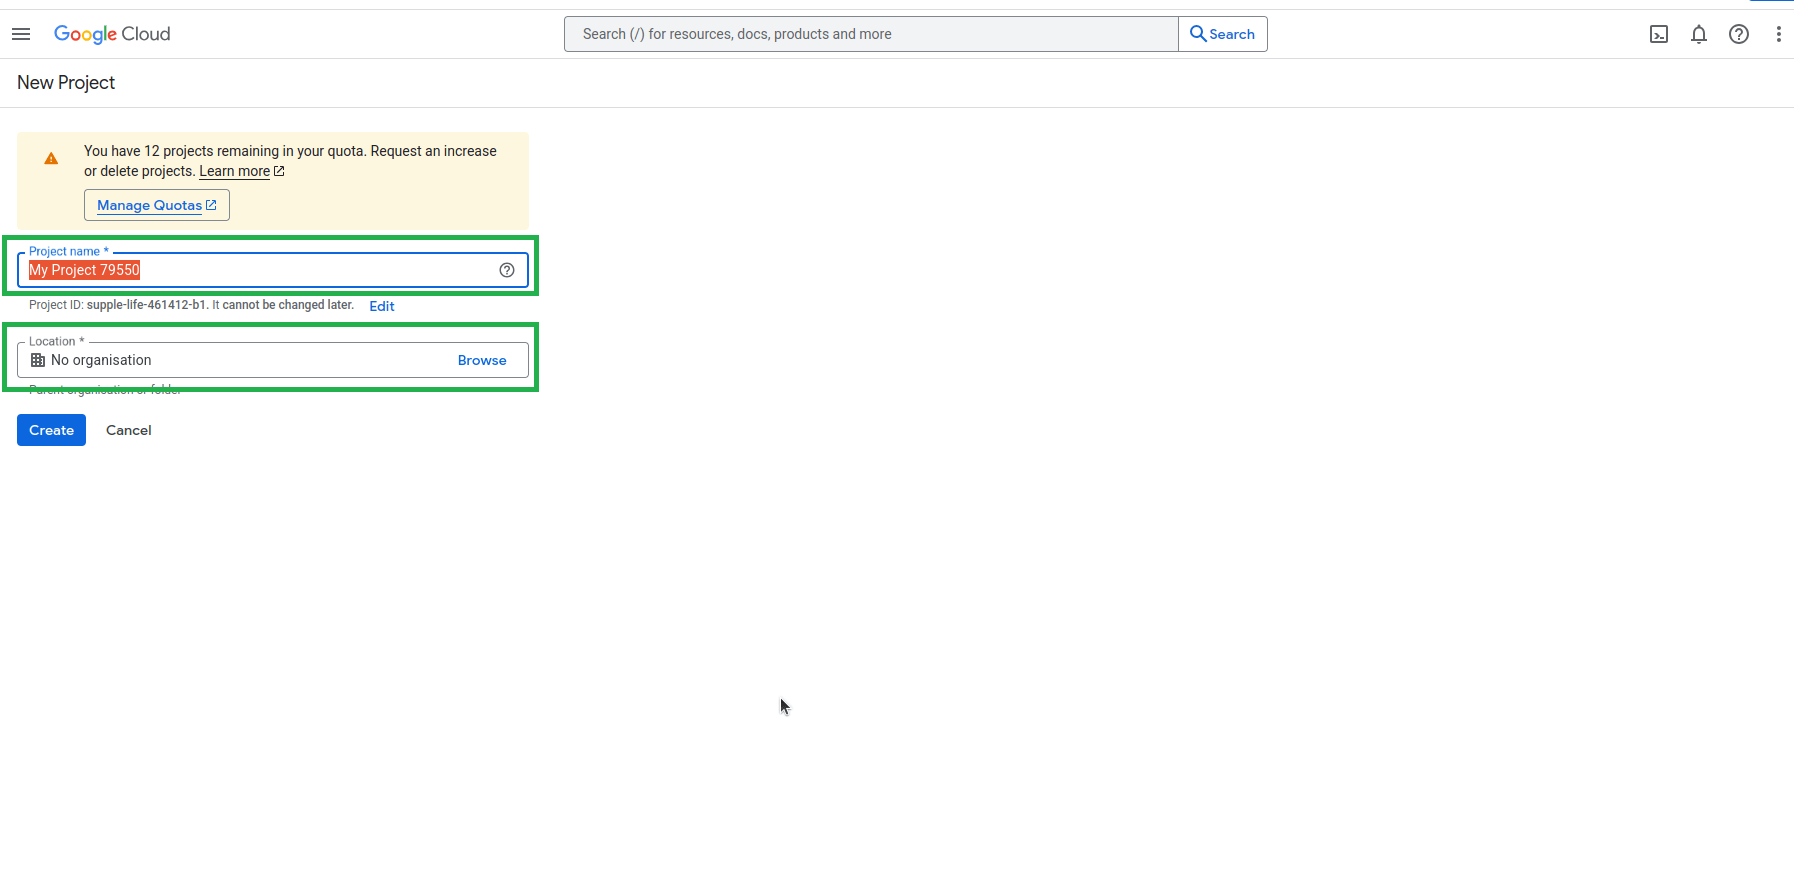
- After that, you must enter the project’s name and location. It is recommended that you choose a name relevant to Google Drive and your app.
- Once the Create button is clicked, the first draft version of your project is ready.
Step 2: Enable Required APIs
With your newly created project selected, go to APIs & Services > Enabled APIs and services.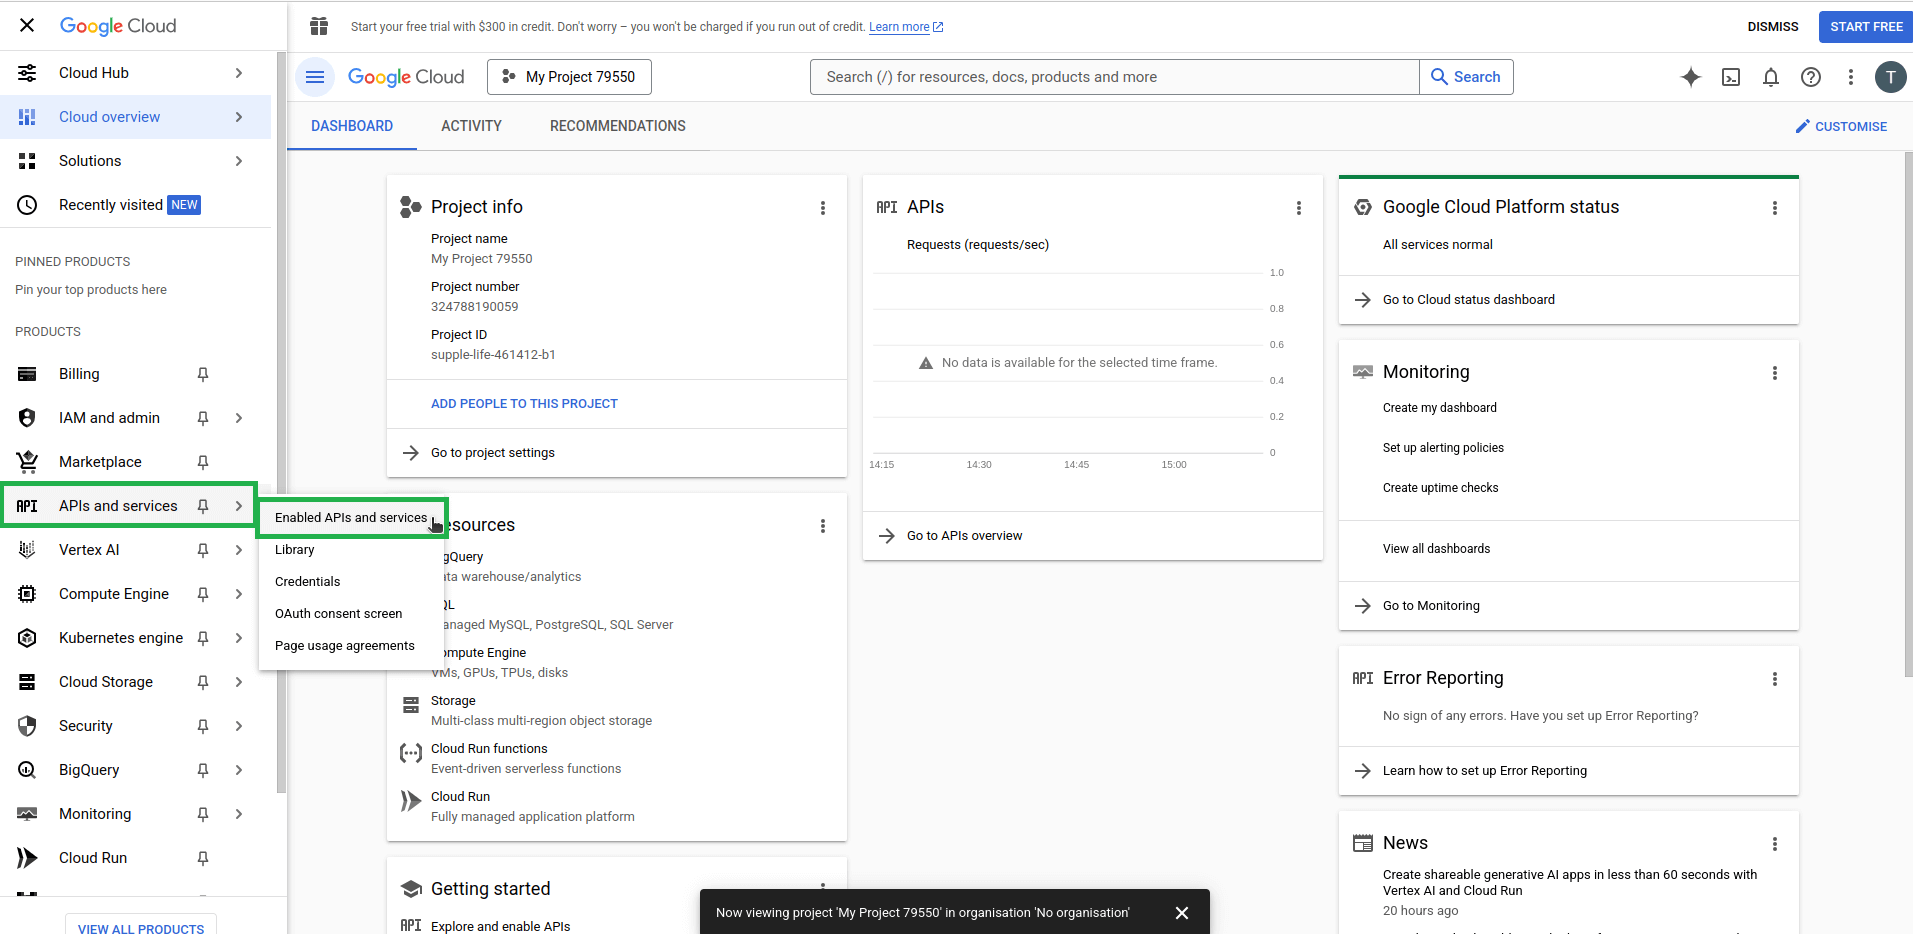
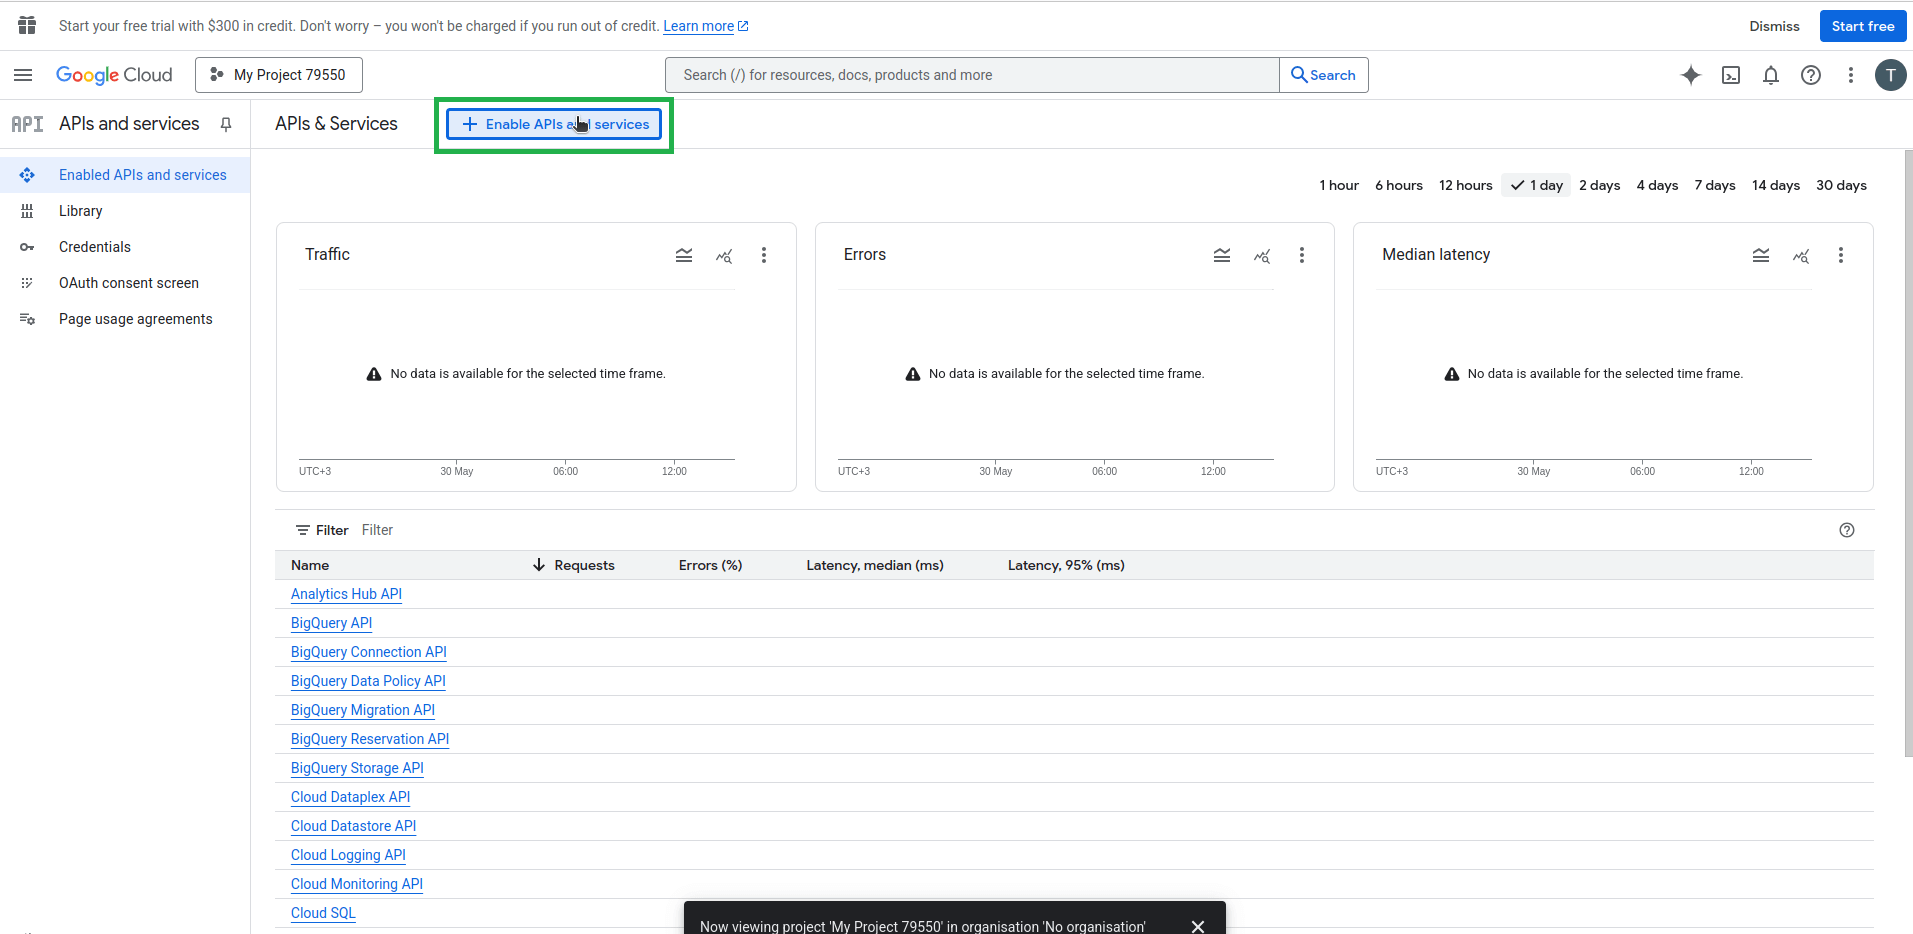
- Click the “+ Enable APIs and services” button.

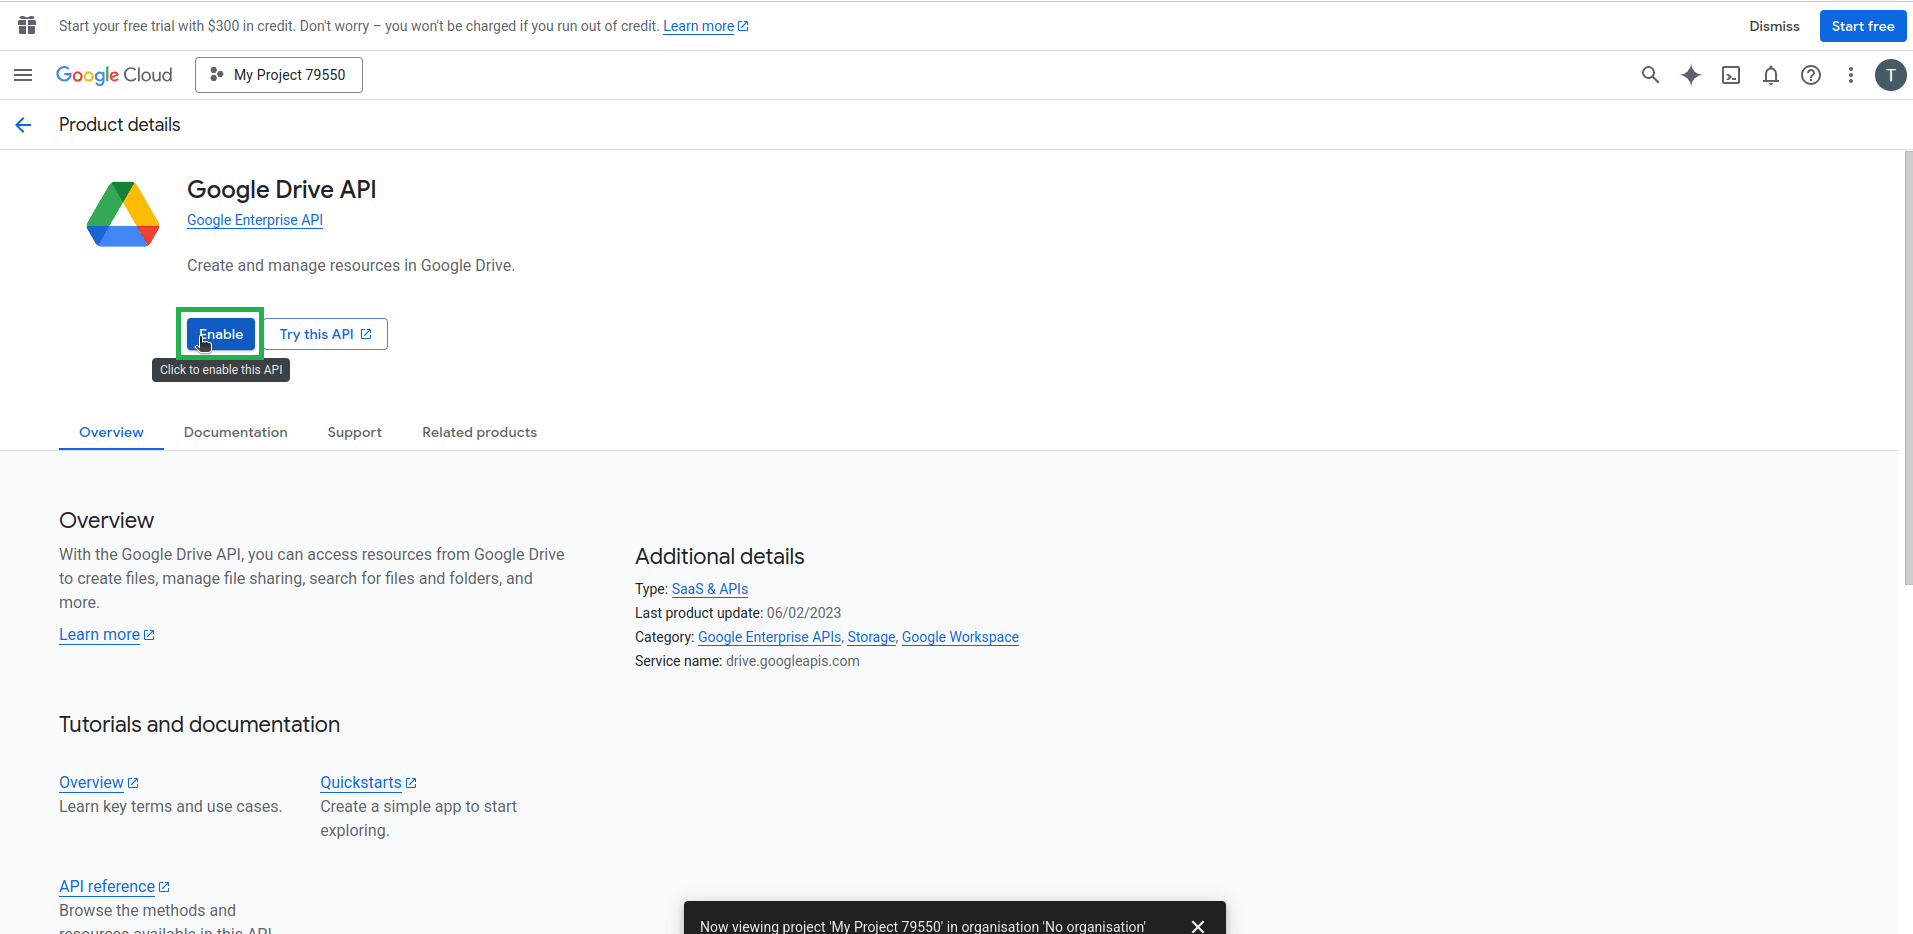
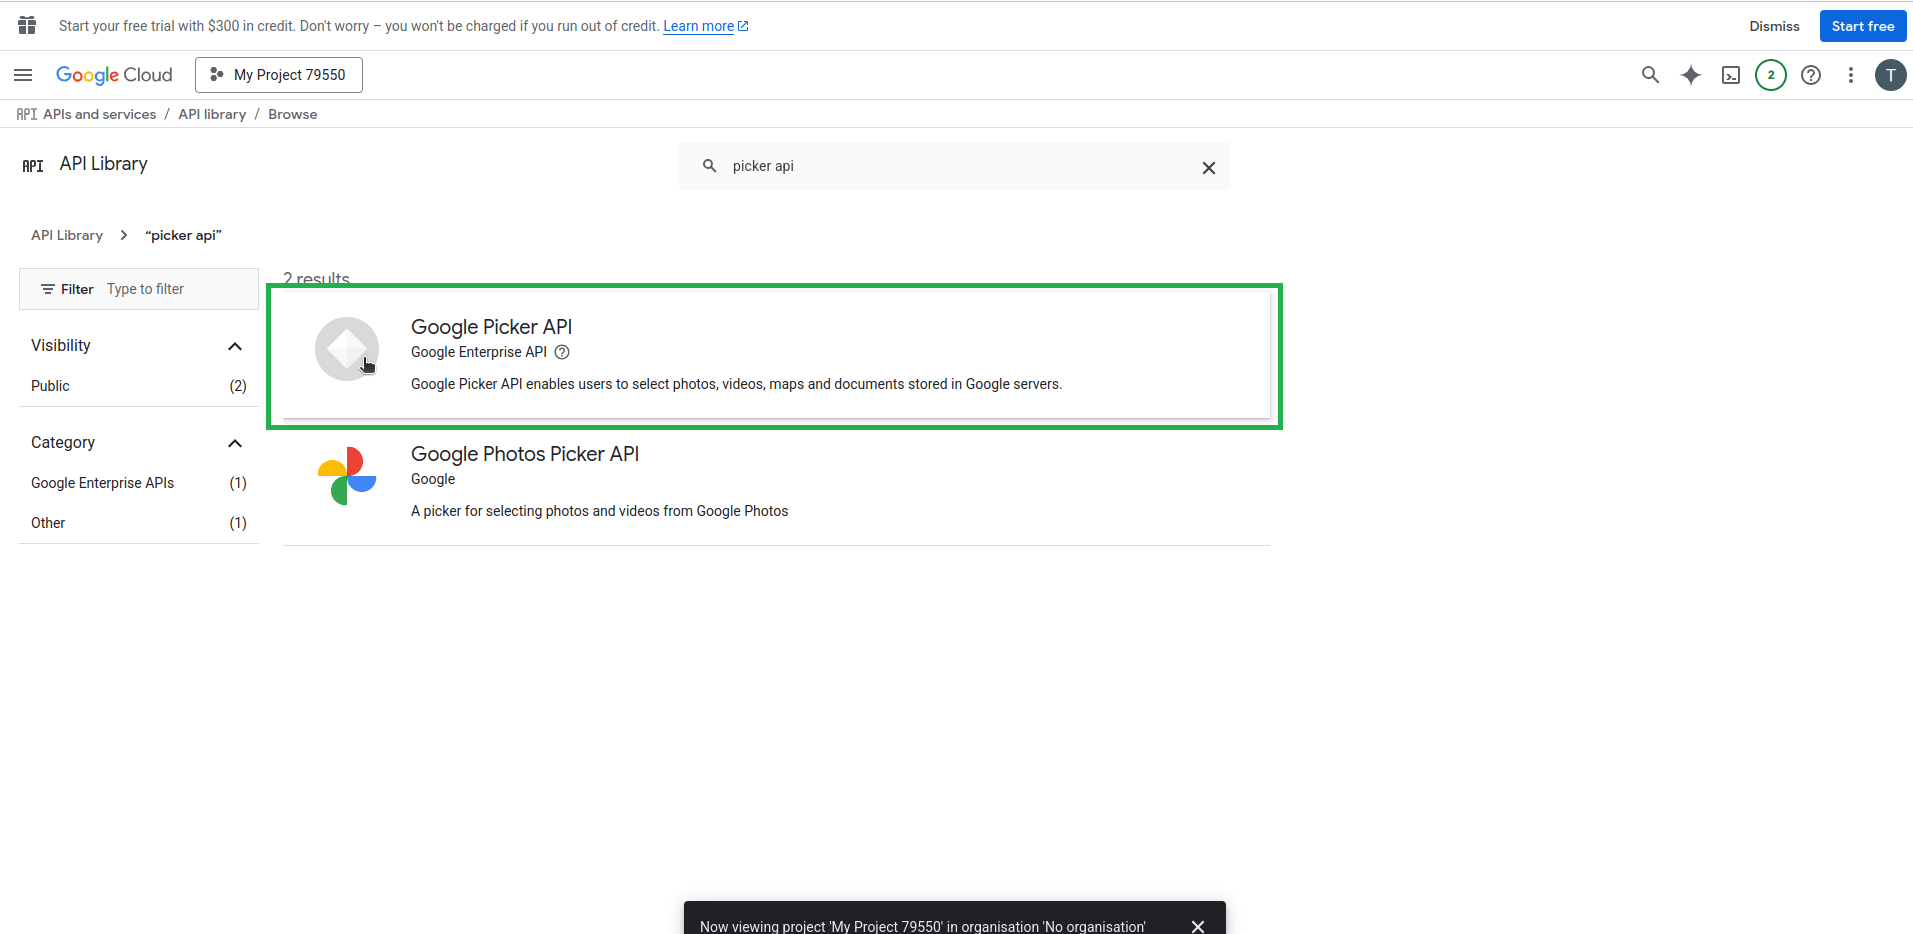
- Search for and enable the following two APIs (Google Drive API & Google Picker API):
- Google Drive API
Select the Google Drive API option.
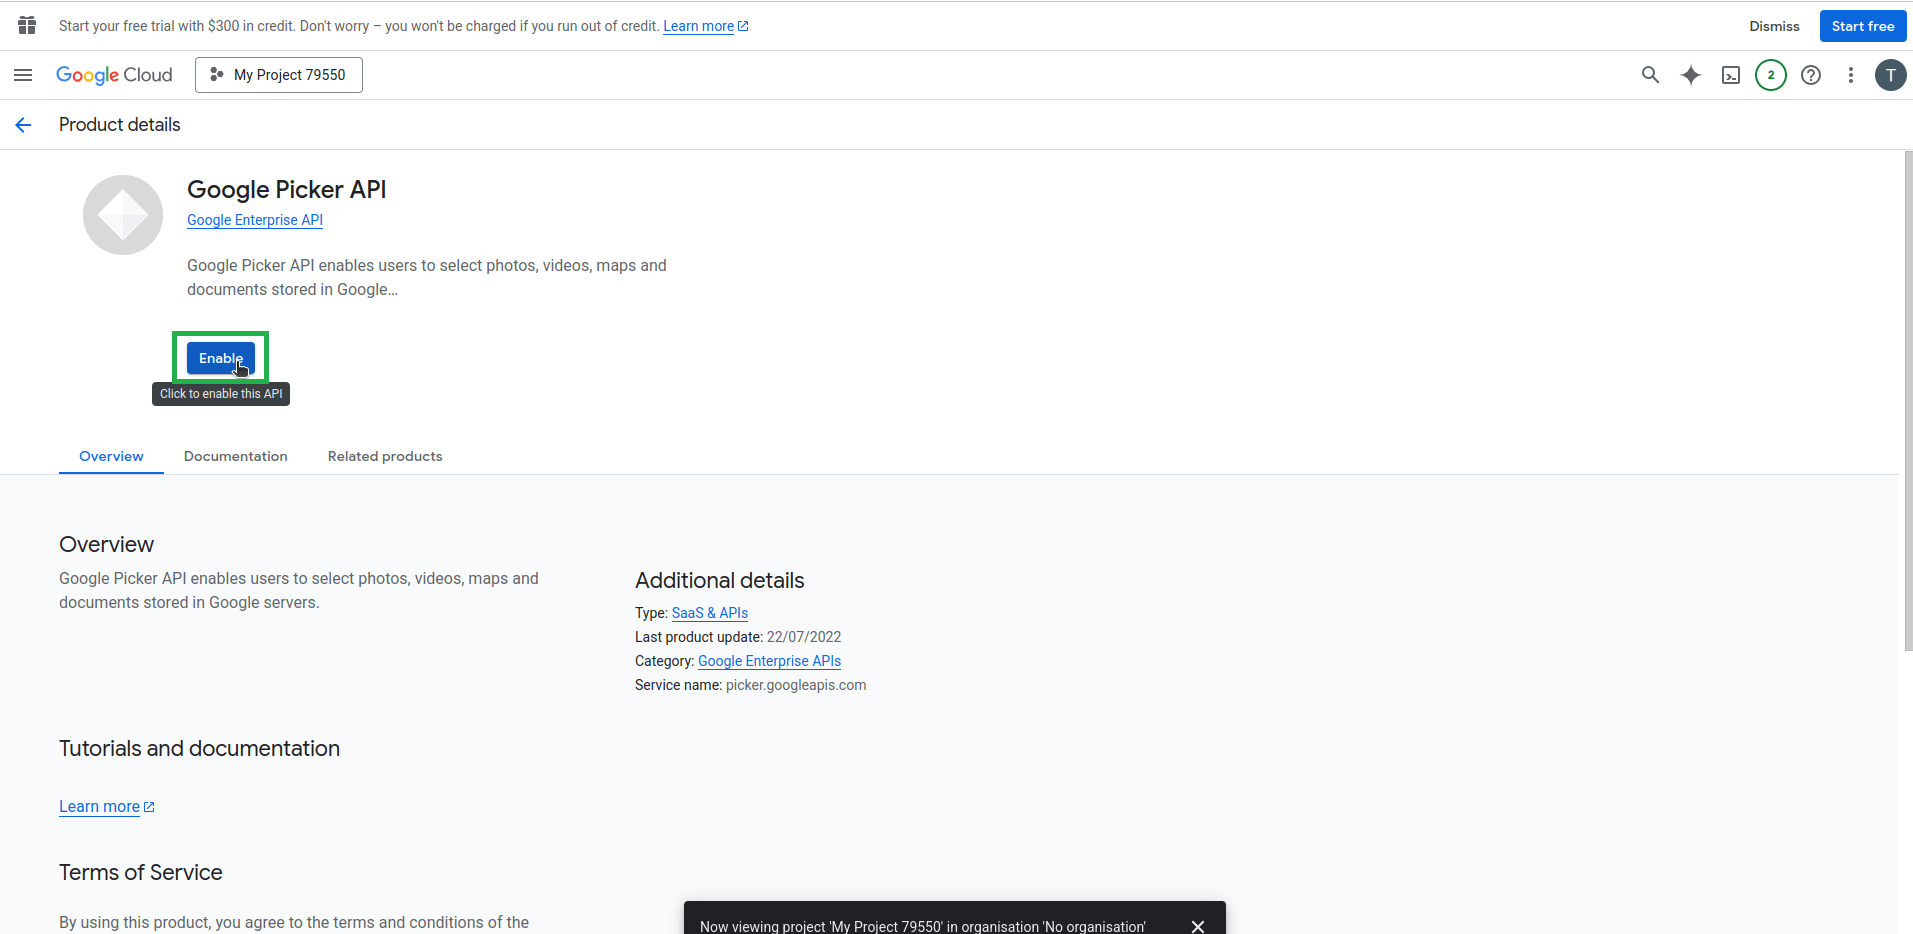
Click the Enable button. - Google Picker API
Select the Google Picker API.
Click the Enable button.
- Google Drive API

Step 3: Configure the OAuth Consent Screen
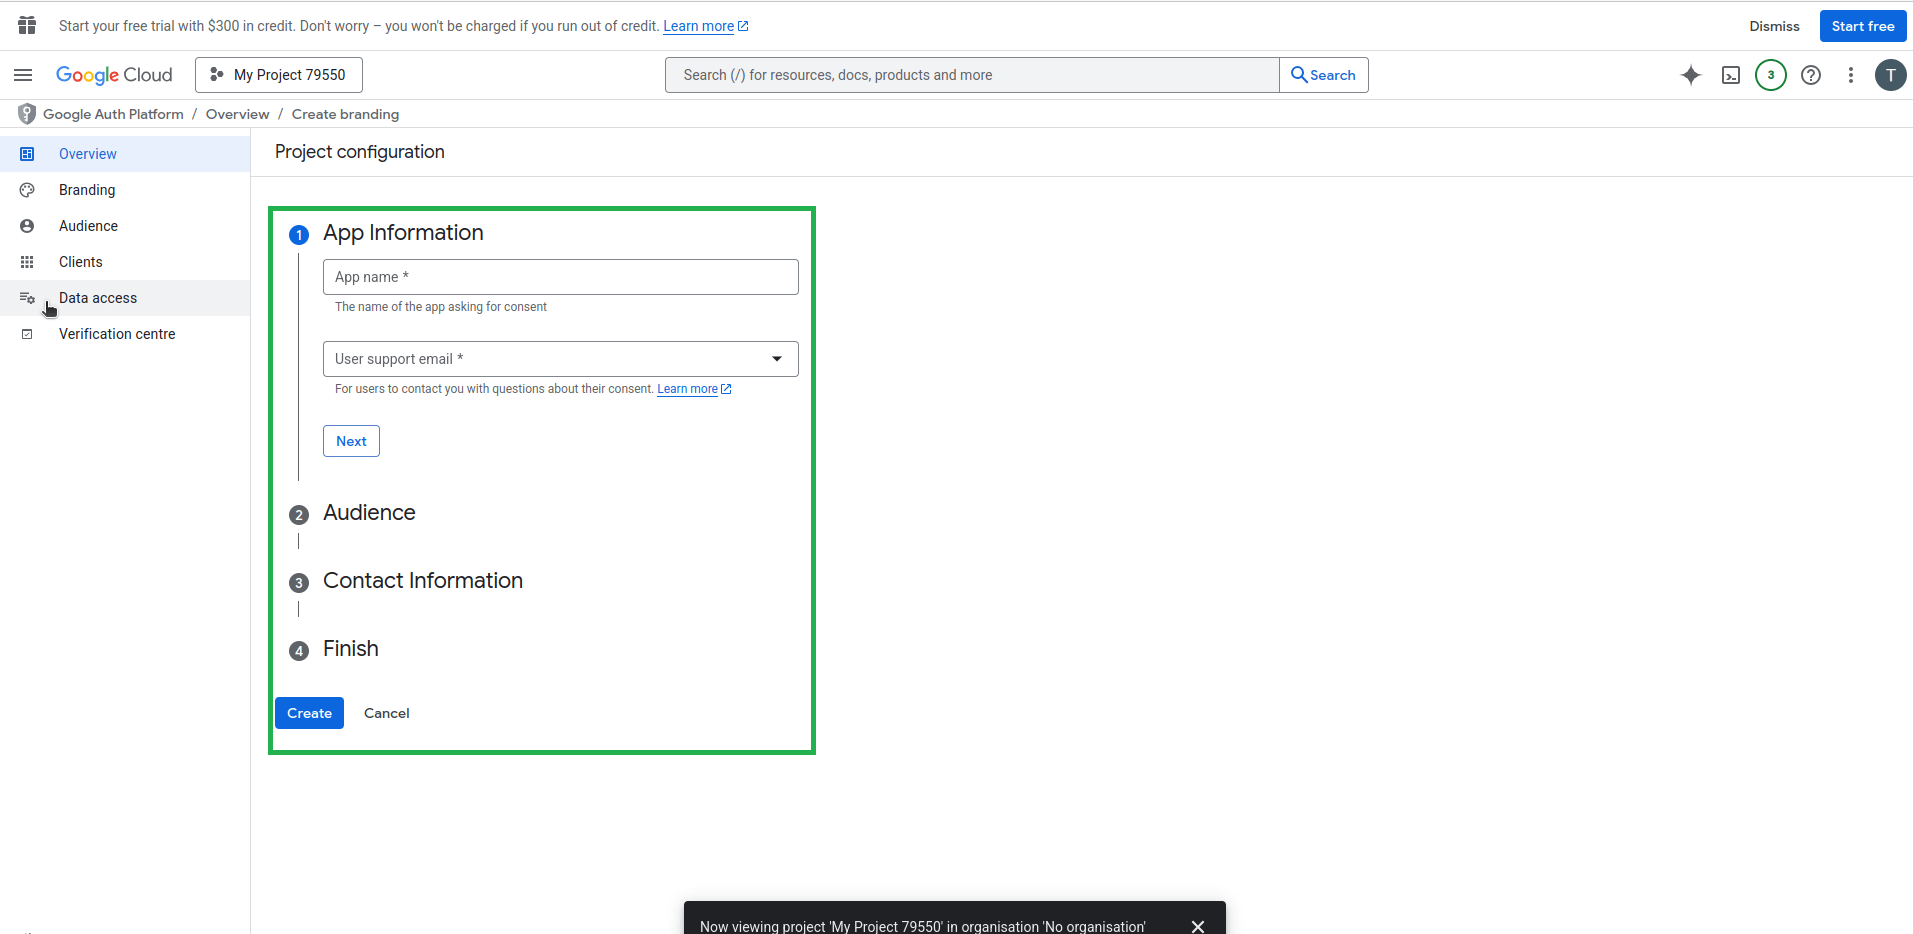
Navigate back to the main dashboard and go to “APIs & Services” > “OAuth consent screen”.
- Please fill in the “App’s information”, namely the App name and the User support email, and click on Next.
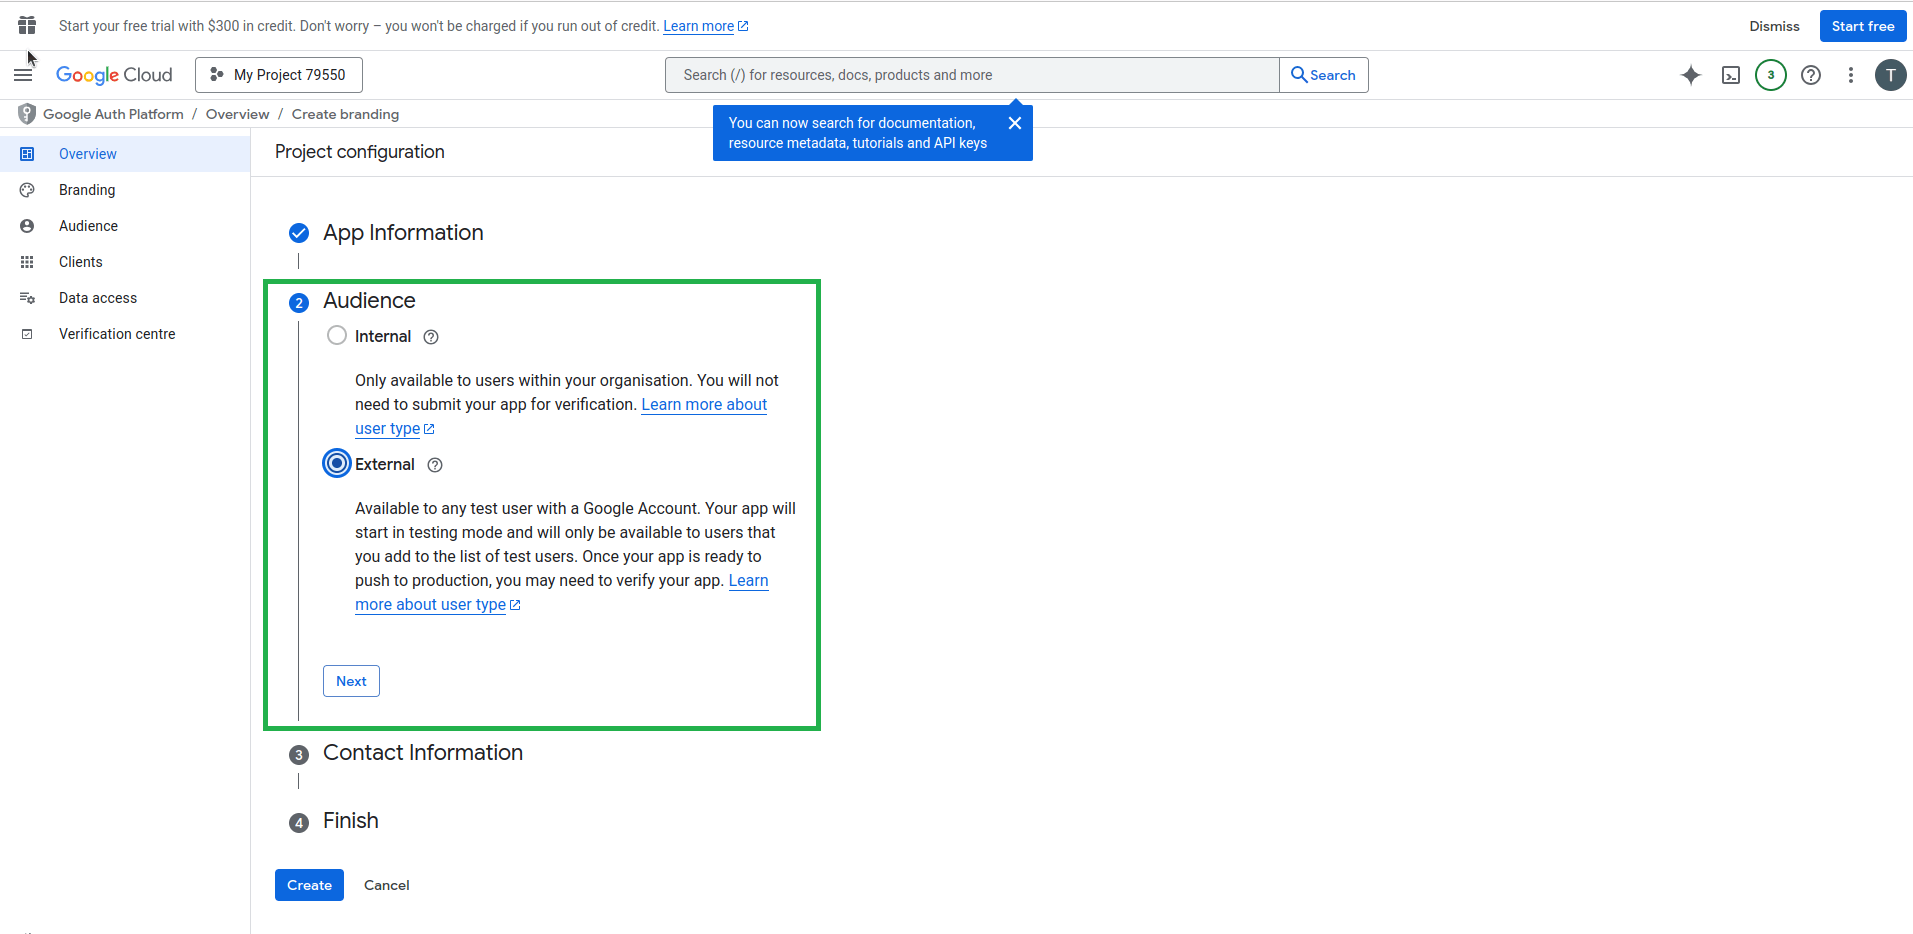
- Afterwards, from the “Audience”, choose “External” as the user type and click Next.
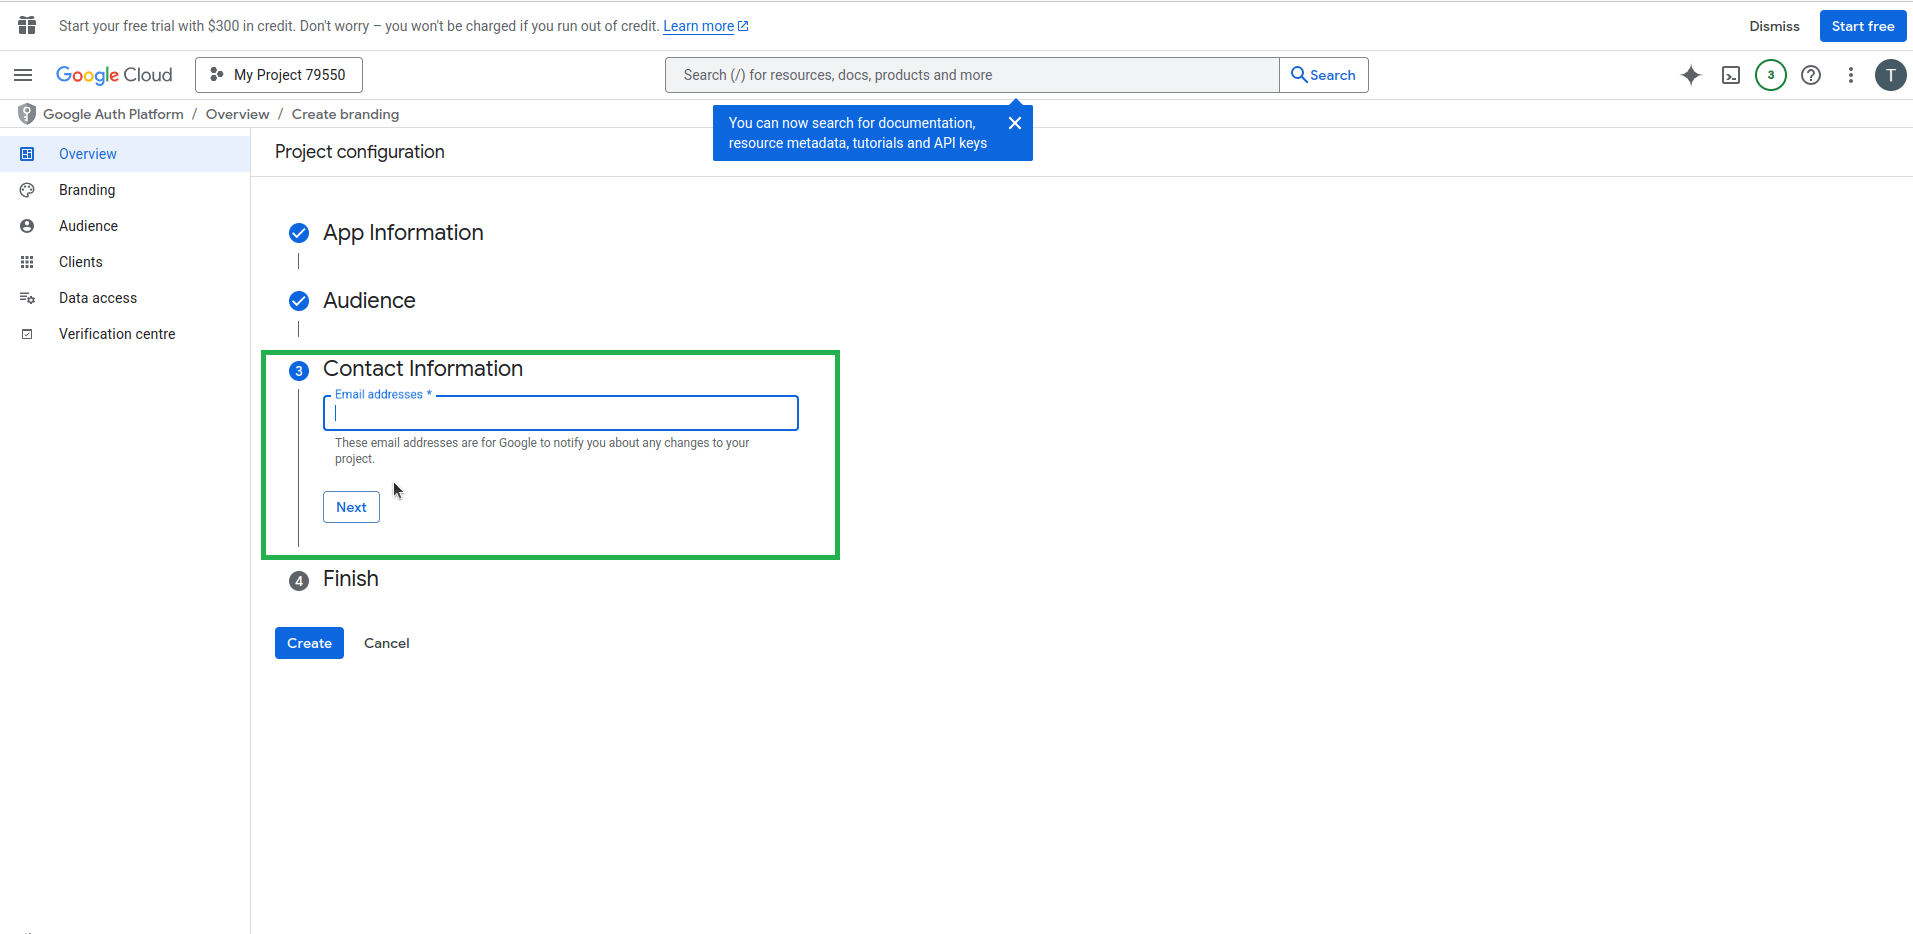
- Then, you need to fill in the “Contact Information” email address (for notification purposes about the project), and click Next.
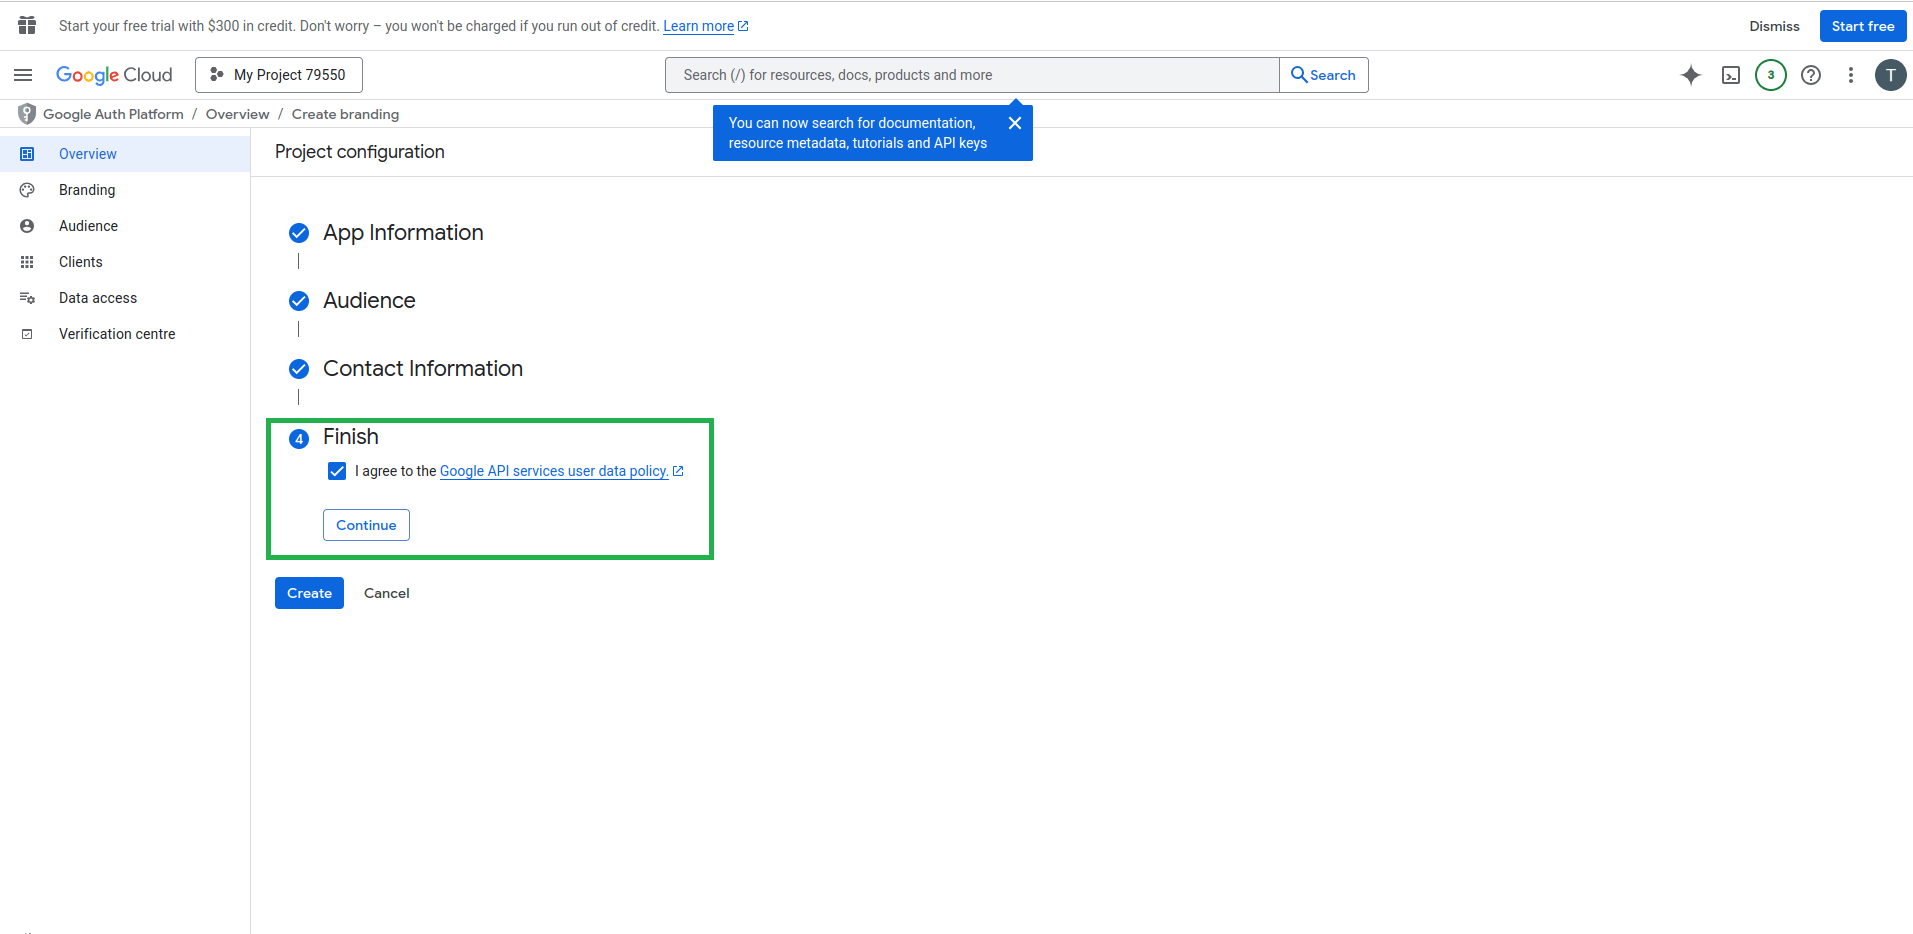
- Lastly, you must confirm the textbox related to the “Google API services user data policy” before clicking the Continue and Create buttons.
You have now completed the OAuth Consent Screen Configuration.
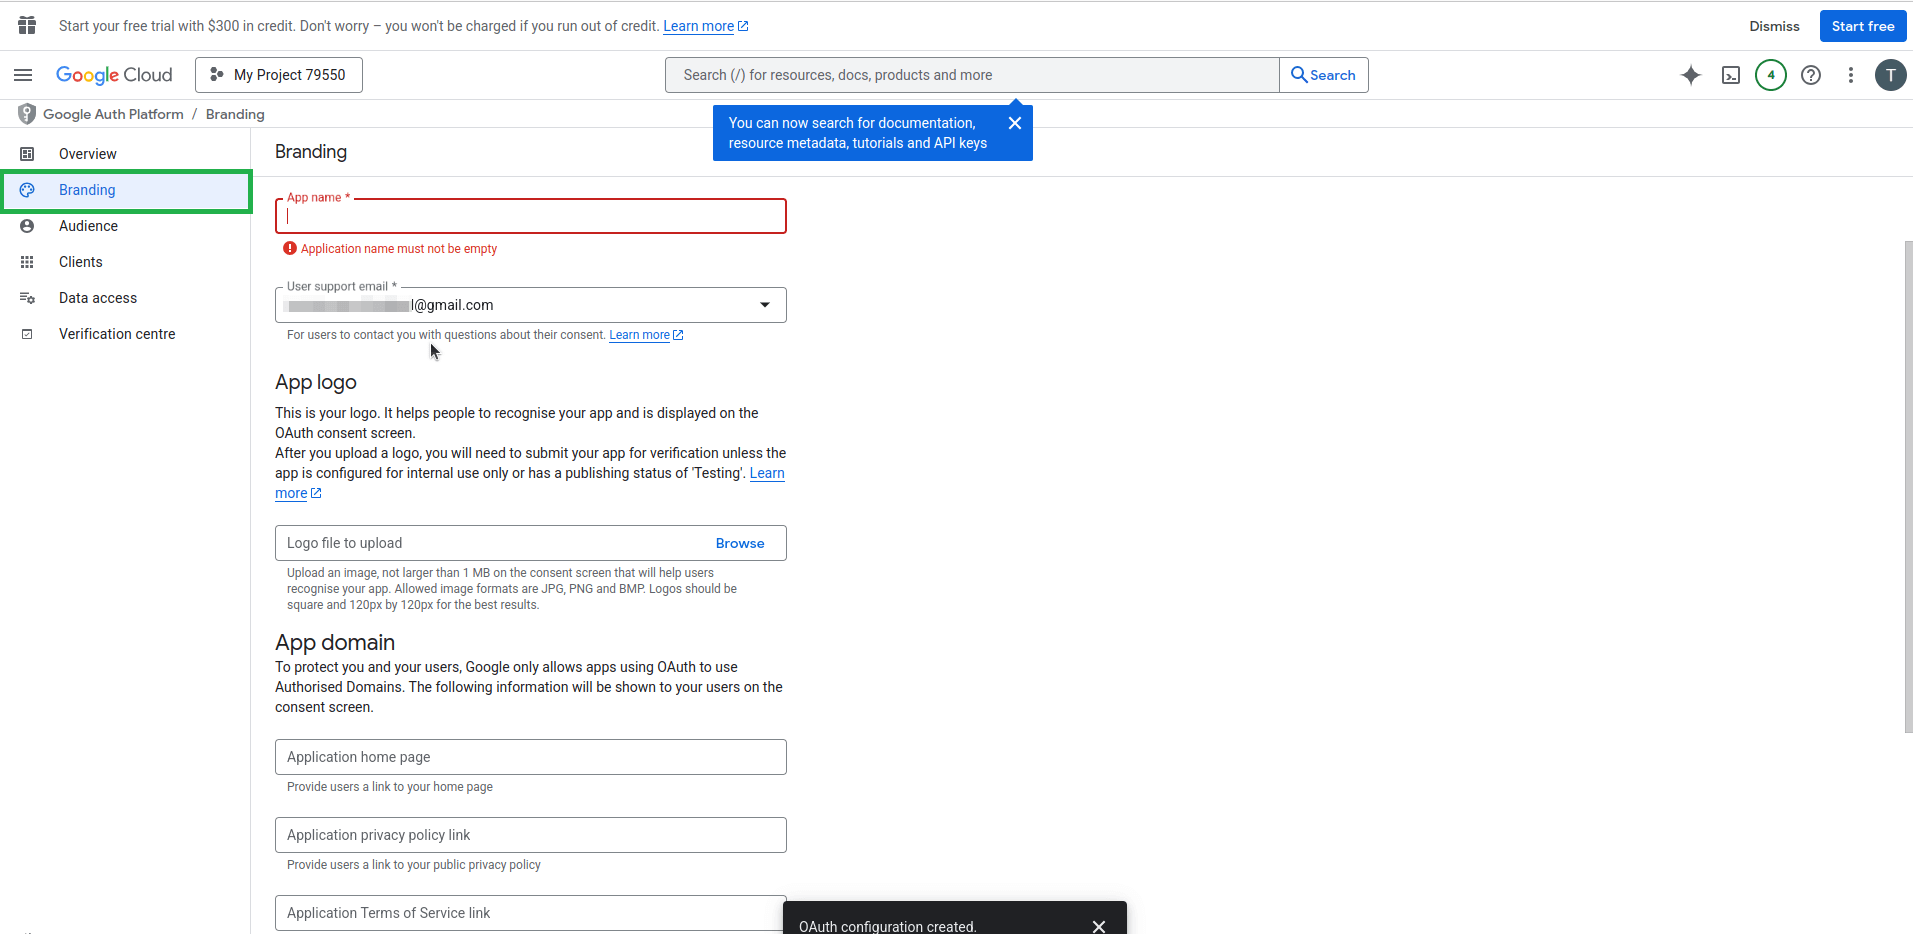
Step 4: Define the Branding
To define the branding, navigate to the “Branding” tab first.
- Fill in the App‘s Branding information, namely the App name, the User support email, and the App logo (optional).
- Then, you must fill in the App‘s domain information.
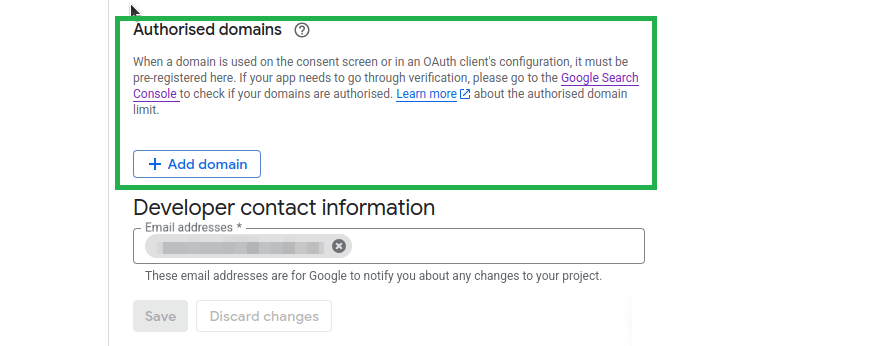
- You must also fill in the Authorised domains. Here, you can type all your customers’ sites’ valid authorised domain URLs. You can also use a wildcard.

- Lastly, you must fill in the “Developer contact information” email address, and then click the Save button.

You have completed the app branding.


Step 5: Define Required App Scopes
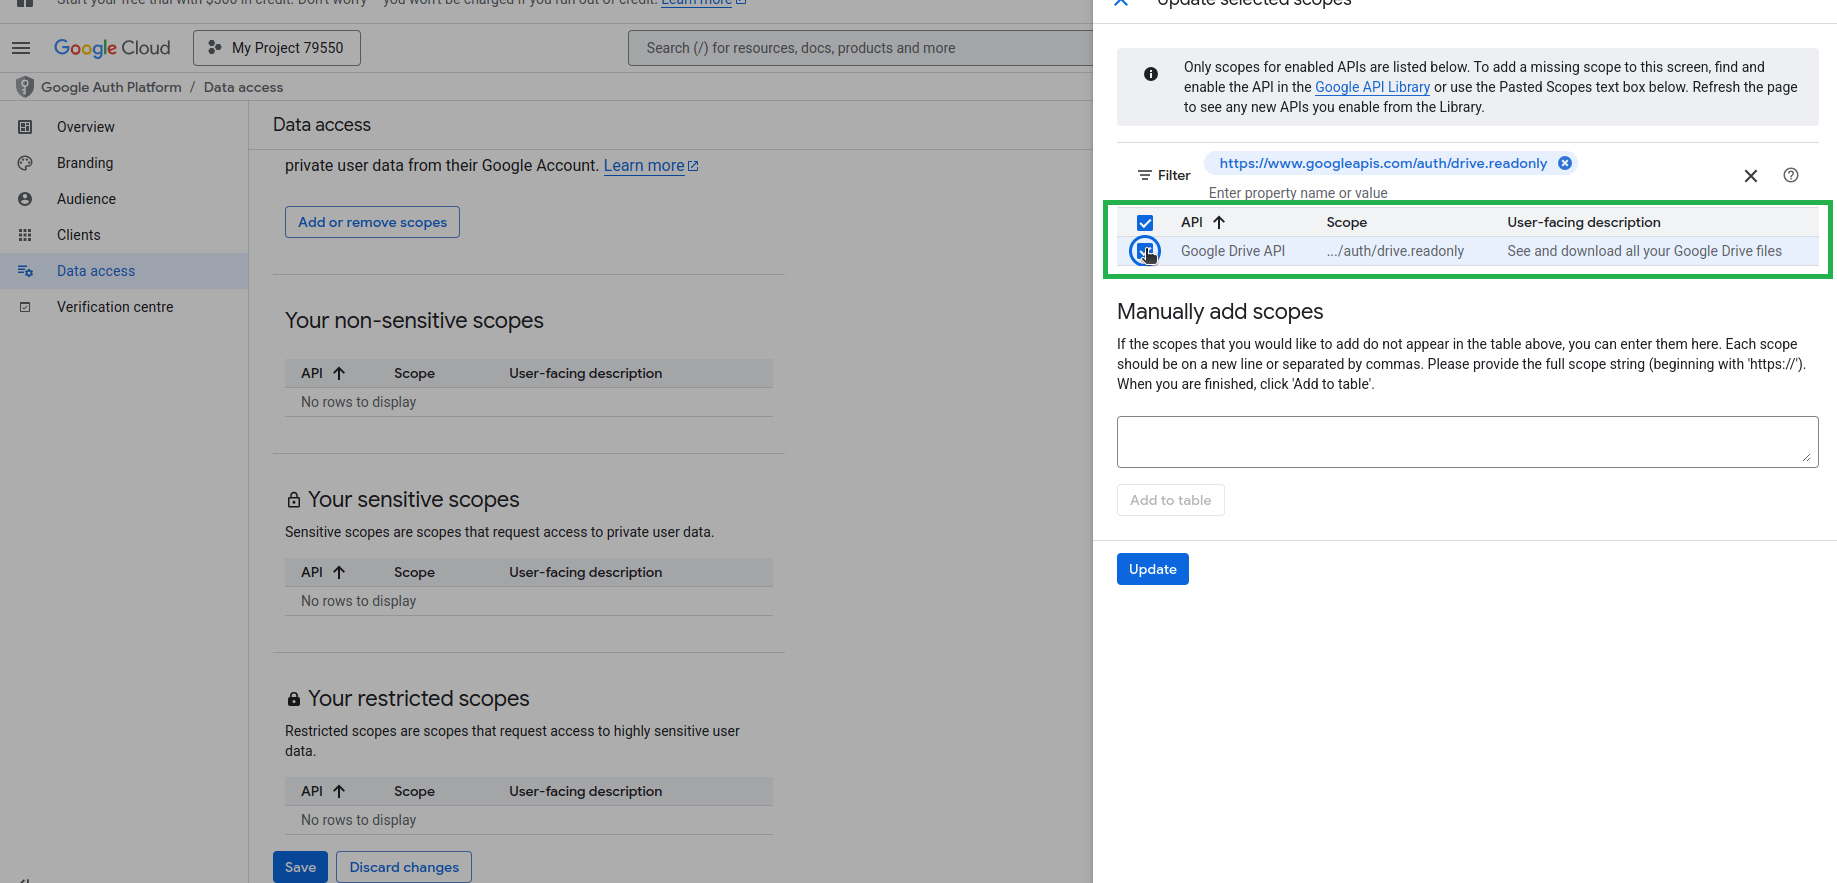
Navigate to “Data access” tab. In this tab, you have to select all the required scopes for the app. Scopes express the permissions that you request users to authorise for your app and allow your project to access specific types of private user data from their Google Account. These are the scopes below that you must select on the following step (1):
- “https://www.googleapis.com/auth/drive.file”
- “https://www.googleapis.com/auth/drive.readonly”
- “https://www.googleapis.com/auth/drive.metadata.readonly”
- Click the “Add or remove scopes” button. Select each one of the aforementioned scopes individually.

You have completed the definition of the required app scopes.
Step 6: Create OAuth Client ID
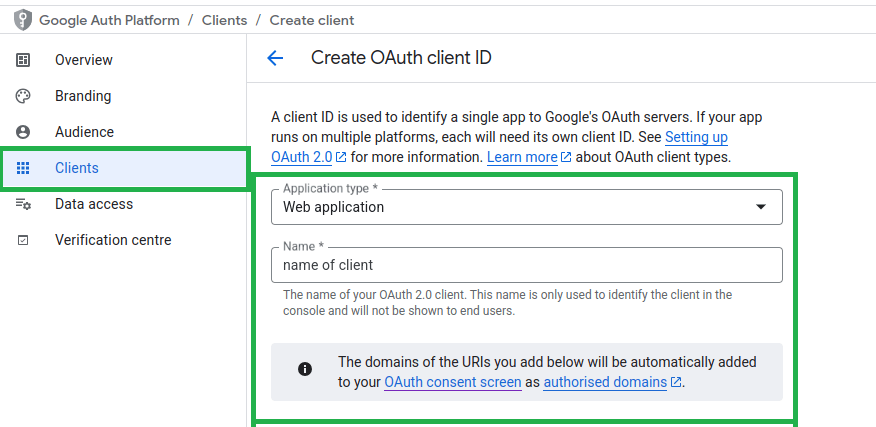
You must also create a client for the app. Start by navigating to the “Clients” tab under the OAuth consent screen section.
- Click the “+ Create Client” button.

- Choose “Web application” as the Application Type, and fill in an identification name for the client.

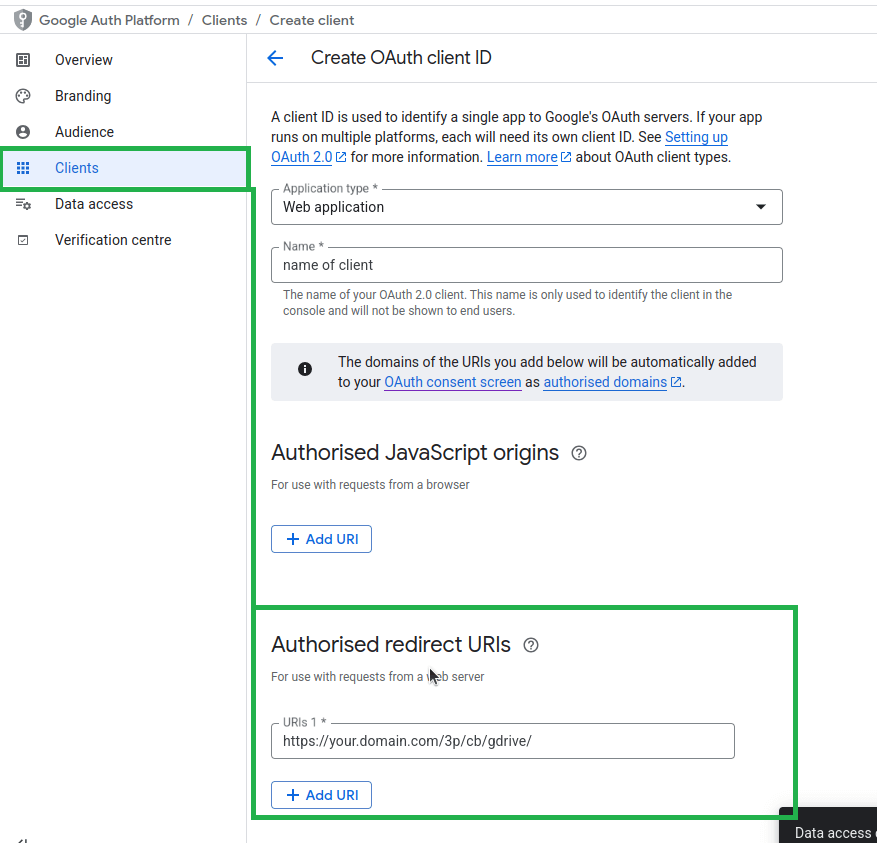
- Fill in the “Authorised Redirect URIs” carefully. Click the Add URI button and type your domain’s name with this extension “/3p/cb/gdrive” (without the quotes). Make sure that you have typed your site correctly. Example: https://your.domain.com/3p/cb/gdrive/

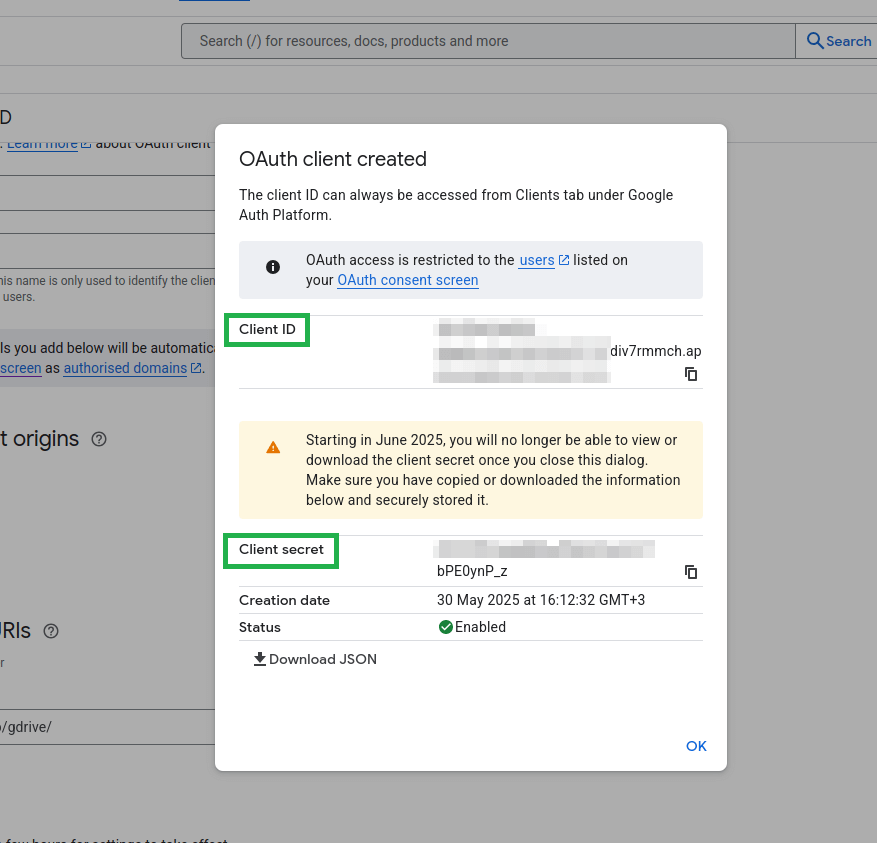
- Store the “OAuth client” carefully. The “Client ID” and “Client secret” are required for the app.
⚠️ Never share these credentials publicly!
You have completed the OAuth Client ID creation.

Step 7: Generate an API Key
Since an API key is also another app requirement, you must create one.
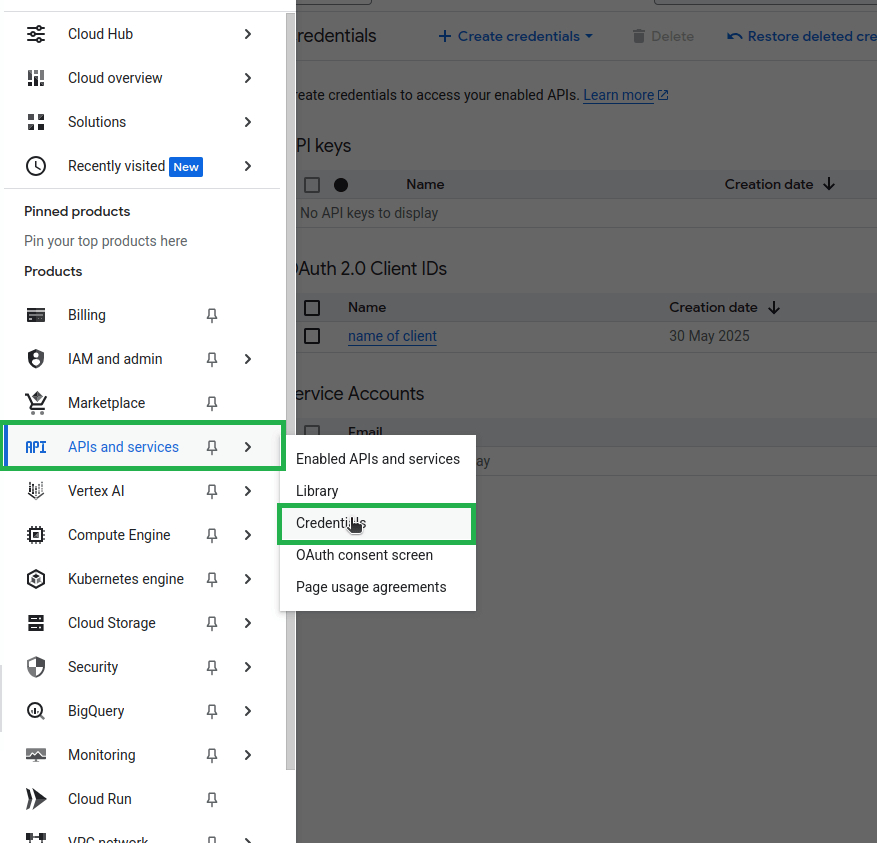
- Navigate back to the main dashboard and go to “APIs & Services” > “Credentials”.
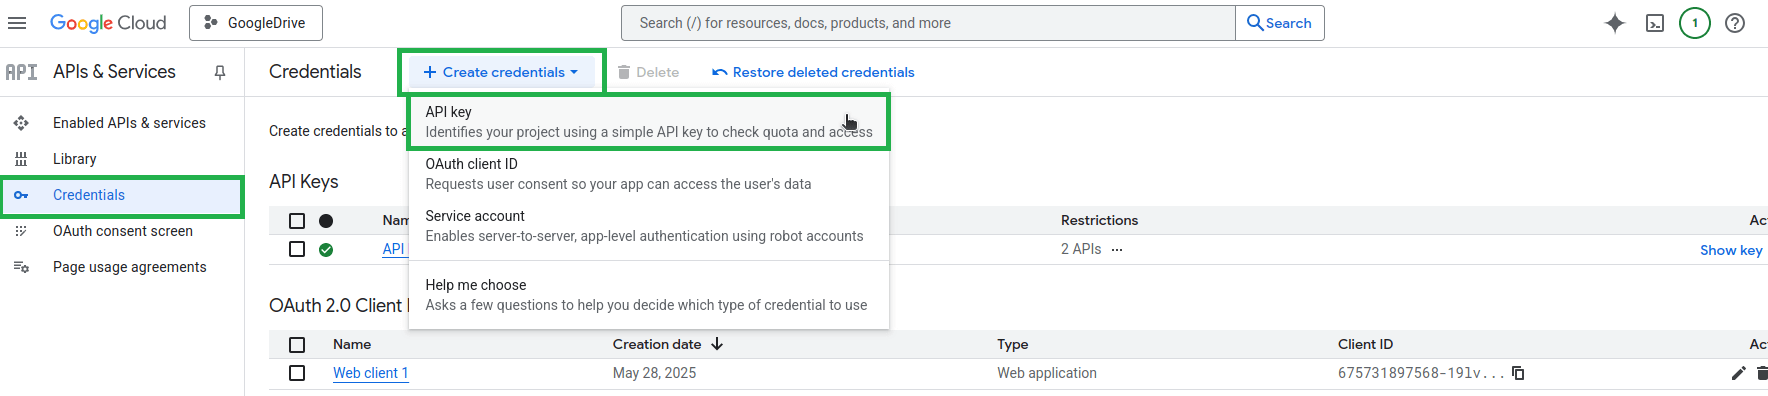
- Click “+ Create Credentials” > “API key”.

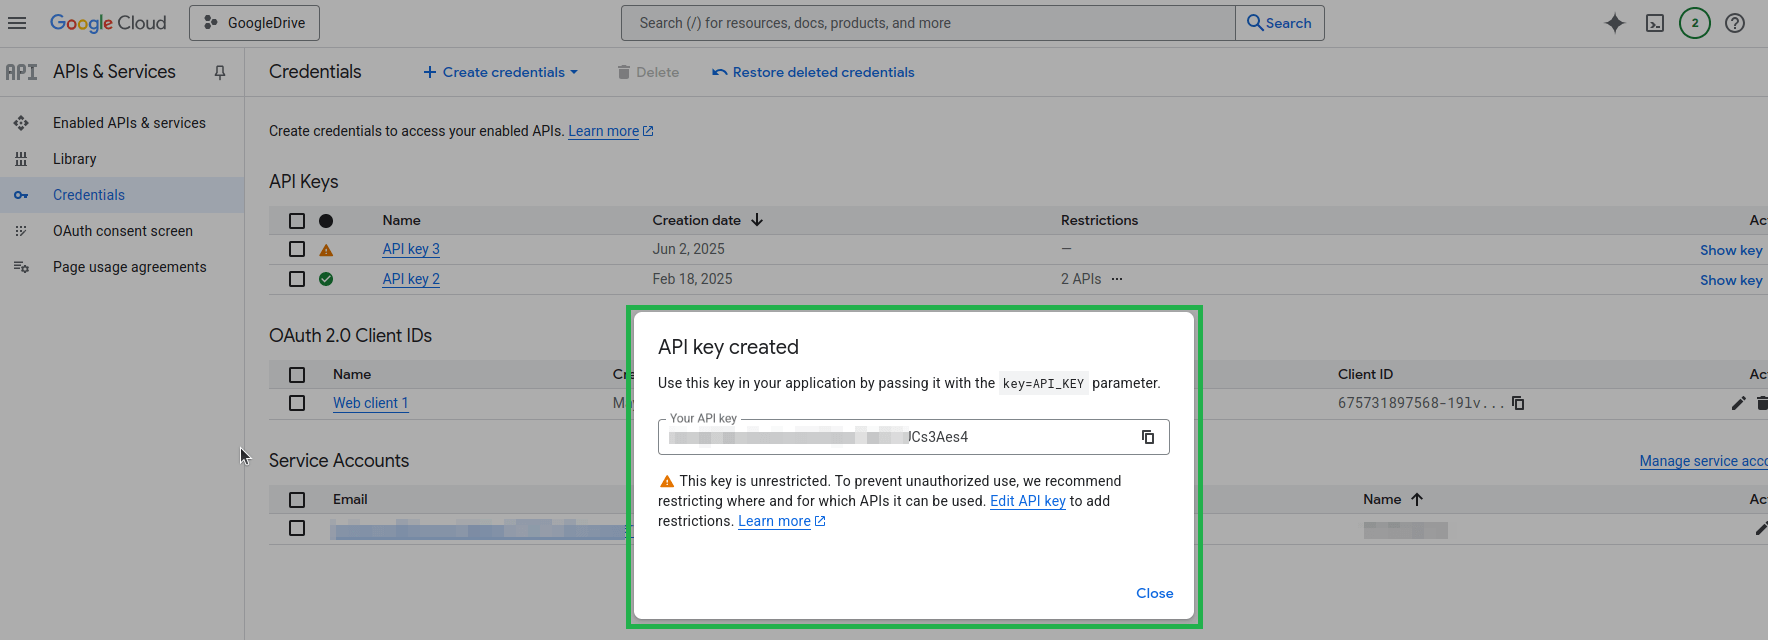
- Since the key is created, edit its configuration. Select in the “API restrictions” section, the “Google Drive API” and “Google Picker API”, and click on the Save button.
- Afterwards, copy and store the API key value.

You have completed the API Key generation.
Step 8: Connect Google Drive to Your White Label Site
After completing the above steps, we now need to pair this Google Drive App with your Whitelabel site.
Follow the link below:
- https:// yoursitesdomainhere /yconsole/partners/siteconnection3ps/add/
Make sure that you have replaced the ” yoursitesdomainhere ” with your actual Whitelabel domain name.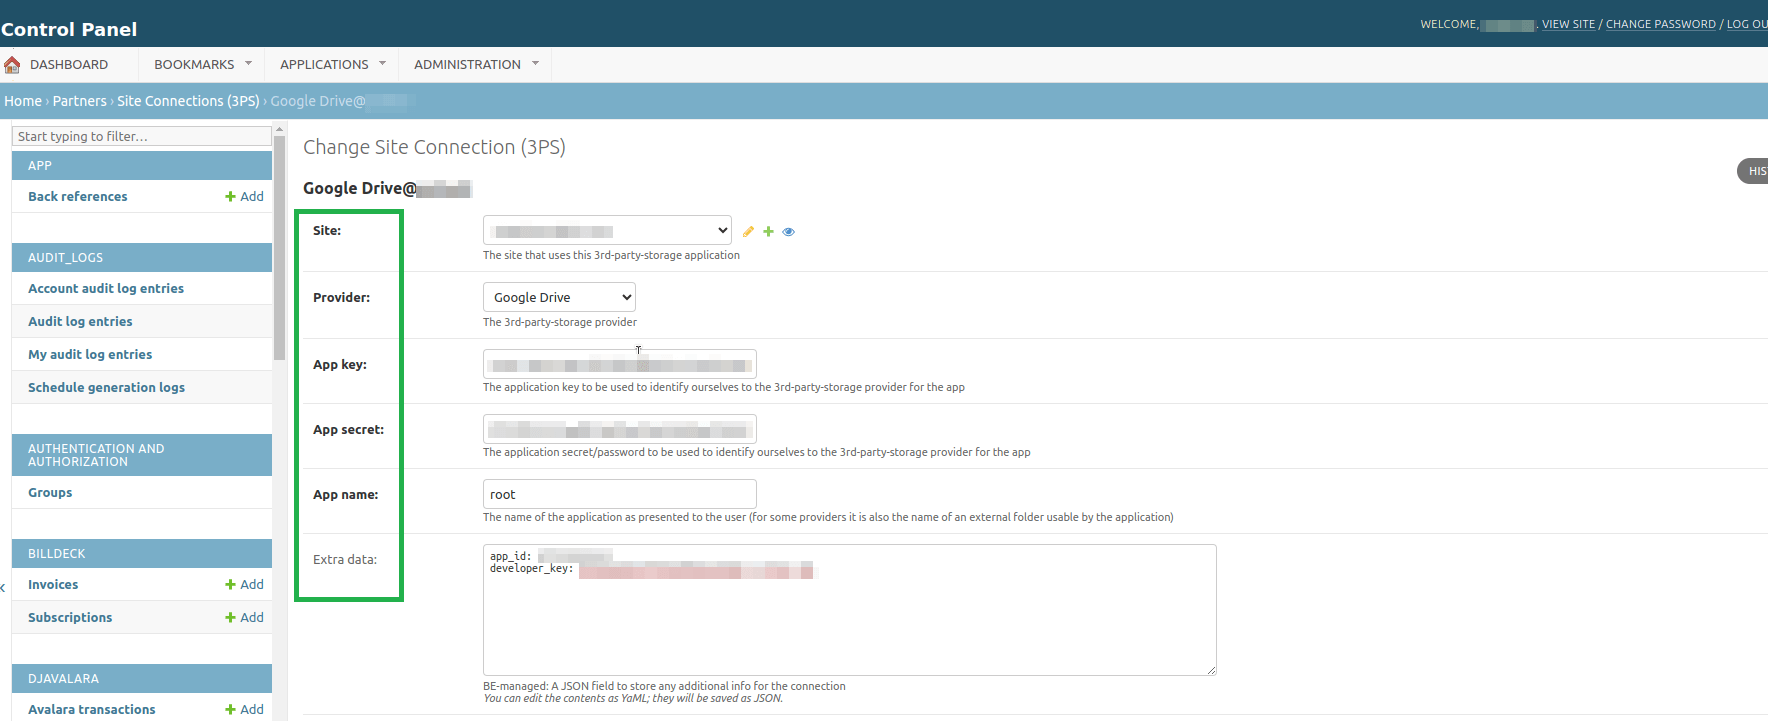
Fill in the required fields:
- Site: Choose your site from the list.
- Provider: Choose “Google Drive”.
- App key: Copy and paste the “Client ID” parameter from the previously analyzed Step 6.
- App secret: Copy and paste the “Client secret” parameter from the previously analyzed Step 6.
- App name: Type in the word “root”.
- Extra data: Be careful with the syntax:
appId: XXXXXXXXXXX (the preceding digits in "App key" before "-")developer_key: XXXXXXXXXXXXXXXXXXXXXXXXXXX (The API Key created in step 6 in "Clients" section) - Click Save to complete the integration.
Your Google Drive playlist integration is now complete. Your customers can start linking their Google Drive files securely through your platform. If you experience issues during setup, ensure all credentials and URIs are entered correctly and that the required APIs are enabled.
How can my clients configure the Google Drive playlist now to their accounts?
Check this article here on how your clients can now configure a Google Drive playlist for their accounts. Feel free to download this guide as PDF and share it with them.