The Webpage Recording Tool simplifies the power of the Web Scripting Engine by allowing you to record your actions on a webpage without writing any code. The code is automatically generated based on the actions being recorded. Therefore, the tool does the scripting/coding for you.
What Can You Do with the Recording Tool?
Please review the following bullet points to better understand the tool’s capabilities:
Select Element: Records all the clicks and typing (e.g., Logging In, Search, Navigate to specific page/pop-up, etc.)
Remove Element: Removes the selected element and displays the rest of the web page.
Scroll to Element: Scrolls the web page until the selected element is visible on the page. The scroll action will not appear as a video showing the page scrolling at a certain speed. Instead, it will display the final scrolled state, similar to a screenshot.
Extract Element: Removes everything apart from the selected element on the web page.
Visual Flow View: See a simplified, visual representation of your script, perfect for non-technical users.
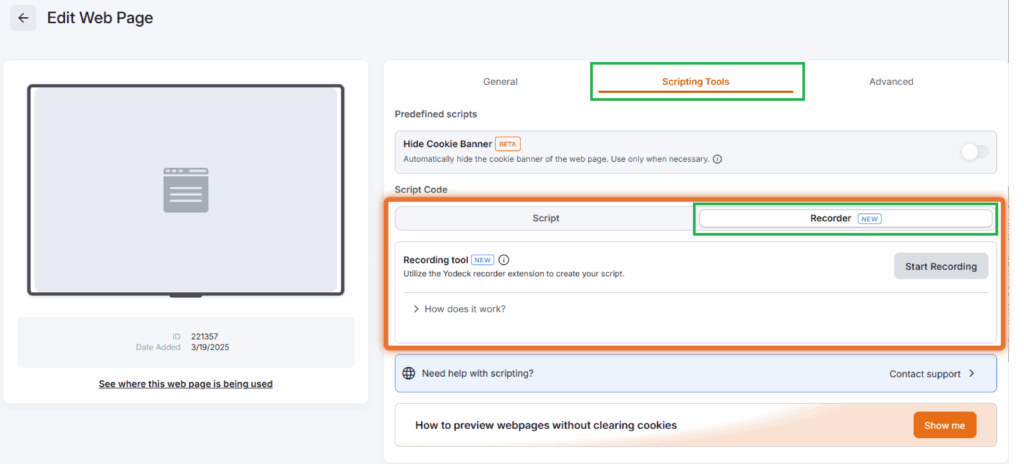
View of the Recorder Tool inside the Edit Web Page modal
Limitations of the Recording Tool
Keyboard-Only Actions are Not Recorded: Only mouse clicks and typing in input fields are recorded; actions like pressing the “Enter” key are not captured.
Chrome Browser Requirement: The Webpage Recording Tool is only compatible with Google Chrome.
Unsupported 2FA Logins **: Currently, you cannot document the steps for two-factor authentication. We plan to provide support for these features in future updates.
Shadow DOM & iFrame Limitations: Currently, the tool does not support Shadow DOMs, closed shadow roots, or iFrames. We plan to provide support for these features in future updates.
Separate Window Logins Not Supported: If a login process opens a separate window (like Google authentication), it cannot be captured.
Scrolling Behavior: The tool captures the final scroll position but does not animate the scrolling process.
Web Preview vs. Screen Playback Differences: Minor display differences may occur between browser previews and actual playback on Raspberry Pi-based players.
Screen Ratio Impact on Scrolling: On some setups, scrolling behavior may vary depending on the screen’s aspect ratio.
** For “2FA Login” cases, you can contact our support team to help you out with the setup.
Prerequisites Before Getting Started
To use the Webpage Recording Tool, ensure you:
Use Google Chrome.
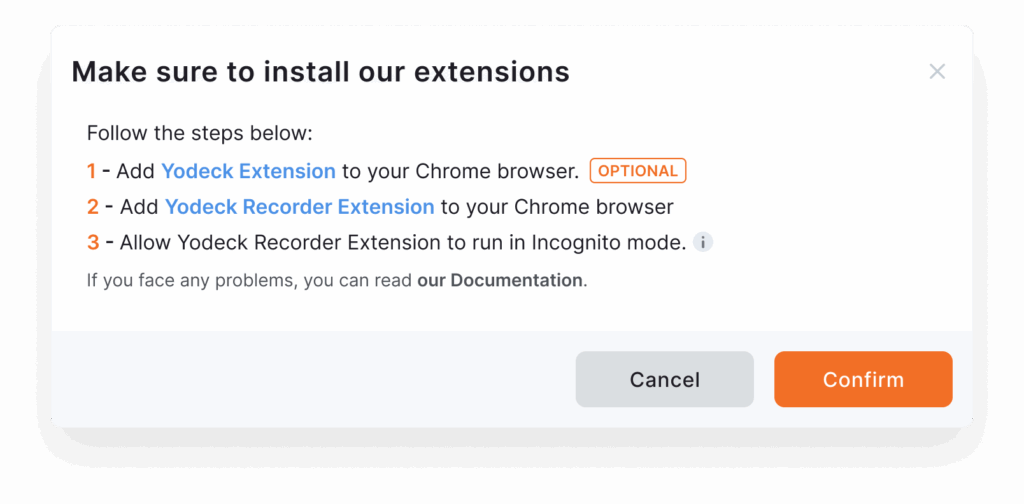
Install the Yodeck Recorder Extension.
Enable the extension in Incognito Mode.
(Optional but recommended) Install the Classic Yodeck Extension for webpage previews.
💡Yodeck smartly checks which tools you already have and will guide you through any missing steps.
Prerequisites Help pop-up window
Steps for Creating a Webpage Recording
To use the Recording Tool in Yodeck, go to Media > Web Pages from the main menu.
Step 1: Start Recording
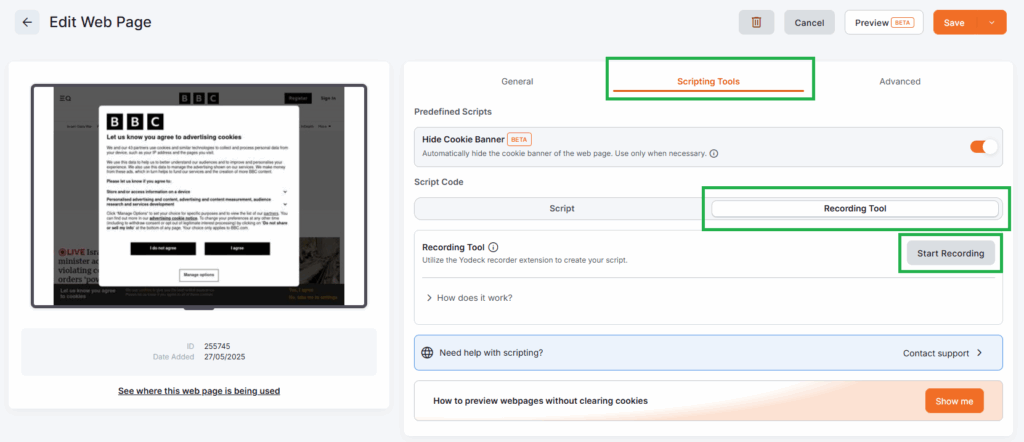
Select an existing web page or create a new one. In the Edit Web Page modal, click the Scripting Tools tab, then click the Start Recording button to begin.
Starting the Recording Tool
Existing Script Code
The platform checks for existing code in the script box, and if code is found, a warning message appears stating that the Recording Tool will overwrite any existing script if you proceed.
Step 2: Interact with the Webpage
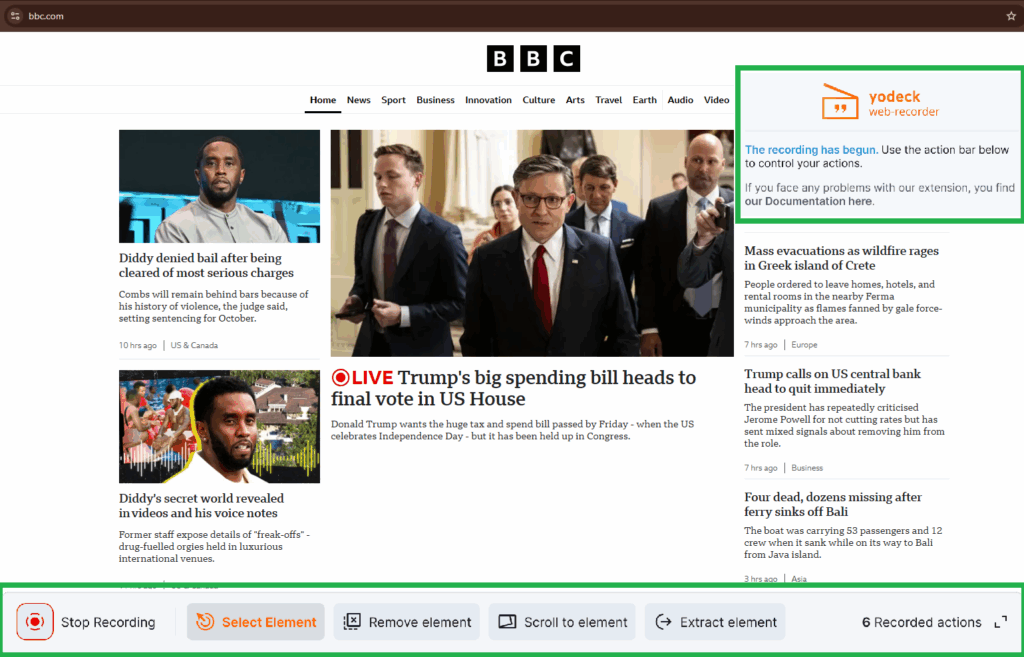
Once you initiate the recording, a new Incognito web page tab opens with special action buttons, which are the following:
Select Element: Captures clicks and typing (e.g., logging in, searching).
Remove Element: Deletes selected items from the page (perfect for removing ads or popups).
Scroll to Element *: Scrolls to a specific area of the page.
Extract Element: Focuses only on the element you want, removing all other content.
⚠️*Note: Scrolling is captured as a final state, not as a video animation.
Interacting with the web page via the Recording Tool options
Step 3: Stop Recording
When you have finished, click the Stop Recording button. Your recorded actions are automatically converted into a script and displayed in the Recording Tools’ script placeholder.
Stoping the RecordingScript Placeholder
Visual Flow View & Code View
Once the recording has ended, you can observe and do the following.
Default Views:
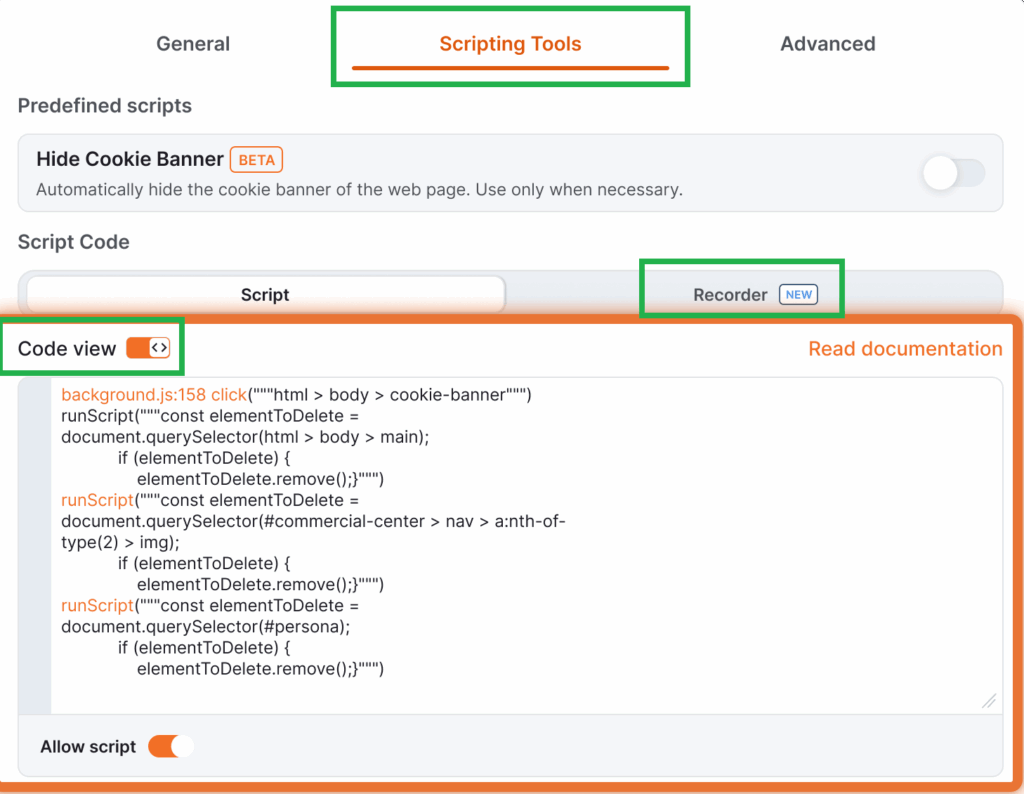
If you already have a script: The Code View is your default view.
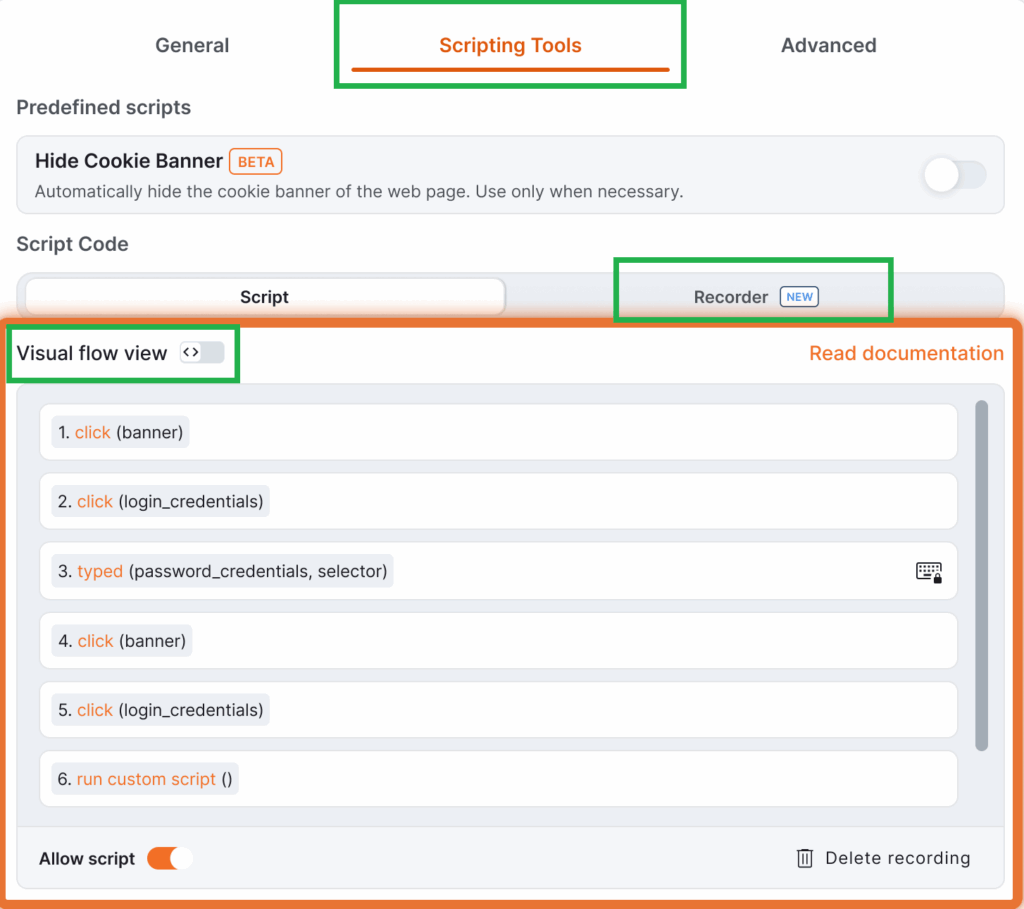
If you’re starting fresh: The Recorder View, also known as Visual Flow View is your default view.
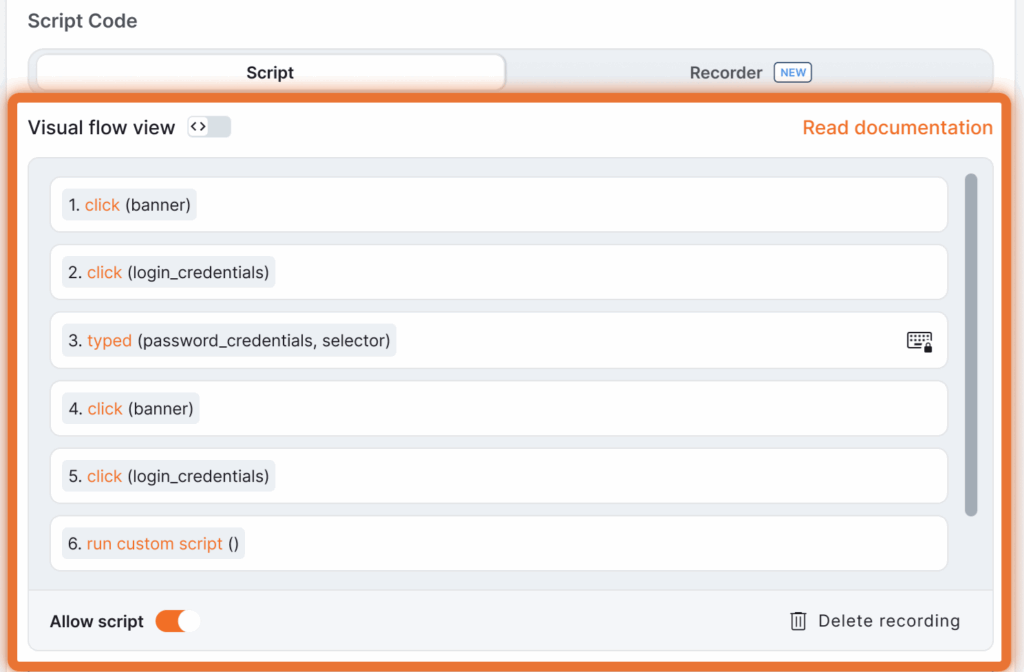
By default, you’ll see a Visual Flow View—a clean, easy-to-follow script summary.
Prefer raw code? Switch to Code View. Yodeck will remember your preference for that webpage.
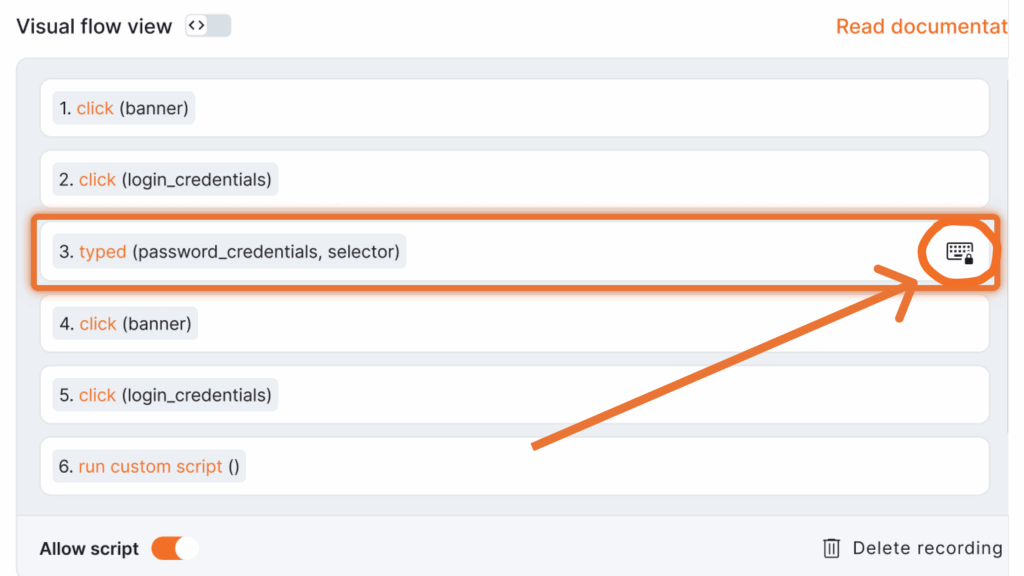
You can also mask typed passwords in your recorded actions to keep them secure.
Button for masking the password credential
Visual Flow View exampleCode View example
💡Pro Tip: Technical users will love the side-by-side updates. Changes made in Code View automatically reflect in Visual Flow View and vice versa.
Examples of Action Buttons During the Recording
You can find below examples from all four action buttons of the Tool (click each one to enlarge it):
“Select” Action Button
“Remove” Action Button
“Scroll to” Action Button
“Extract” Action Button
F.A.Q.s
Got questions? We’ve got answers! This section addresses common questions about the Recording Tool.
Can I preview the web script before using it?
Yes, you can preview the scripted web page directly within Yodeck, but there might be small display differences on Raspberry Pi players.
What happens if my screen size is different from the preview?
Scrolling behavior might vary slightly based on the screen’s aspect ratio.
Can I edit the recorded script?
Yes, you can edit the script in Visual Flow View or Code View, and changes automatically sync between both views.
On some websites, the Recorder toolbar is blocking or overlapping elements I need to interact with. What should I do?
If the Recorder toolbar is covering parts of a webpage you want to click, you can temporarily hide it. Simply click on the toolbar once, then hold down the Space key on your keyboard. The toolbar will disappear while the key is held, allowing you to interact freely with the page.
Need Help?
The Yodeck Support Team can help you out! Log in to your Yodeck account and send us a message from the bottom right corner!