Table of Contents
Overview
Take complete control of your screen audio by scheduling when and how loud your Yodeck Players play sound. Whether you want to lower the volume for quiet evenings or turn it up during busy hours, Volume Schedules make it easy.
Available only on the Premium/Enterprise plan!
This feature is only available on the “Premium/Enterprise” Plan. You might not see some menus below if you are not on the “Premium/Enterprise” Plan.
Remember that the “Premium/Enterprise” Plan is free if you only manage 1 screen to evaluate these features quickly.
What Are Volume Schedules?
These schedules let you automatically adjust the volume of your screens at specific times of the day, week, or month. You can create multiple schedules and assign them to one or more players, directly from the Sound/Display tab.
Step-by-Step Setting Up Volume Schedules
Step 1: Locating the “Volume Schedules” Page
- Log in to your Yodeck account.
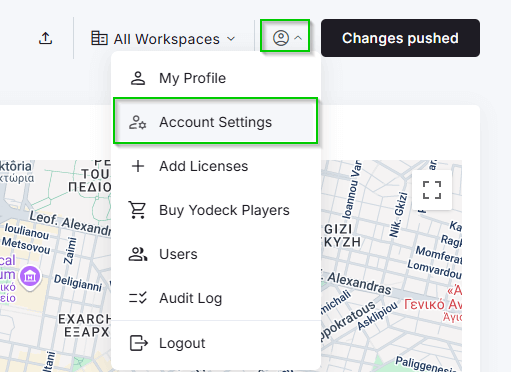
- Click your Profile Icon.
- Go to Account Settings > Volume Schedules.
Step 2: Creating a New Volume Schedule
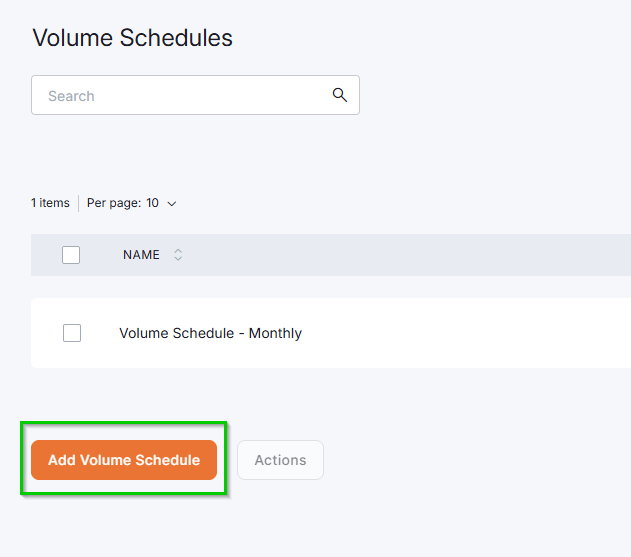
- Click the Add Volume Schedule button.
- Afterwards, you then have to provide a clear name for your schedule, such as “Evening Volume” or “Morning Volume.”
For example, “Evening Volume” is a good option if you want to lower the noise at night.
Step 3: Add an Entry to Your Volume Schedule
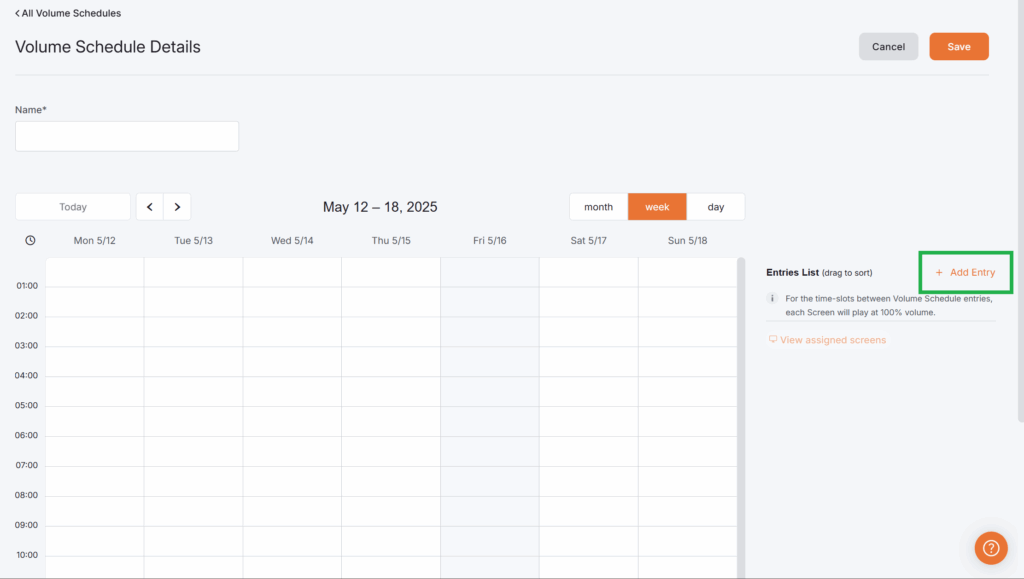
- Click the +Add Entry option.
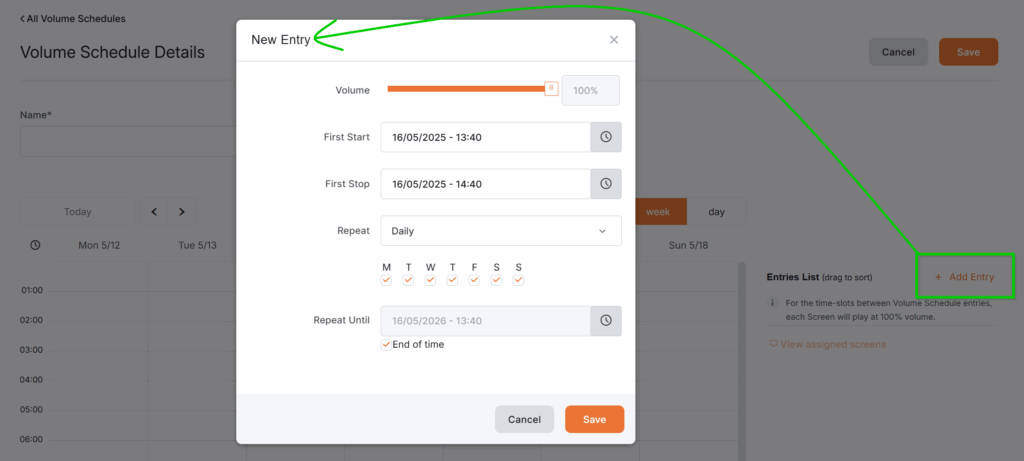
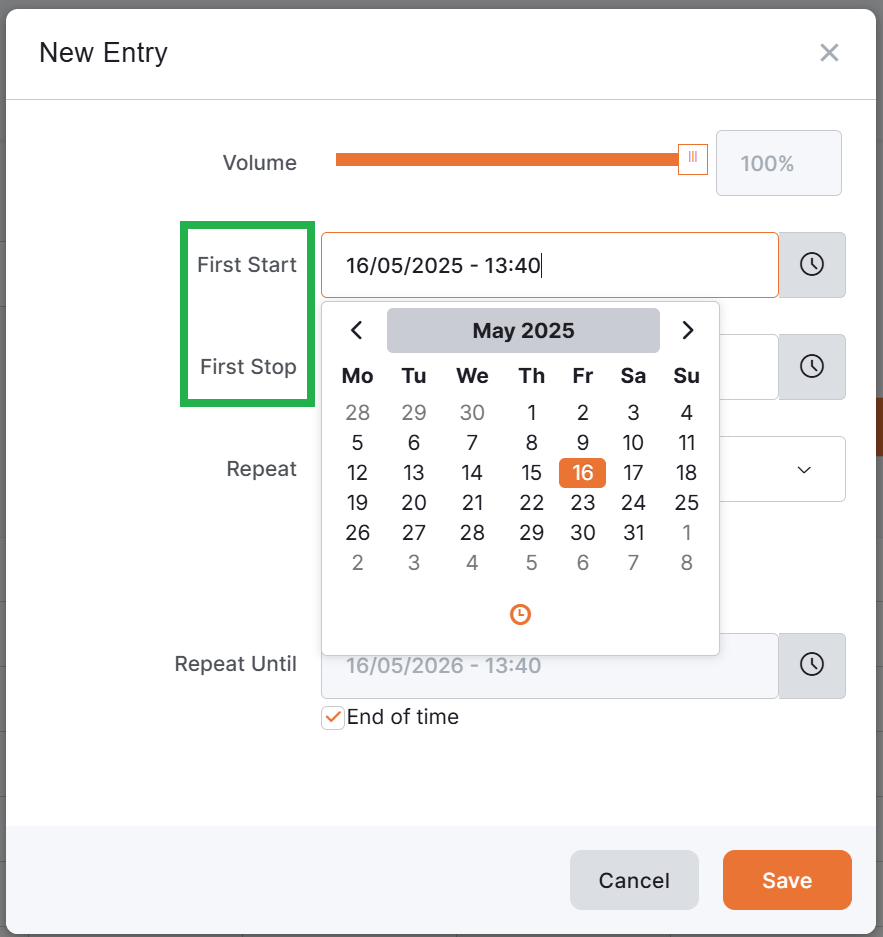
- Use the volume slider to set the desired level (0%–100%), with 5% granularity.
- Set the First Start and First Stop dates and times via their respective clock icons. Specifically, the First Start determines when the player will commence the schedule, while the First Stop specifies when the player will cease the schedule for the first time.
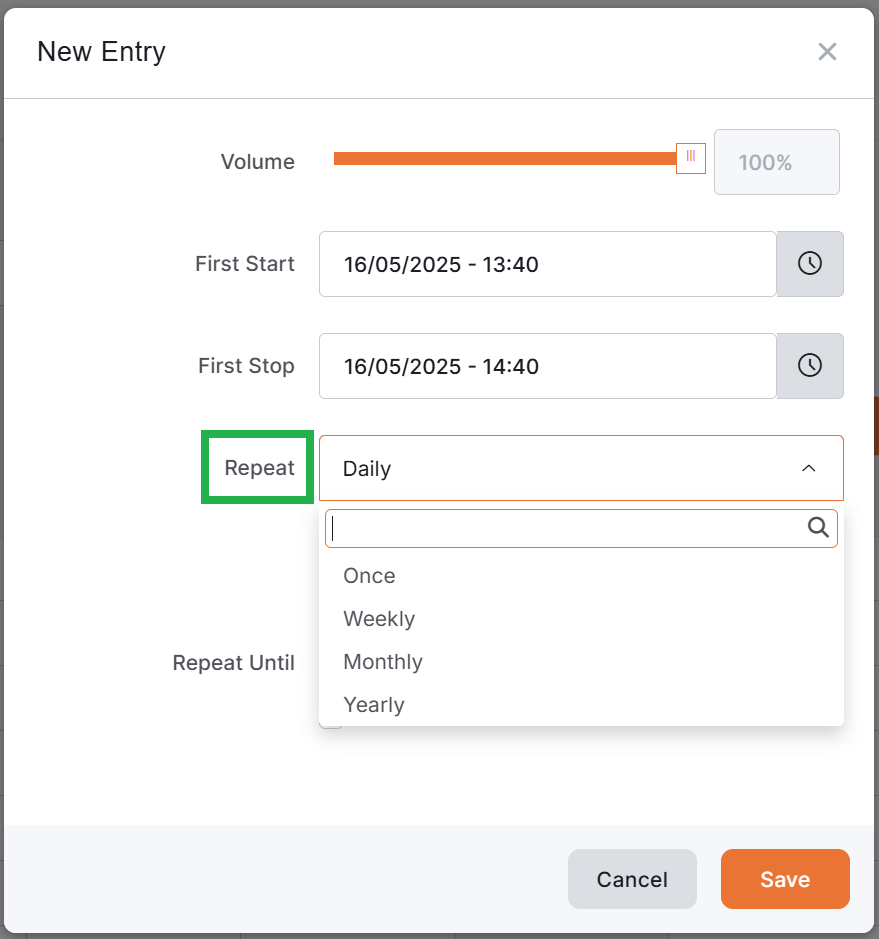
- Select a Repeat Frequency:
- Once: Plays on a specific day/time.
- Daily*: Check specific weekdays.
- Weekly: Plays once per week.
- Monthly: Plays once per month.
- Yearly: Plays once per year.
* To set a daily schedule, check the boxes for the days of the week. Select all boxes for daily use, or just Monday through Friday for weekdays only.
- Afterwards, set the Repeat Until option (date/time or “End of time”). This option specifies your schedule’s final repeat time frame.
- Click the Save button in the pop-up window and on the overview page.
You can push the changes to your screens for immediate effect.

Tip to help you get the most out of your Volume Schedules
You can create multiple volume schedules for different times of day or week, such as one for morning announcements, another for lunchtime music, and a third for evening quiet time.
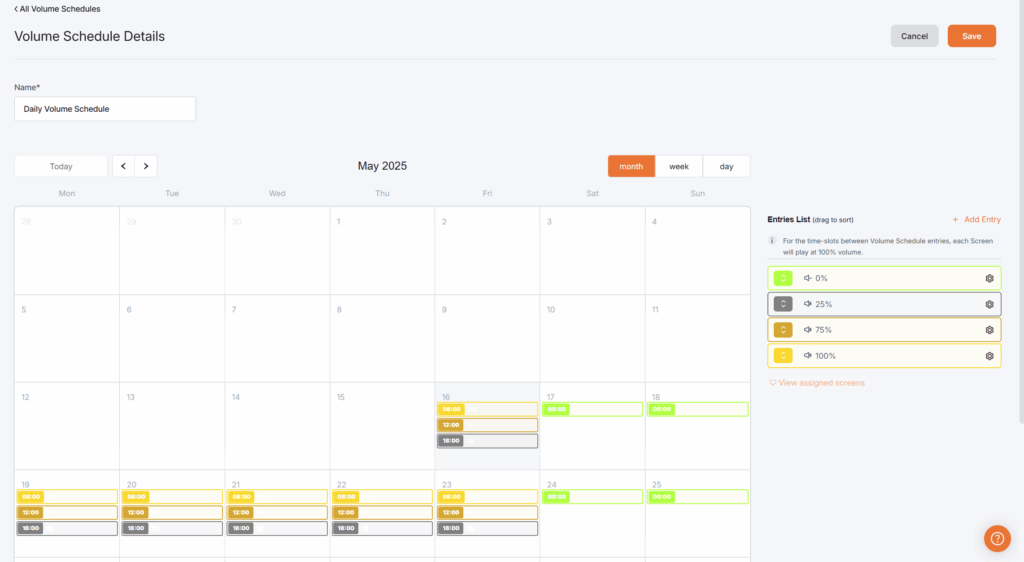
Example with Multiple Entries
You can create multiple entries in one schedule to match your day. For example:
- First entry: Monday – Friday => 08:00 –12:00 → 100% volume
- Second entry: Monday – Friday => 12:00 –18:00 → 75% volume
- Third entry: Monday – Friday => 18:00 – 08:00 → 25% volume
- Fourth entry: Weekends => All Day -> 0% volume (mute)
Assigning Volume Schedules to Screens
After setting up one or more Volume Schedules, you can assign them to one or more screens in various ways.
Assignment to a Single Screen
To assign a Volume Schedule to a specific screen, you can:
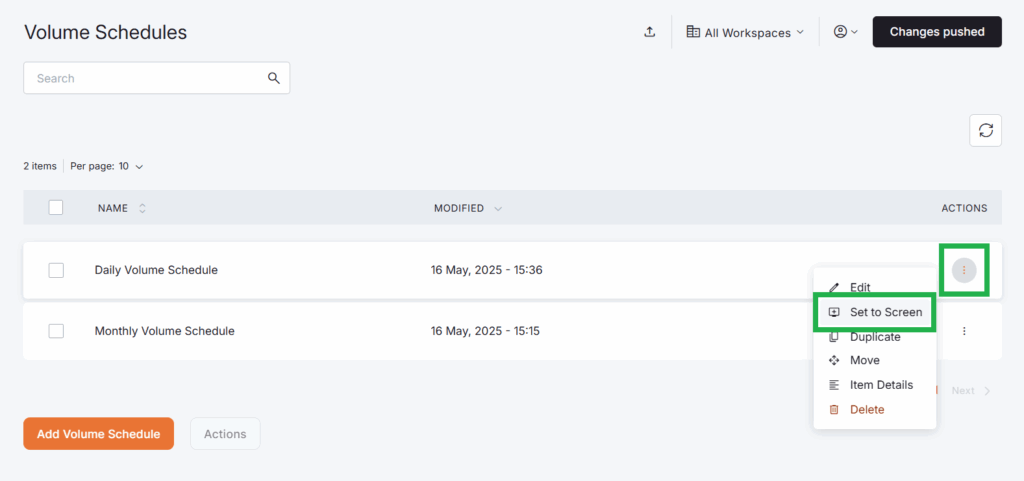
- Option 1: Go to Volume Schedules, click the three dots next to a schedule, and select the Set to Screen option.
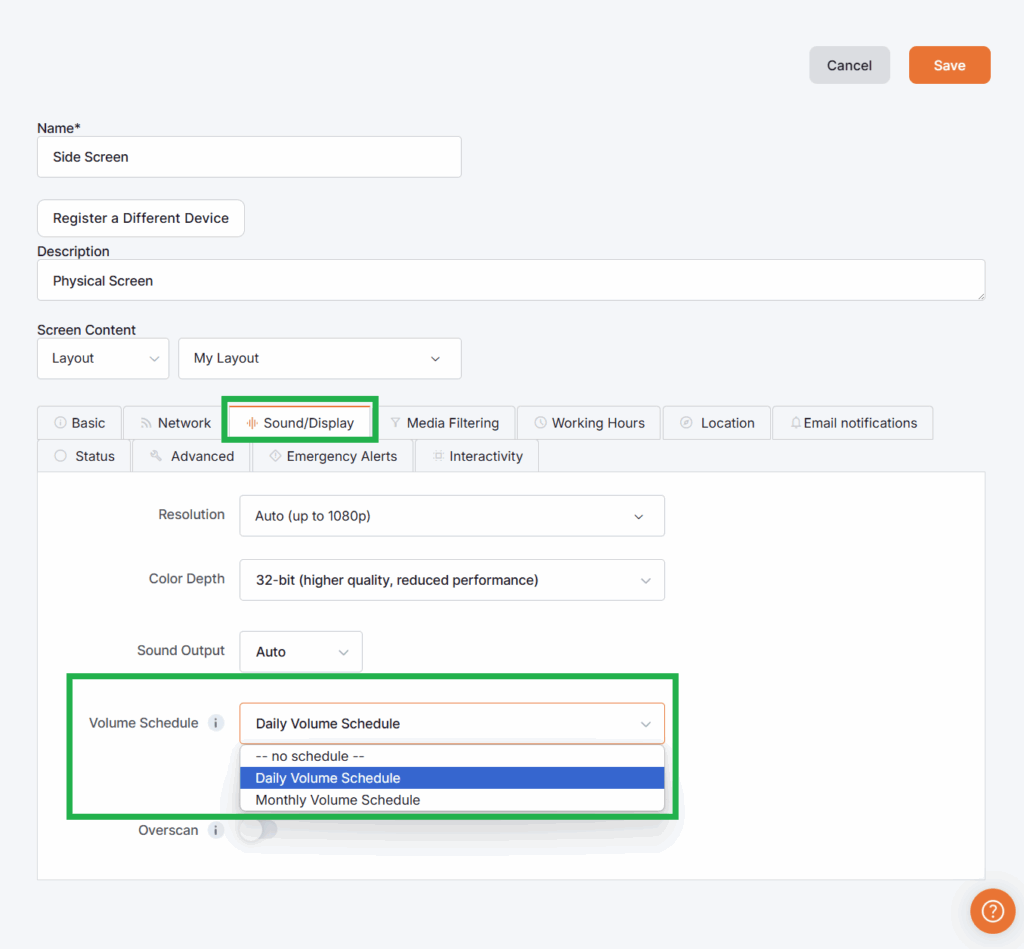
- Option 2: Navigate to the Screens tab from the left main menu.
- Afterwards, select a screen from the list, and then select the Sound/Display tab.
- Use the dropdown button next to Volume Schedule to assign it.
- Click on the Save button in the top-right corner of the page.
You can push the changes to your screens for immediate effect.
Assignment to Multiple Screens
To assign a Volume Schedule to multiple screens through a bulk edit, you can:
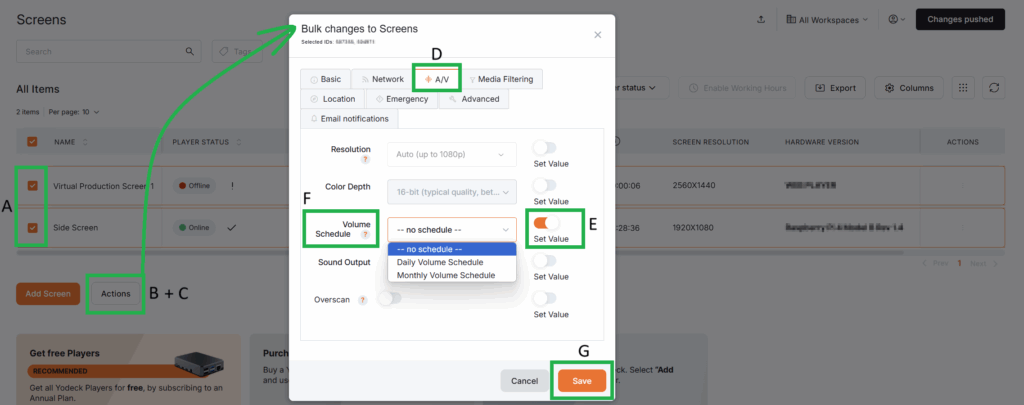
- Go to the Screens page.
- Select two or more screens from the list.
- Click on the Actions button.
- Select the Edit option.
- The Bulk changes to Screens pop-up window appears, in which you must select the A/V tab.
- Enable the Set Value toggle button corresponding to the Volume Schedules field.
- Since the Volume Schedules field is now editable, choose your preferred Volume Schedule option to assign it to all previously selected screens.
- Finally, click the Save button in the bottom-right corner of the pop-up window.
You can push the changes to your screens for immediate effect.
How to quickly assign content to your Screens
For more information on how you can quickly assign content to your Screens, please check the related page here.
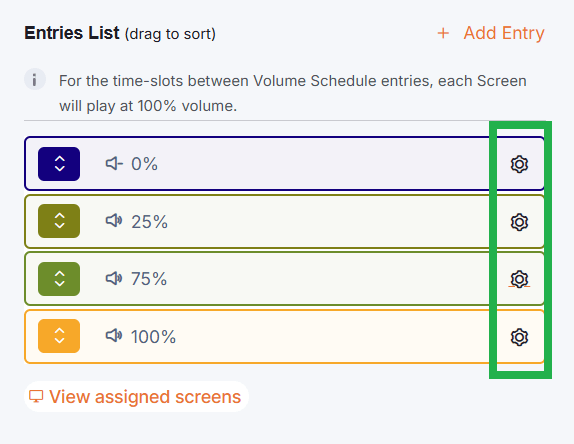
Editing Volume Schedules
You can edit existing entries in Volume Schedules. Select a Volume Schedule and, from the related entries available, click on the cogwheel icon next to the entry you wish to edit.
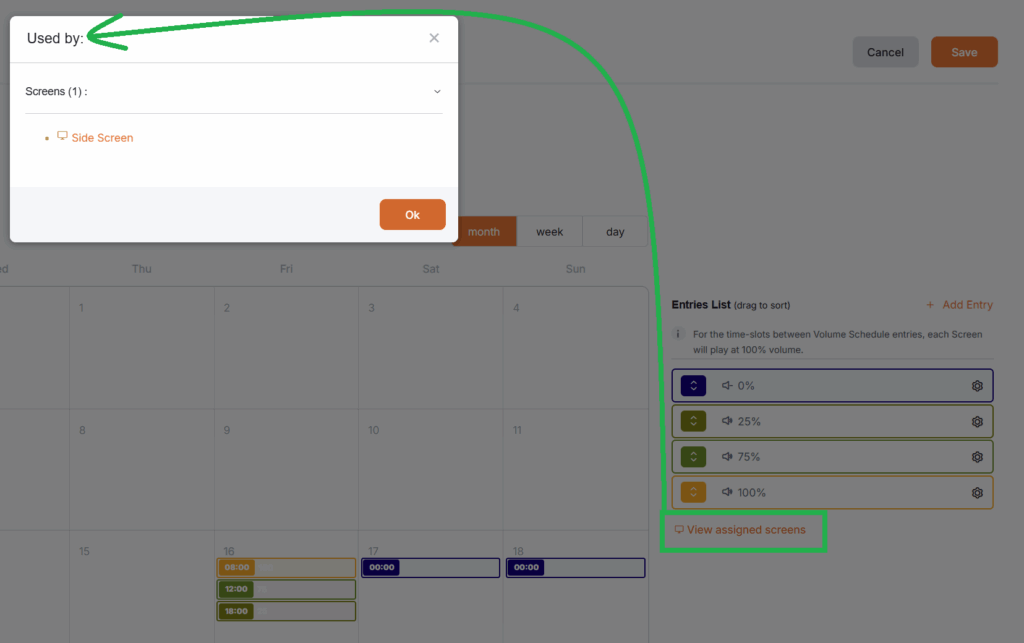
Viewing Assigned Screens of the Volume Schedule
Click the View Assigned Screens button located below the Entries. A pop-up window appears, displaying the names and numbers of the screens associated with the selected schedule.
F.A.Q.
Got questions? We’ve got answers! This section addresses common questions about Volume Schedules.
The platform will apply the schedule that starts last. For example, if you have a schedule from 6 PM to 10 PM at 50% volume and another from 8 PM to 11 PM at 25% volume, the volume will be 25% from 8 PM to 11 PM.
No, a single Volume Schedule applies the same volume level to all selected players. If you need different volumes, you can create separate schedules.
Yes, you can manually adjust the volume on a player, and it will remain at that level until the following scheduled change.
First, please double-check that your players are online and that the schedule is enabled. Then, verify the start and end times, the AM and PM designations, and lastly, ensure the correct players are selected. If you’re still having trouble, our support team is here to help!
Need Help?
The Yodeck Support Team can help you out! Log in to your Yodeck account and send us a message from the bottom right corner!