Table of Contents
Overview
When multiple people work on your layouts, it’s important to keep your designs consistent and prevent accidental changes. The locking tools in Yodeck’s Layout Editor give you control over what can and cannot be edited, helping you protect brand assets, control content updates, and guide team workflows.
Available only on the Premium/Enterprise plan!
This feature is only available on the “Premium/Enterprise” Plan. You might not see some menus below if you are not on the “Premium/Enterprise” Plan.
Remember that the “Premium/Enterprise” Plan is free if you only manage 1 screen to evaluate these features quickly.
What is possible with the Locking option?
- Prevent elements from being moved, edited, or deleted.
- Allow limited editing (e.g., text changes) while preserving layout structure.
- Block new elements from being added to a layout.
ℹ️This feature is especially useful in multi-user environments, branded template workflows, or client-facing accounts where design integrity is essential.
Roles and Permissions
Only Admins can lock or unlock elements. Other users may still edit unlocked regions, but their access will be limited based on their role.
| Role | Lock/Unlock Elements | Edit Locked Elements | Edit Unlocked Elements |
|---|---|---|---|
| Account Admin | ✅ Yes | ❌ No | ✅ Yes |
| Workspace Admin | ❌ No | ❌ No | ✅ Yes |
| Content & Device Manager | ❌ No | ❌ No | ✅ Yes |
| Content Manager | ❌ No | ❌ No | ✅ Yes |
| Restricted Content Manager | ❌ No | ❌ No | ✅ Yes |
| Enterprise – Custom Role with Edit Access | ❌ No | ❌ No | ✅ Yes |
Note for Users with Editing Permissions but No Locking Rights
Even users with editing permissions cannot change or delete locked elements. Only users with locking rights can unlock them.
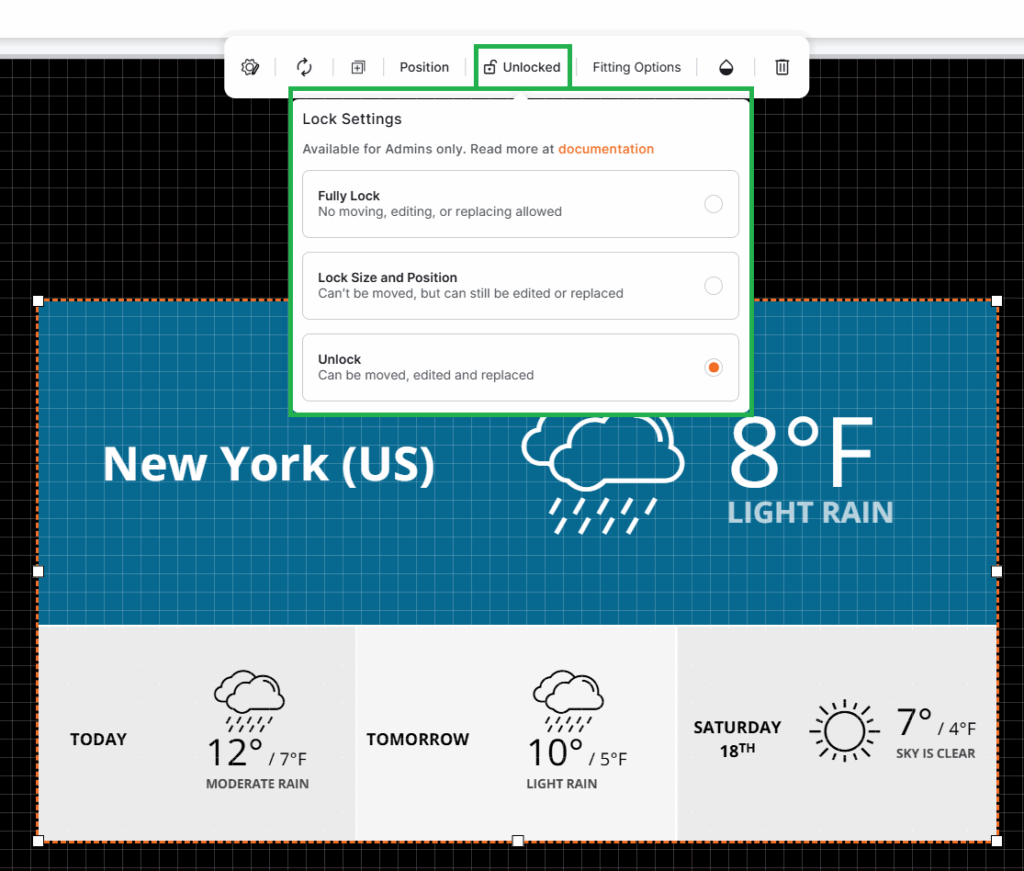
Locking Options Explained
Yodeck provides three types of locking, each designed for a different level of control. Please carefully review the following three tabs to understand each control level better.
A Fully Locked element cannot be moved, resized, edited, or replaced.
This is the strictest level of protection and is ideal for logos, brand colors, or other critical design elements.
- Text: Cannot be edited or styled.
- Media: Cannot be changed, replaced, or repositioned.
- Playlists: Cannot be edited or swapped.
Use case: Protect a header with your company logo so that no one can accidentally remove or move it.
With this option, an element cannot be moved or resized, but its content can still be edited or replaced. This is useful when you want to maintain a consistent layout but allow updates to the content itself.
- Text: Content can be edited, but the text box stays in place.
- Media: The file can be replaced, but the size and position remain fixed.
- Playlists: Items can be edited or replaced, but the region stays locked.
Use case: Keep your layout aligned while allowing marketing teams to update seasonal images or text.
This option prevents team members from adding new elements to a layout.
It’s a simple but powerful way to ensure that only approved components are used.
Use case: When using a branded template, allow content edits but prevent anyone from adding unauthorized media or widgets.
How to Lock and Unlock Elements
Locking elements is quick and straightforward in the redesigned Layout Editor.
To lock an element:
- Select the element on the canvas frame.
- In the Toolbar, click the Lock icon.
- Choose your locking type: Fully Lock or Lock Size & Position.
To lock all elements:
- Use the Lock All option from the toolbar or layer panel to secure everything in the layout at once.
To unlock:
- Select the locked element and click the Unlock icon.
- Or use the Unlock All button to release all locked items simultaneously.
Lock Behavior by Element Type
Locking affects each element type slightly differently. Here’s how it works:
| Element Type | Fully Lock | Lock Size & Position | Lock Insert |
|---|---|---|---|
| Text | Cannot move, resize, or edit | Cannot move, but can edit and replace | Prevent adding new text boxes |
| Media / Apps | Cannot move, resize, or replace | Can replace media, but position stays | Prevent adding new media |
| Playlists | Cannot move, resize, or edit | Can edit playlist content | Prevent adding new playlists |
| Elements | Cannot move, edit, or replace | Cannot move, but can edit, and replace | Prevent adding new elements |
Best Practices for Using Locking
- Protect branding: Fully lock logos, backgrounds, and corporate design elements.
- Control workflow: Use “Lock Size & Position” to let marketing or content teams update text or media safely.
- Prevent clutter: Enable “Lock Insert” to stop users from adding extra elements that could break your design.
- Use templates with locking: Combine locking with Branded Templates to maintain consistency across multiple screens and locations.
- Document your locking rules: If multiple people are editing layouts, include a short note or naming convention explaining which regions are editable.
Example Scenario
Imagine you’ve designed a corporate announcement screen. Here’s how you might use locking:
- Fully Lock the company logo and brand-colored background.
- Lock Size & Position for the main text box so the marketing team can update messages without affecting alignment.
- Lock Insert to ensure no one adds unauthorized apps or media.
🥇The result: Consistent, brand-safe layouts even when multiple team members are involved.
F.A.Q.s
Got questions? We’ve got answers! This section addresses common questions about Locking Elements and Controlling Access.
Can locked elements still be visible on the canvas frame?
Yes. Locked elements remain visible and functional during playback. They are just protected from editing.
Can a user with no locking permissions unlock an element?
No. Only users with locking permissions (e.g., Admins or Content & Device Managers) can unlock elements.
What happens if I duplicate a layout with locked elements?
The locked status is preserved in the duplicated layout.
Can I lock multiple elements at once?
Yes. You can use multi-selection (Shift + Click) and lock them together, or use the “Lock All” option.
“Layout Editor” Series – Article Navigation
Click any of the buttons below to proceed to whichever article (1-7) you wish in the Layout Editor series.
Need Help?
The Yodeck Support Team can help you out! Log in to your Yodeck account and send us a message from the bottom right corner!