Table of Contents
Overview
As a Whitelabel Partner, you can set up a SharePoint Online connection for your customers to make use of our features (SharePoint playlists, Import files from SharePoint directly). The first thing that we need to do is create a Microsoft account.
Getting Started
Please follow the step-by-step guide below to create a SharePoint app, link it to your platform, and offer it as a playlist to your customers.
Step 1: Create the SharePoint App in Azure
You can begin by creating a Microsoft/Live/Office365/account (or use an existing one).
- Visit the App Registrations in Azure and click the
New registrationbutton:
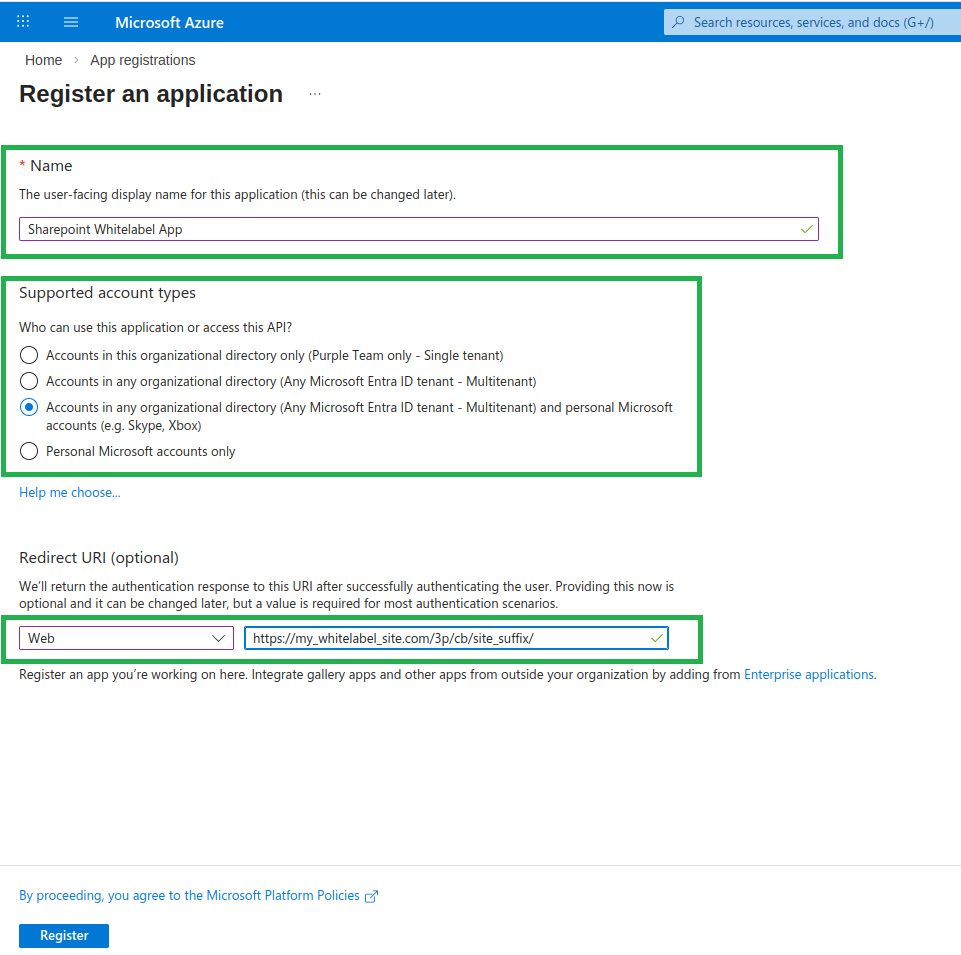
- Fill in the basic facts: Name, Supported account types, Redirect URI (All points of interest are marked with green.) The Name value must be set as our App name. Then you can click on the
Registerbutton.
Configure the Redirect URI
Please be careful:
- In Redirect URI, you have to replace
my_whitelabel_site.comwith your partner’s site. - In Redirect URI, you have to replace
site_suffixwith:sharepointfor SharePoint Online playlists app,sharepoint_import_filesfor Import files from SharePoint Online.
- In Redirect URI, don’t forget the last slash (/).
Example of Valid Redirect URIs (mysite.com as my example site)
https://mysite.com/3p/cb/sharepoint/ for SharePoint Online playlists app,https://mysite.com/3p/cb/sharepoint_import_files/ for Import files from SharePoint Online
Select the Correct Supported Account Types
- In Supported Account Types, please ensure you pick the “supported account types” option that includes “Any Azure AD directory” and “personal Microsoft accounts”! The options might be more than three or in a different order.
Step 2: Retrieve the Application (Client) ID
Write down the Application (client) id because it is our App key .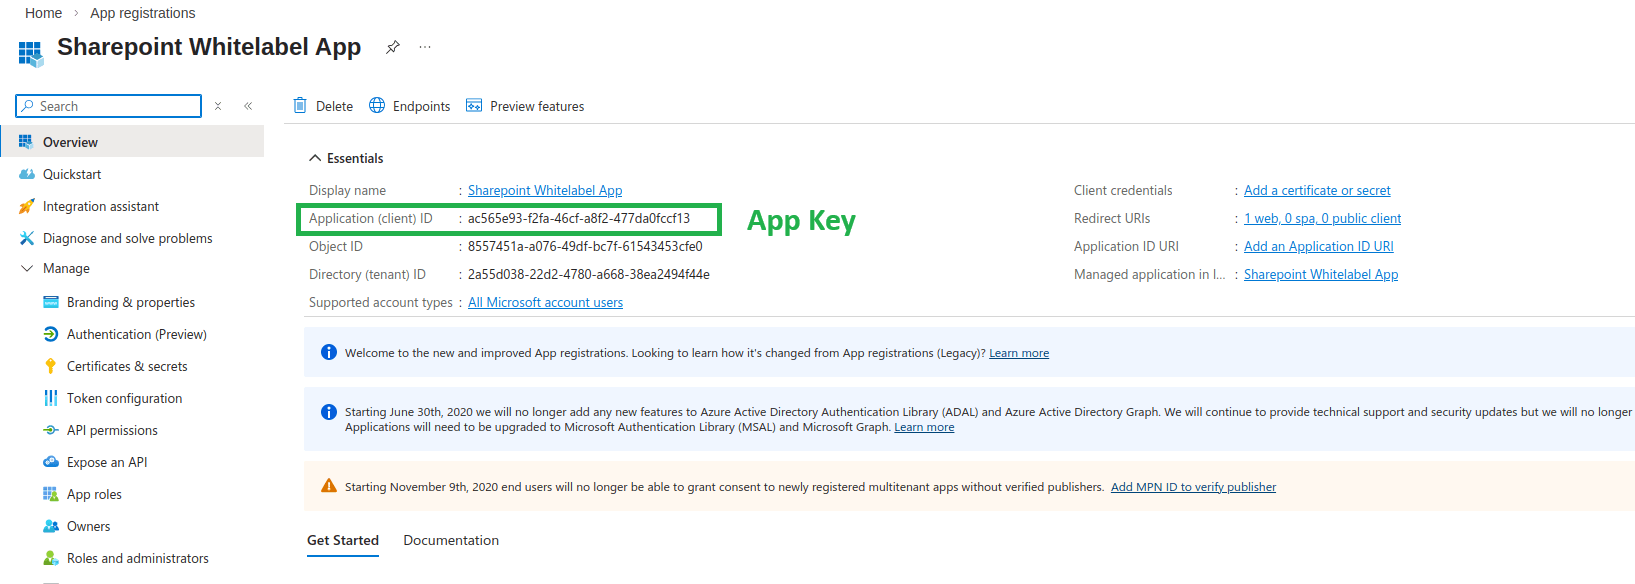
Step 3: Generate the Client Secret
Enter the Certificates & Secrets section and click New client secret. Enter a Description and select when it Expires, click Add.
Client Secret Expiration and Renewal
Write down the Value of the client’s secret because it is our App secret.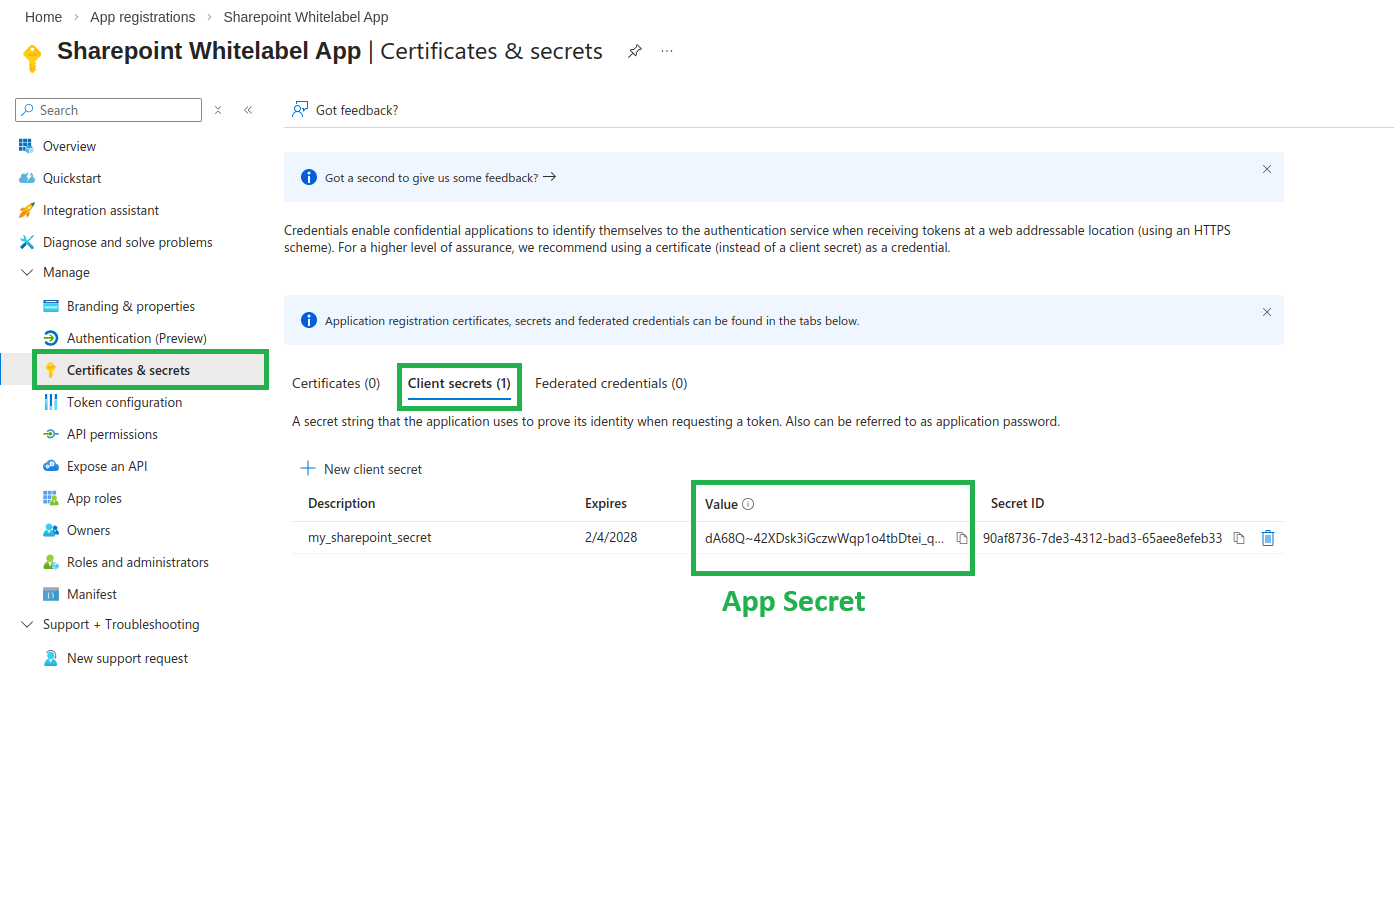
Remember to refresh!
- Then, you must create a new client secret before this one expires and update the relevant
yconsole --> Partners --> Site Connection (3PS)record with the newly created app secret. - Please, be careful: This is your only chance to copy the value of the client’s secret. If you move away from this page and later return, you won’t ever see the value again, and you have to regenerate a new one.
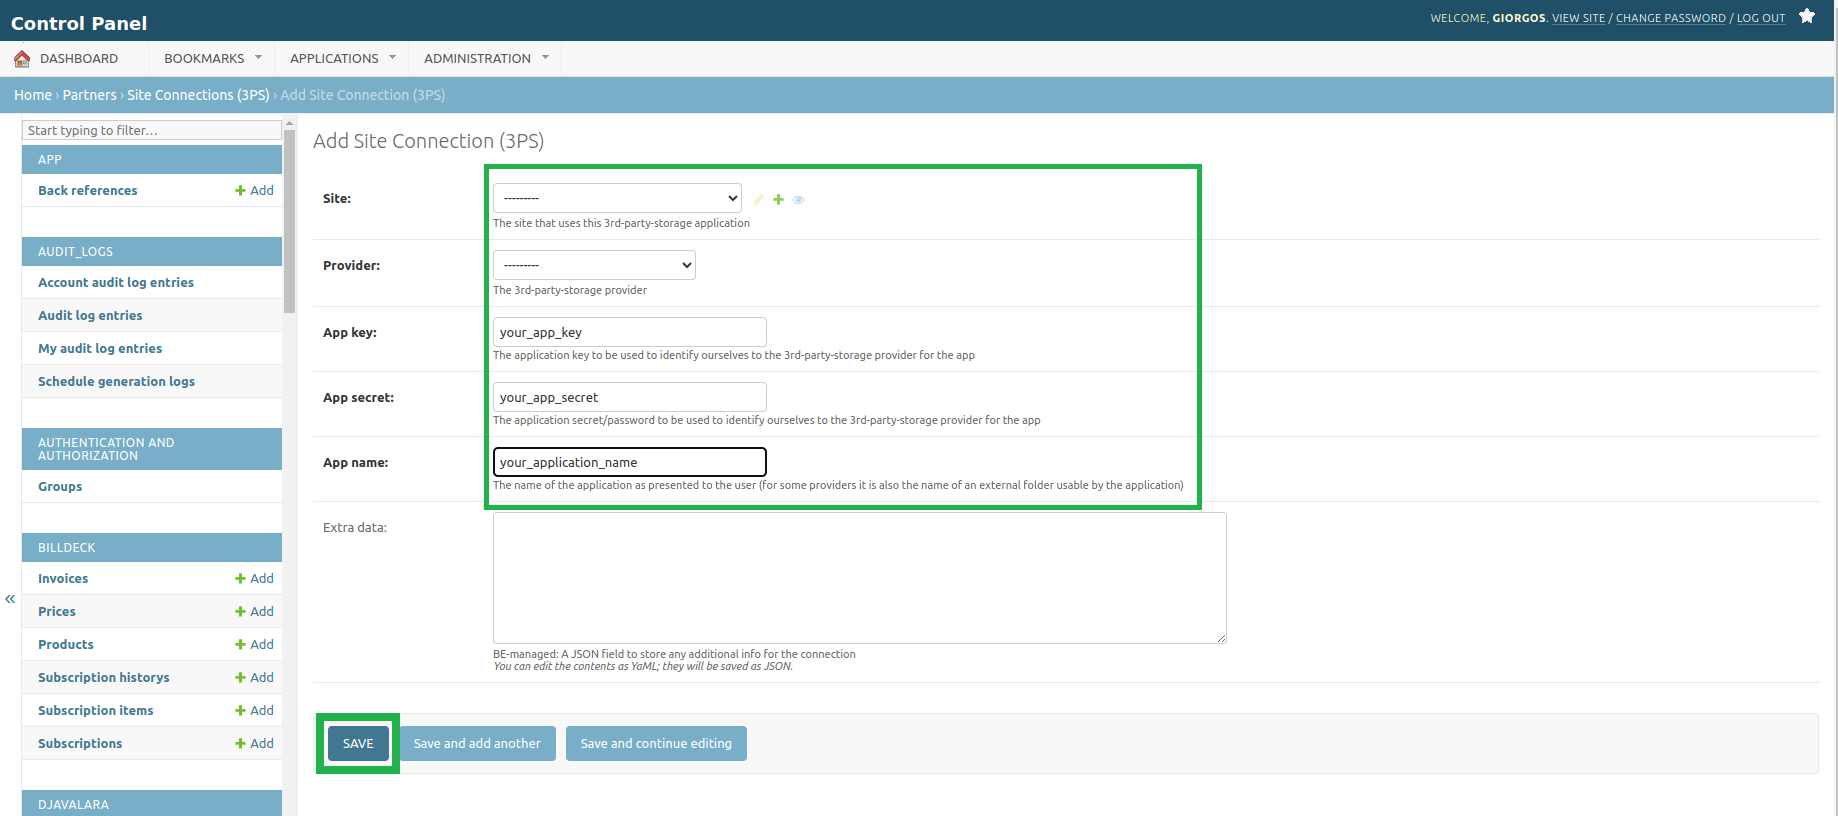
Step 4: Configure the SharePoint App in Yconsole
Go to your Yconsole and create a yconsole --> Partners --> Site Connection (3PS) record for the new app, following the instructions below. Then, press Save.
- In Site section, choose your site URL,
- In Provider section, choose:
Sharepointfor SharePoint playlists,Sharepoint (ImportFiles)for importing files from SharePoint.
- In App Key section, paste the app key as generated in Step 2.
- In App Secret section, paste the app secret as generated in Step 3.
- In App Name section, fill in the application’s name.

Step 5: Configure App Branding in Azure
Back to Azure again: enter the Branding section and click Update domain. You can select a verified domain or verify a new domain. Using a verified domain, prevents the “unverified app” in OAuth consent in user’s login.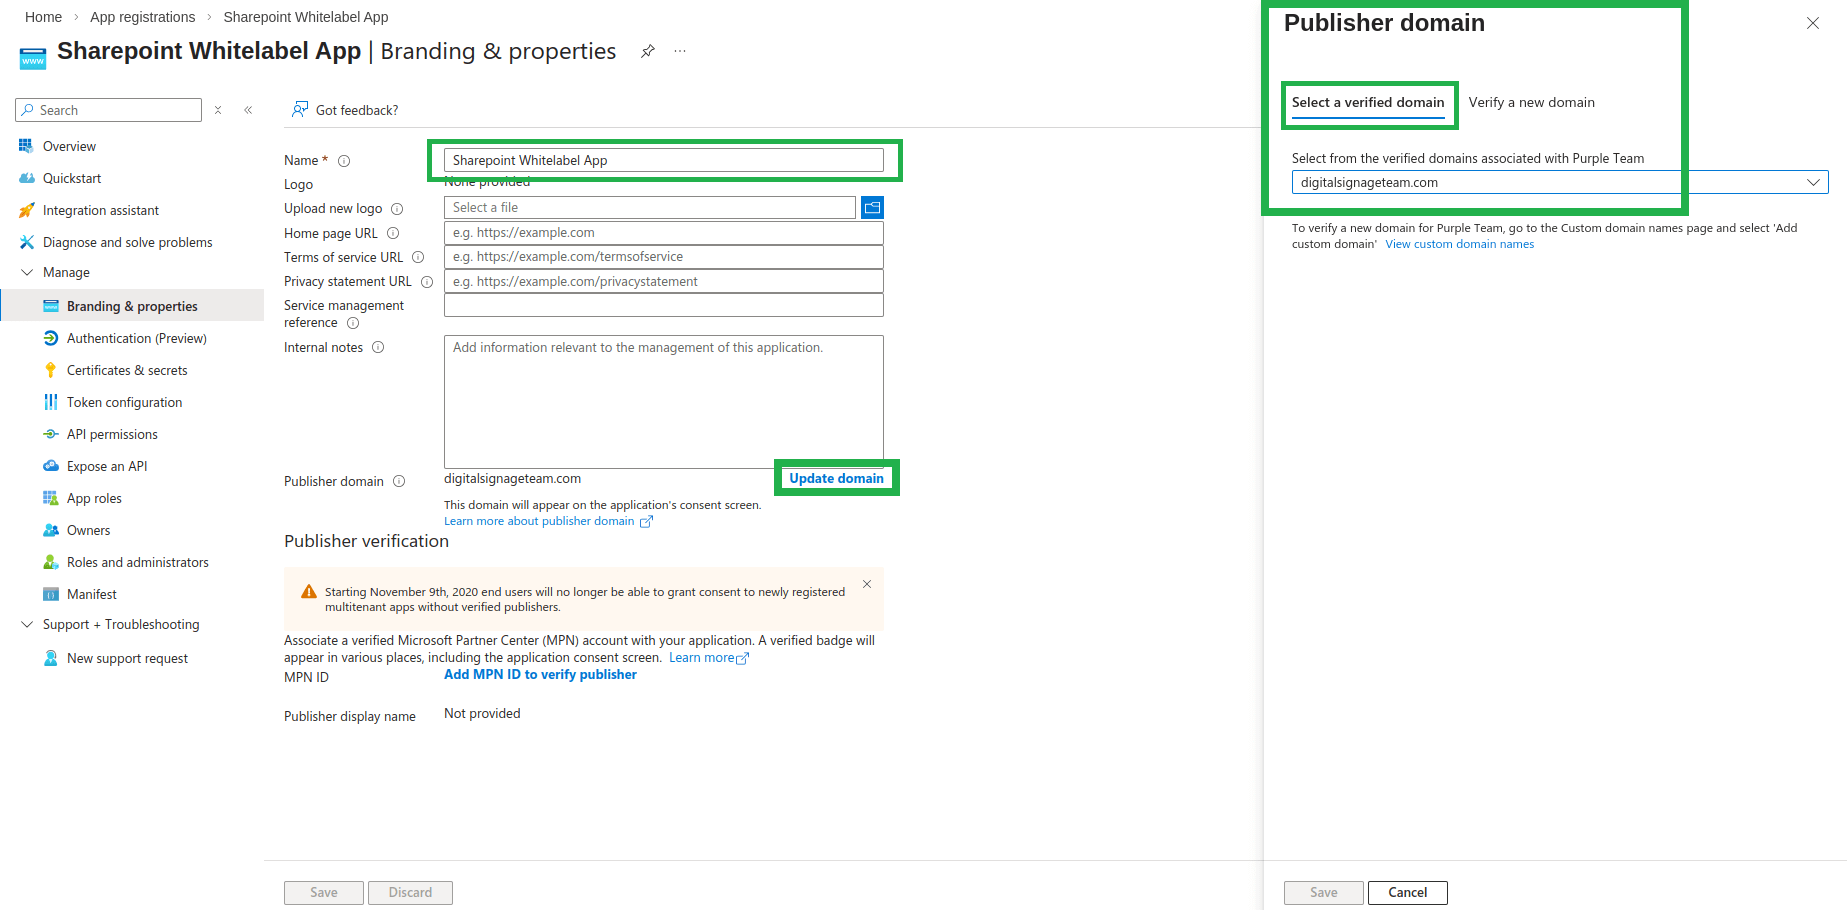
✅If you have completed all the aforementioned steps, your SharePoint app is successfully created and can be used as a playlist for your customers!
How can my clients configure the SharePoint playlist now to their accounts?
Check this article here on how your clients can now configure a SharePoint playlist for their accounts. Feel free to download this guide as PDF and share it with them.